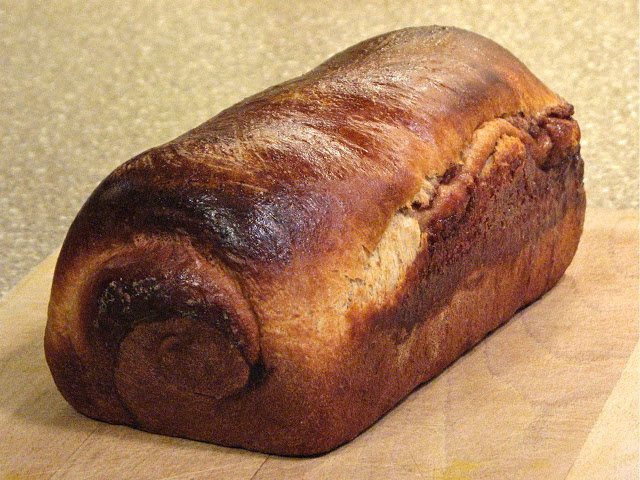
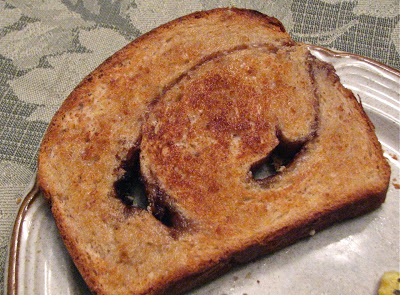
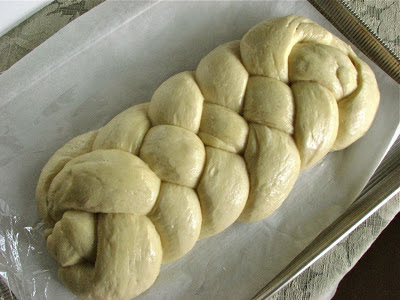
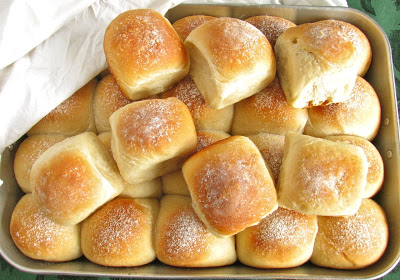
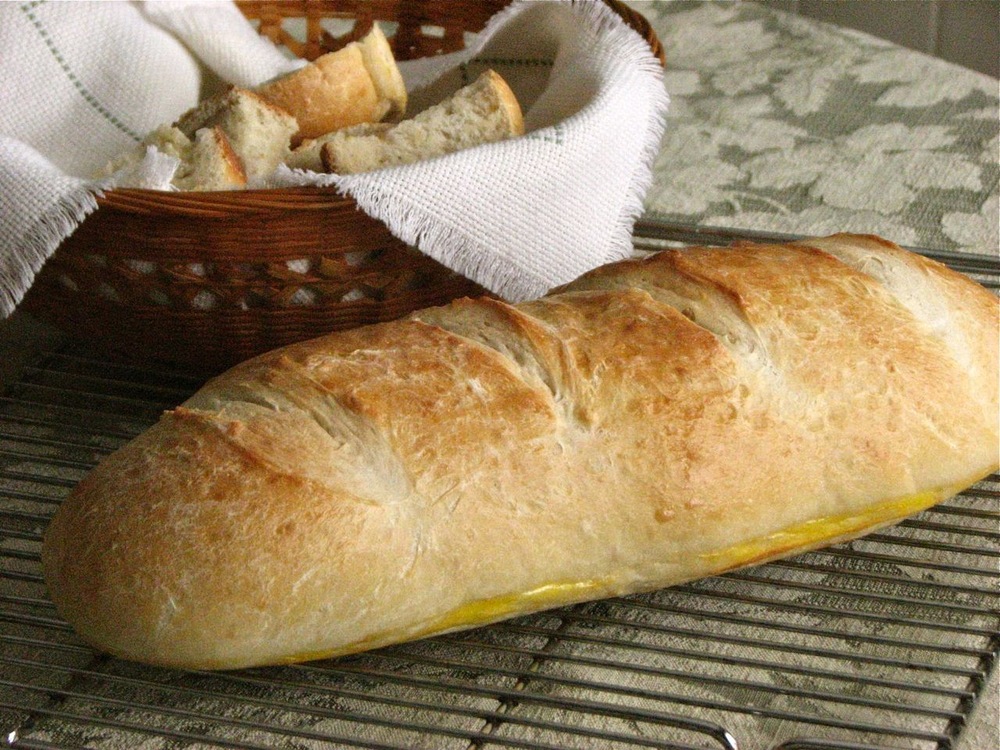
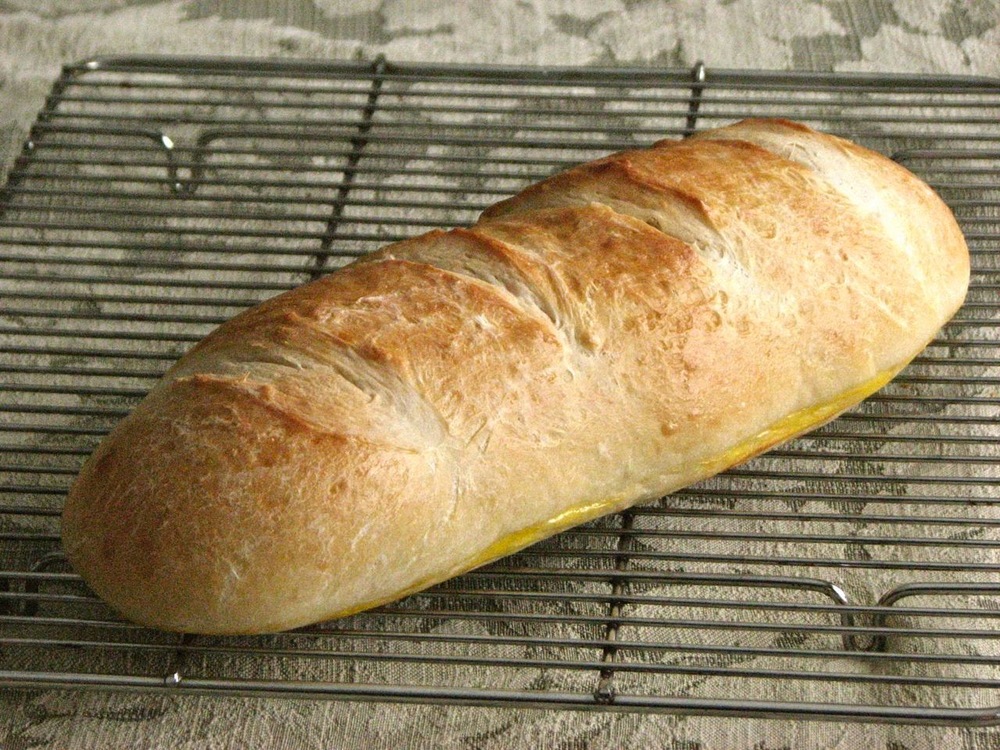
Simple French Bread

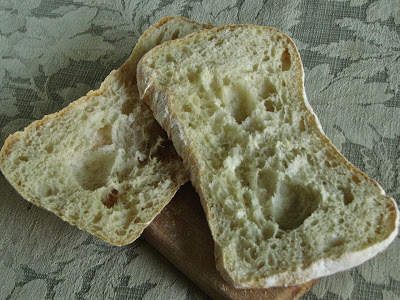
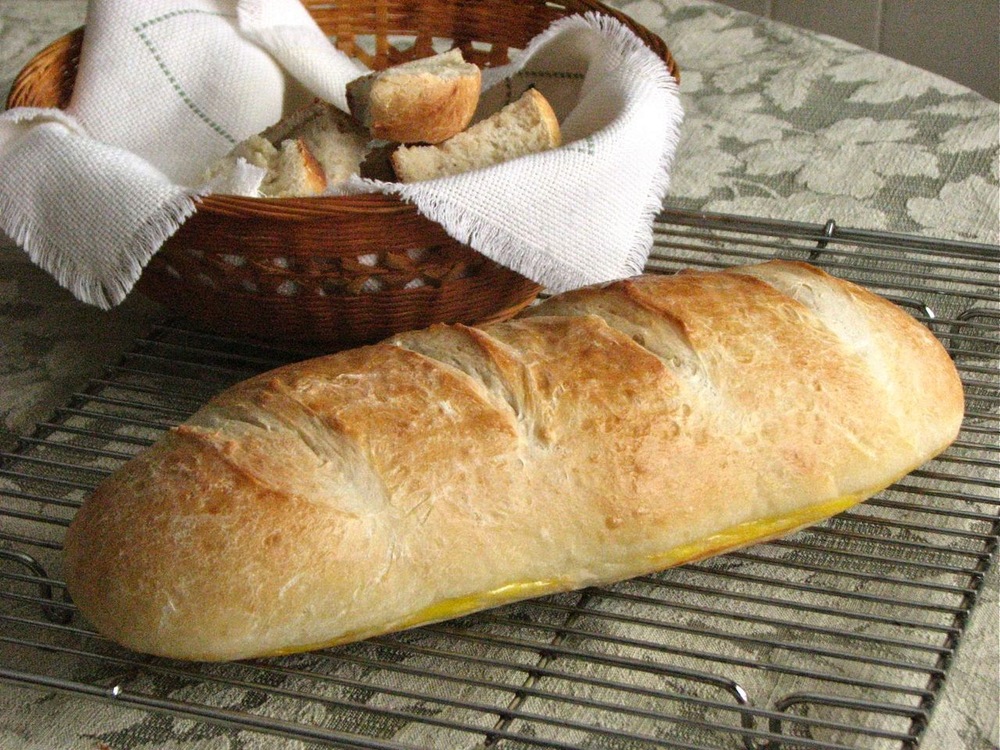
Bread is always a crowd pleaser at my house, especially soft white bread still warm from the oven, smeared with salted butter. While I love hearty whole wheat loaves and crusty sourdough, sometimes a simple loaf of soft white bread is just what a meal needs. This bread is everything that it should be; soft and tender and delicious, you really can't go wrong. 

The instructions for this bread are a little different than most. There is a little kneading, and then 6 cycles of a 10 minute rest followed by 10 seconds of stirring. Very different than most breads I make, but it seemed to work just fine. Then just shape, let rise, and bake! 

Simple French Bread

From 

Mel's Kitchen Cafe

Ingredients

  • 2 1/4 cups warm water
  • 2 tablespoons sugar
  • 1 tablespoon instant yeast
  • 1 tablespoon salt
  • 2 tablespoons oil
  • 5 1/2 - 6 cups flour

Directions

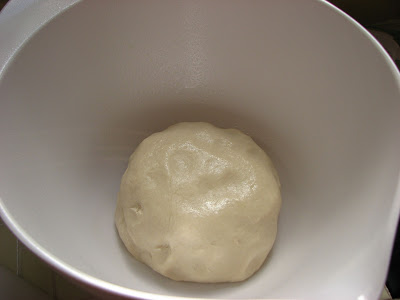
In a large bowl or in the bowl of a stand mixer fitted with the dough hook, combine the water sugar and yeast. . Add the salt, oil and 3 cups of flour and mix. Add in 2 1/2 to 3 more cups of flour gradually. The dough should clean off the sides of the bowl and not be too sticky but it should still be soft. Knead for 2-3 minutes until the dough is smooth and soft.

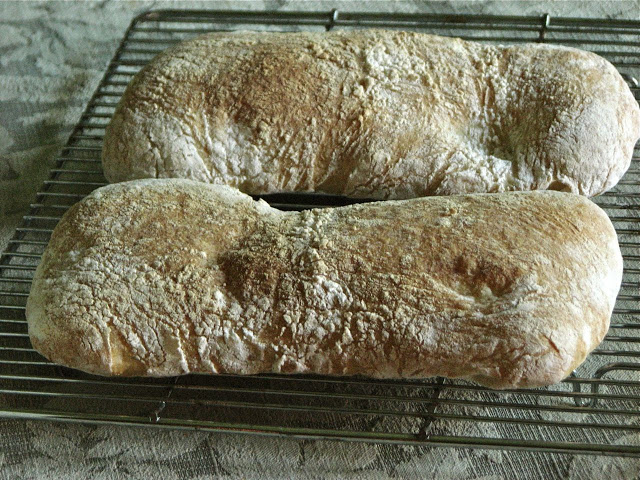
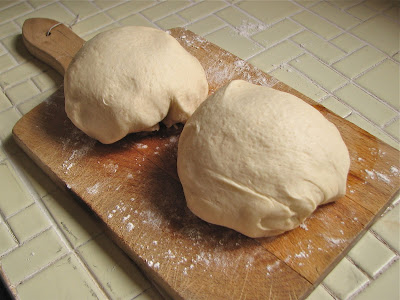
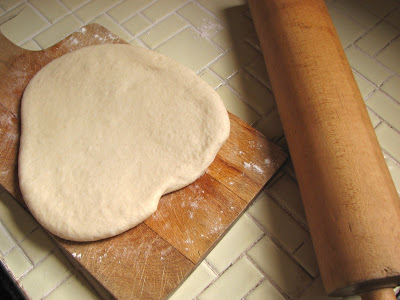
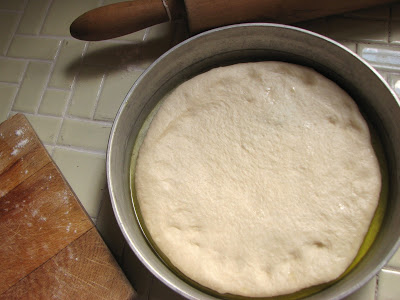
Leave the dough in the mixer to rest for 10 minutes and then stir it down (turn on your mixer for 10 seconds or use a wooden spoon to stir down the dough) and then allow to rest another 10 minutes. Repeat for a total of 5 times. Then turn the dough onto a lightly greased surface and divide into two equal parts. Roll each part into a 9X13-inch rectangle. Roll the dough up starting from the long edge and pinch the seam to seal. Arrange seam side down on a large baking sheet lined with parchment paper. Repeat with the second part of dough. Place it on the baking sheet leaving room for both loaves (or use a second baking sheet for the second loaf). Cover with greased plastic wrap and let the loaves rise until doubled in size. 

With a very sharp knife cut 3 or 4 gashes at an angle on the top of each loaf. Bake at 375 degrees F for 25-30 minutes until golden brown and baked through.

Cinnamon Swirl Loaf

In high school I worked in food service at a retirement home, serving food to the residents, as well as prepping for meals and cleaning up. Certain foods will forever be linked in my mind to this experience, one of them being cinnamon toast. Cinnamon toast was a resident favorite for breakfast, and to this day, every time I smell the toasting of cinnamon bread it brings me back to those days. 

This recipe produces bread that is far superior to that served in the retirement home, but it still gives off that same wonderful sugary-cinnamony smell as it toasts up to golden perfection in the toaster. Smeared with some butter and sprinkled with a little more cinnamon, because why not, this bread is a wonderful way to start the day. 

The only problem I had with this bread was while it was baking. Partway through I smelled some burning and realized that some of the sugar had leaked out of the bread and had fallen to the floor of the oven where it was burning. Not the best smell. A few moments later, this blob of burning sugar then burst into flames! It wasn't too bad, and quickly died out, but I just want to warn you that this could happen. It's probably a good idea to put a baking sheet (lined with foil for easy clean up) under the loaf pan while it is baking. I also recommend covering this bread with foil halfway through, or even earlier, to prevent it from getting too brown. But however it comes out, it makes great cinnamon toast!

Cinnamon Swirl Loaf

Adapted From Martha Stewart's Baking Handbook

Ingredients:

For the dough:

  • 17 ounces (3¼ cups) all-purpose flour
  • 1 1/4 teaspoons instant yeast
  • ¼ cup sugar
  • 1¼ teaspoons coarse salt
  • 1½ teaspoons ground cinnamon
  • 1 large egg
  • 4 tablespoons unsalted butter, at room temperature
  • 1 cup warm milk 

For the filling:

  • ¾ cup sugar
  • 1 tablespoons ground cinnamon
  • 2 tablespoons water
  • 1 egg, lightly beaten

Directions:

In the bowl of a stand mixer fitted with the dough hook, combine the flour, yeast, sugar, salt and cinnamon. Give a quick mix with a wooden spoon to combine. Add in the egg, butter, and warm milk and again mix briefly, until a shaggy dough forms. Knead with the dough hook (or by hand) on low speed until the dough is mostly smooth and clears the sides of the bowl, 5-6 minutes until the dough is smooth and supple. 

Transfer the dough to a lightly oiled bowl, turning once to coat. Cover the bowl with plastic wrap or a clean kitchen towel and let rise in a warm place until doubled in bulk, about 1 hour.

Turn the dough out onto a lightly floured work surface. Pat into a round. Fold the bottom third of the dough up and fold the top third down, like a business-letter. Then fold the right and left sides into the center in thirds, forming a rectangle. Press down to seal. Return to the bowl, cover and let rise again until doubled, about 40 minutes.

Generously butter a 9 by 5-inch loaf pan. To make the filling, combine the sugar, cinnamon and water in a small bowl and whisk until well combined. 

Return the dough to a lightly floured work surface. Roll the dough into a 10 by 12-inch rectangle. Brush lightly with the beaten egg. Sprinkle with the cinnamon-sugar mixture, leaving a thin border around the edges. Fold in the edges of the long sides of the dough about 1 inch.

Beginning with one of the short ends, roll the dough up into a tight spiral log, gently pressing as you go. Pinch the seam shut, and place the loaf seam side-down in the prepared baking pan. Cover loosely with plastic wrap or a clean towel and let rise until the dough rises just above the edge of the pan, about 30 minutes.

Meanwhile, preheat the oven to 425˚ F. When the loaf has risen, brush the top of the loaf lightly with the remaining beaten egg. Bake, rotating the pan halfway through, until the loaf is golden brown, about 45 minutes. If the surface seems to be browning too quickly, tent loosely with foil. Cool in the pan 5 minutes, then turn the loaf out and transfer to a wire rack to cool completely before slicing.

Ciabatta

Sometimes all I want is a good sandwich. Versatile and delicious, I could probably eat a sandwich every day. And we all know (I hope) that a good sandwich demands excellent bread. Sub-par, stale grocery store bread just doesn't do it for me anymore. I need something better. For me, that means I have two options; head to the bakery (which, trust me, I do a lot!) or make some of my own. One of these options is more convenient and, let's be honest, probably better, but the other option is super cheap, absolutely delicious, and extremely satisfying. Pulling warm loaves of homemade bread out of my oven only 4 ingredients later is one of my favorite ways to spend an afternoon. I highly recommend it!

This recipe is easy, and simple, although it does take some advanced planning and to be honest, some practice (at least for me). It turned out 3 beautiful loaves of ciabatta that were perfect for my sandwich craving. 

Ciabatta
From The Bread Baker's Apprentice by Peter Reinhart
Ingredients
Poolish

  • 2 1/2 cups (11.25 ounces) bread flour

  • 1 1/2 cups (12 ounces) water, at room temperature

  • 1/4 teaspoon instant yeast

Dough

  • 3 1/4 cups (22.75 ounces) poolish

  • 3 cups (13 1/2 ounces) unbleached bread flour

  • 1 3/4 teaspoon salt

  • 1 1/2 teaspoon instant yeast

  • 6 tablespoons to 3/4 cup (3 to 6 ounces) water, lukewarm

Directions
For the Poolish: stir together the flour, water and yeast until all the flour is moistened. It will be soft and sticky, like very thick pancake batter. Cover the bowl with plastic and let sit at room temperature for 3 to 4 hours, until bubbly and foamy, then place in the refrigerator where it will keep for up to 3 days.

For the ciabatta: remove the poolish from the refrigerator 1 hour before starting. Stir together flour, salt and yeast in the bowl of a stand mixer fitter with the paddle attachment. Add the poolish and 6 tablespoons of the water and mix on low speed until the ingredients form a sticky ball, adding additional water as needed. Increase the speed to medium and mix for 5 to 7 minutes or until the dough is smooth and sticky. Switch to the dough hook and mix for 2 more minutes. The dough should clear the sides of the bowl but still stick to the bottom. You may need to add additional flour, but don't add too much, the final dough should be quite soft and sticky.

Spray about an 8-inch square part of your counter with cooking spray. Using a dough scraper, transfer the dough to the counter. Dust the top of the dough liberally with flour, patting it into a rectangle. Wait 2 minutes for the dough to relax. Coat your hands with flour, lift the dough from each end, stretching it to twice its size. Fold the dough over onto itself, like folding a letter, returning it to its originally shape. Dust the top of the dough with flour, and loosely cover with oiled plastic wrap.

Let rest for 30 minutes. The repeat the stretch and fold as above. Dust with flour and cover with plastic again. Let the dough ferment and rise on the counter for 1 1/2 to 2 hours. It should swell, but won't necessarily double in size.

Set up a couch with a cotton dish towel, sprayed with oil and generously floured. Carefully remove the plastic wrap from the dough. Using a pastry scraper, divide the dough into 3 rectangles, making sure not to degas the dough. Sprinkle the dough generously with flour and use the scraper to gently lift each piece from the counter and lay it on the floured cloth, folding each piece of dough from left to rich, letter-style, into an oblong about 6 inches long. Bunch the cloth between the pieces to provide a wall.

Proof for 45 to 60 minutes at room temperature, or until the dough has noticeably swelled. Meanwhile, place a baking stone in the oven and preheat to 500 degrees, placing an old heavy duty sheet on the lower rack.

When the dough is ready, gently transfer each piece of dough to a 9x12-inch piece of parchment paper, lifting from each end and gently tugging the dough out to just smaller than the piece of parchment. Slide the dough, parchment and all, onto the preheated baking stone. Pour one cup of hot water into the sheet pan and close the door. After 30 seconds, open the door and spray the sides of the oven with water from a spray can. Repeat twice more at 30 second intervals. After the last spray, turn the oven temperature down to 450 degrees and bake for 10 minutes. Rotate the loaves 180 degrees and continue baking for 5-10 minutes, or until done, the bread should register 205 degrees in the center and be golden brown. Allow loaves to cool at least 45 minutes before slicing and serving.

No Knead Bread

I know there is nothing new about this no knead bread recipe. It's been around for a while now but I never really got around to trying it before. Recently however, I decided to give it a go and see how it turned out, you never know until you try. It is super easy and turns out a beautiful loaf of bread. Some of the comments I had seen mentioned that it wasn't as tall of a loaf as they would have liked, and I agree. It would be nice if it rose a little taller in the pot, but that's okay.

So obviously, there is no kneading with this recipe, very little hands on at all in fact. This does not mean however that it is quick. You have to think ahead to have this bread on your table at dinner. It requires a 12-18 hour rise after mixing the ingredients together. And after shaping it needs another 2 hours. But this is all hands off time. All you have to do is set it aside and forget about it. It doesn't get much easier than that!

As for the flavor, this bread was pretty good. The crumb inside was full of beautiful air bubbles and the top crust was beautiful golden brown. On the other hand, the bottom of this loaf got quite dark brown, almost to burned which I don't like at all. Maybe there's a way to change this, but as it was, the bottom was overcooked. Also, while the crust was beautiful, I did think it was a little tough and thick. Not horrible, but not great either. But the bread inside was flavorful and moist, perfect for dipping into your soup bowl, or smearing with a pat of butter. I think this recipe has a lot of potential, but I might need to play around with it a little to make it work for me.

No Knead Bread

From

Jim Lahey via The New York Times

Ingredients

  • 3 cups all-purpose or bread flour, more for dusting
  • ¼ teaspoon instant yeast
  • 1¼ teaspoons salt
  • Cornmeal or wheat bran as needed

Directions

Mix together the flour, yeast and salt in a large bowl. Add 1 5/8 cups water, and mix well; dough will be shaggy and sticky. Cover the bowl with plastic and let dough rest at least 12-18 hours, (preferably 18), at  room temperature.

When the surface of the dough is dotted with bubbles it is ready to continue. Place dough on a lightly floured work surface and sprinkle with a little flour and fold it over on itself once or twice. Cover with plastic wrap and let rest about 15 minutes.

Gently and quickly shape dough into a ball using just enough flour to keep dough from sticking. Coat a cotton towel with plenty of flour, wheat bran or cornmeal and put dough seam side down on towel and dust with more of the flour, bran or cornmeal. Cover the dough with another cotton towel and let it rise for about 2 hours. When the dough is ready, it will be more than double in size and will not readily spring back when poked with a finger.

At least a half-hour before dough is ready, heat oven to 450 degrees and place a 6- to 8-quart Dutch oven inside. When dough is ready, carefully remove pot from oven. Slide hands under towel and turn the dough over into the pot, seam side up; it may be messy, but that is okay. Shake pan once or twice if dough is unevenly distributed; it will straighten out as it bakes. Cover with lid and bake 30 minutes, then remove lid and bake another 15 to 30 minutes, until loaf is browned beautifully. Cool on a rack before slicing

Yield: One 1½-pound loaf.

Braided Challah Bread

I've been wanting to try making challah for some time now, but I just couldn't seem to get around to it. Last week I decided it was time to stop coming up with excuses and just do it. I looked at several different recipes for challah, it was difficult to choose one to try, but I finally settled on this recipe I found on The Apron Archives. The pictures were beautiful and the original recipe was from the King Arthur Flour Baker’s Companion Cookbook, so I figured I was in good hands. While my loaf turned out beautifully and smelled divine, it was a little dry and overcooked. I think it would be just perfect if it baked for just a little less time. I'm definitely going to try it again and keep my eye on it. But even so, this bread made some fabulous grilled sandwiches, and killer croutons. I think my next experiment will be french toast! Can't wait!

I just love the braided look of this bread, it is so pretty. If you want to know how to achieve this look, head over to The Apron Archives where I got the recipe, she has a great little tutorial on how to do the 4 strand braid. It is really not difficult at all, and makes the finished product so festive looking.

Braided Challah Bread
From The Apron Archives
Ingredients
Quick Starter

  • 1 cup All-Purpose Flour
  • 1 cup water
  • 2 tsps instant yeast

Dough

  • All of the starter
  • 3 1/2 cups All-Purpose Flour
  • 1 3/4 tsps salt
  • 1/3 cup sugar
  • 1/4 cup vegetable oil
  • 2 large eggs + 1 yolk (save 1 egg white for the wash, below)

Wash

  • 1 egg white
  • 1 tsp sugar
  • 1 Tbsp water

Directions
To make the starter, mix the 1 cup flour, 1 cup water and yeast together in a large bowl. Let the mixture sit for about 45 minutes. Add the dough ingredients to the starter and mix and knead together until a smooth is formed.Place the kneaded dough in a greased bowl, turning it over once to coat both sides. Cover it and let it rise for 1 1/2 hours, or until doubled in size.

Turn the dough out onto a lightly floured surface. Divide the dough into four even pieces and roll each into a strand about 18 inches long. On a lightly greased or parchment-lined sheet pan, braid the strands. Once your braid is done, make the wash by mixing together the reserved egg white, sugar, and water. Brush the loaf with half the wash. Cover the loaf with lightly greased plastic wrap and allow it to rise again for 45 minutes to 1 hour, or until it’s almost doubled in size.

Brush the loaf with the remaining egg wash and bake in a preheated 375°F oven for 35 to 40 minutes, covering with aluminum foil if it starts getting too brown. Remove it from the oven, and cool completely before slicing.

Soft Dinner Rolls

There is almost nothing I love better than a soft, buttery, freshly baked roll. Still slightly warm from the oven, smeared with softened butter, it can't really get any better than this. I've been making these rolls for several years now and they are my absolute favorite. I found the recipe in a memoir by Katherine Darling about her time at The French Culinary Institute. She calls them Mama's Rolls because the recipe came from her mom, obviously. I don't know her or her mom but every time I make these rolls I thank both of them for sharing the recipe.

Throughout the years I've made this recipe into dinner rolls, sandwich rolls, hamburger buns, whatever I need. I just change up the size depending on what I want. The recipe makes quite a big batch, which usually isn't a problem for me. I just stick the leftovers in the freezer to have whenever I need them. However, if you really don't need a huge batch this recipe halves very nicely too, I've done it several times. So whatever you need, these rolls will work beautifully for. Give them a try, I promise you you won't regret it.

Soft Dinner Rolls

Adapted from:

Under the Table: Saucy Tales from Culinary School

by Katherine Darling

Ingredients

  • 7 to 8 cups (36 1/2 ounces) all purpose flour
  • 1/3 cup (2 1/3 ounces) sugar
  • 1 tablespoon instant yeast
  • 1 tablespoon salt
  • 1/2 cup vegetable oil or 1 stick butter
  • 1/2 cup water
  • 2 cups (about 18 ounces) milk

Directions

In the bowl of a stand mixer fitted with the dough hook, place the flour, sugar, yeast and salt. Mix briefly to combine. Add the oil or butter, water and milk. Knead dough until a soft, supple dough forms, about 5-6 minutes, it should not be too sticky or too dry and tough. Place the dough in a oiled bowl and let rise until doubled, about an hour and a half. 

Butter a rimmed baking sheet. Cut the dough into 36 equal size pieces. Shape each piece of dough into a smooth ball and place on the baking sheet. When all the rolls are formed, let the dough once again rise until doubled in volume. 

Preheat the oven to 350 degrees. Brush the risen rolls with a little butter if desired and then bake for 25 to 30 minutes. If they begin to get too brown, cover the top with foil. 

Barbecue Chicken Pizza

Homemade pizza has become one of my go-to dinners. All I have to do is whip up a quick batch of my favorite pizza dough, throw whatever I have on hand on top of one of the crusts and slide it into the oven, right onto my awesome pizza stone. I've found that this is a great way to use up leftovers. Almost anything you can think of can be turned into a pizza. I love the versatility and creativity a blank crusts offers, just let your imagination run wild.

The key to really good homemade pizza is a super hot oven and cooking surface. A baking stone is your best bet, it will produce pizza with the crispest, most professional tasting crust. If you don't have one, an upside down cookie sheet will do, but it won't get as hot as the stone will. Also, when it's time to heat up your oven, crank it up as high as it will possibly go, usually 500 or 550, and let your stone heat up for at least 30 minutes, or an hour if you have the time. The hotter the better for pizza. Trust me, this will take your pizza to a whole new level.

This week I made barbecue chicken wraps and had some leftover sauce and chicken so what was the first thing I thought of; barbecue chicken pizza of course! I used the leftover barbecue sauce for the base. I used a recipe from Tyler Florence for the sauce, I've made it several times and love how easy and delicious it turns out, thick and sweet. I just topped this canvas with the leftover chicken, onions, peppers and cheese. It couldn't get much easier, or much more delicious. Homemade pizza really is one of my all time favorite dinners, it's almost impossible to mess it up so there are no excuses not to try it for yourself.

Dough, ready to go

Sauce it up

Topping time

Finished with some cheese

Slide the whole thing from the 

pizza peel into the oven

In just a few minutes, you're ready to eat!

Perfect Pizza Dough
Adapted from Annie's Eats, originally from Baking Illustrated
Ingredients

  • 4 cups (22 ounces) bread flour, plus more for dusting 
  • 2 1/4 teaspoons instant yeast 
  • 1 1/2 teaspoons salt 
  • 1 3/4 cup water, at room temperature 
  • 2 tablespoons extra-virgin olive oil 

Directions
In the bowl of a stand mixer fitted with the paddle attachment, combine the bread flour, yeast and salt, mixing briefly to blend. Add the water and olive oil. Mix until a cohesive dough is formed. Switch to the dough hook. Knead on low speed until smooth and elastic, about 5 minutes. Transfer to a lightly oiled bowl, turning once to coat. Cover with plastic wrap and let rise until doubled in size, 1½-2 hours.

Transfer the dough to a lightly floured work surface. Divide the dough into four equal pieces. Form each piece of dough into a smooth, round ball. If using immediately, cover with a damp cloth. Let the dough relax for at least 10 minutes but no longer than 30 minutes. You can also refrigerate or freeze any dough you don't want to use. Just place each piece in a greased plastic bag and put in the fridge for a couple of days or freeze for a couple of weeks/months. When you want to make pizza, thaw overnight in the fridge (if frozen). Take the dough out of the fridge about an hour before you want to make pizza and let come to room temperature before proceeding.

To bake, preheat the oven and pizza stone to 500˚ F for at least 30 minutes. Transfer the dough to your pizza peel or shaping surface, lightly sprinkled with cornmeal. Shape the dough with lightly floured hands. Brush the outer edge lightly with olive oil. Top as desired. Slide into the oven and bake until the crust is golden brown, and cheese is bubbling, 8-12 minutes. (If you don't have a pizza stone, use a heavy duty cookie sheet placed upside down in the oven. You can shape the pizza directly on parchment paper and slide the whole thing, parchment paper and all, into the oven on top of the upside down cookie sheet.)

Barbecue Sauce
From: Tyler Florence
Ingredients

  • 1 slice bacon 
  • 1 bunch fresh thyme 
  • Extra-virgin olive oil 
  • 1/2 onion, chopped 
  • 2 garlic cloves, chopped 
  • 2 cups ketchup 
  • 1/4 cup brown sugar 
  • 1/4 cup molasses 
  • 2 tablespoons red or white wine vinegar 
  • 1 tablespoon dry mustard 
  • 1 teaspoon ground cumin 
  • 1 teaspoon paprika or smoked paprika if available 
  • Freshly ground black pepper 

Directions
Wrap the bacon around the bunch of thyme and tie with kitchen twine so you have a nice bundle. Heat about 2 tablespoons of oil in a large saucepan over medium heat. Add the thyme and cook slowly 3 to 4 minutes to render the bacon fat and give the sauce a nice smoky taste. Add the onion and garlic and cook slowly without coloring for 5 minutes. Add the remaining ingredients, give the sauce a stir, and turn the heat down to low. Cook slowly for 20 minutes to meld the flavors.

Pepperoni Pan Pizza

Growing up, pizza was a weekly staple, so if I don't have pizza at least a couple of times a month I go into pizza withdrawals. Until recently, pizza night always involved take out pizza. However, in the last year or so I've been making my own pizzas from time to time. I try not to compare homemade pizza to takeout pizza because to me the two are completely different and so serve a completely different purpose.

When making pizza at home I usually make a thin crust and bake it on my beloved pizza stone with the oven cranked up as high as it will go. This almost always involves the smoke detector going off, but that's okay. These pizzas are delicious and one of my favorite dinners. However, I recently came across a recipe for a pan pizza. When I get takeout I almost always get pan pizza and I didn't think it was possible to mimic this type of crust at home, so when I saw the recipe I knew I had to give it a shot. Not only was it an extremely easy recipe, but it came together quite fast for homemade pizza.

What you do is fill a cake pan with an outrageous amount of oil and then place the dough right on top of it. As the pizza cooks, the oil causes the crust to get brown and deliciously crispy. The dough is extremely light and soft, it rises quite a bit during cooking, leaving you with a thick, pillowy soft layer of crust surrounded by the crisp outer layer. The combination is fabulous, and it's beautiful to look at too, but you won't be able to enjoy that for long, trust me, you'll scarf it down in seconds; enjoy!

It doesn't get much better than this!

Ready to make the dough

Dough made, ready to rise

Get the sauce going

I'm not scared of grease, but I tried this method

to get rid of some of it;

microwave your pepperoni for a minute or so

It let's off quite a bit!

Fill those pans with a healthy dose of 

some good olive oil

Divide the risen dough in half

Roll each half out

Shape it into a nice circle

And lay it on top of the oil 

Ready for topping

Start with the sauce

Then a good dose of cheese

Finish it off with the pepperoni

20 minutes later,

Baked!

Yum!

Look at that thick, crispy, golden brown crust

Let it cool for a minute, then dig in

Enjoy!

Pepperoni Pan Pizza
From America's Test Kitchen
Ingredients
Dough

  • ½ cup olive oil 
  • ¾ cup skim milk plus 2 additional tablespoons, warmed to 110 degrees 
  • 2 tsp sugar 
  • 2 ⅓ cups all-purpose flour, plus extra for counter 
  • 1 package instant yeast 
  • ½ tsp table salt 

Topping

  • 1 (3.5-ounce) package sliced pepperoni 
  • 1 ⅓ cups tomato sauce 
  • 3 cups shredded part-skim mozzarella cheese 

Directions
To make the dough: Adjust oven rack to lowest position and heat oven to 200 degrees. When oven reaches 200 degrees, turn it off. Lightly grease large bowl with cooking spray. Coat each of two 9-inch cake pans with 3 TB of oil.

Mix milk, sugar and remaining 2 TB pf oil in measuring cup. Mix flour, yeast, and salt in standing mixer fitted with dough hook. Turn machine to low and slowly add milk mixture. After dough comes together*, increase speed to medium-low and mix until dough is shiny and smooth, about 5 minutes. Turn dough onto lightly floured counter, gently shape into ball, and place in greased bowl. Cover with plastic wrap and place in warm oven until doubled in size, about 30 minutes.

To shape and top the dough: Transfer dough to lightly floured counter, divide in half, and lightly roll each half into ball. Working with 1 dough ball at a time, roll and shape dough into 9 ½ inch round and press into oiled pan. Cover with plastic wrap and set in warm spot (not in oven) until puffy and slightly risen, about 20 minutes. Meanwhile, heat oven to 400 degrees.

While dough rises, put half of pepperoni in single layer on microwave-safe plate lined with 2 paper towels. Cover with 2 more paper towels and microwave on high for 30 seconds. Discard towels and set pepperoni aside; repeat with new paper towels and remaining pepperoni.

Remove plastic wrap from dough. Ladle ⅔ cup sauce on each round, leaving ½ inch border around edges. Sprinkle each with 1 ½ cups cheese and top with pepperoni. Bake until cheese is melted and pepperoni is browning around edges, about 20 minutes. Remove from oven; let pizzas rest in pans for 1 minute. Using

spatula, transfer pizzas to cutting board and cut each into 8 wedges. Serve.

Basic Pizza Sauce
From: America's Test Kitchen
Ingredients

  • 1 Tablespoon olive oil 
  • 2 cloves garlic, minced 
  • 1 28-ounce can crushed tomatoes 

Directions
Cook oil and garlic in medium sauce pan over low heat until fragrant, about 2 minutes. Add tomatoes, increase heat to medium, and cook until slightly thickened, about 10 to 15 minutes. Season with salt and pepper.

(This isn't an amazing sauce, but it's good, easy and does the trick. You could try to doctor it up a little with additional spices/herbs, or just use your favorite pizza sauce.)