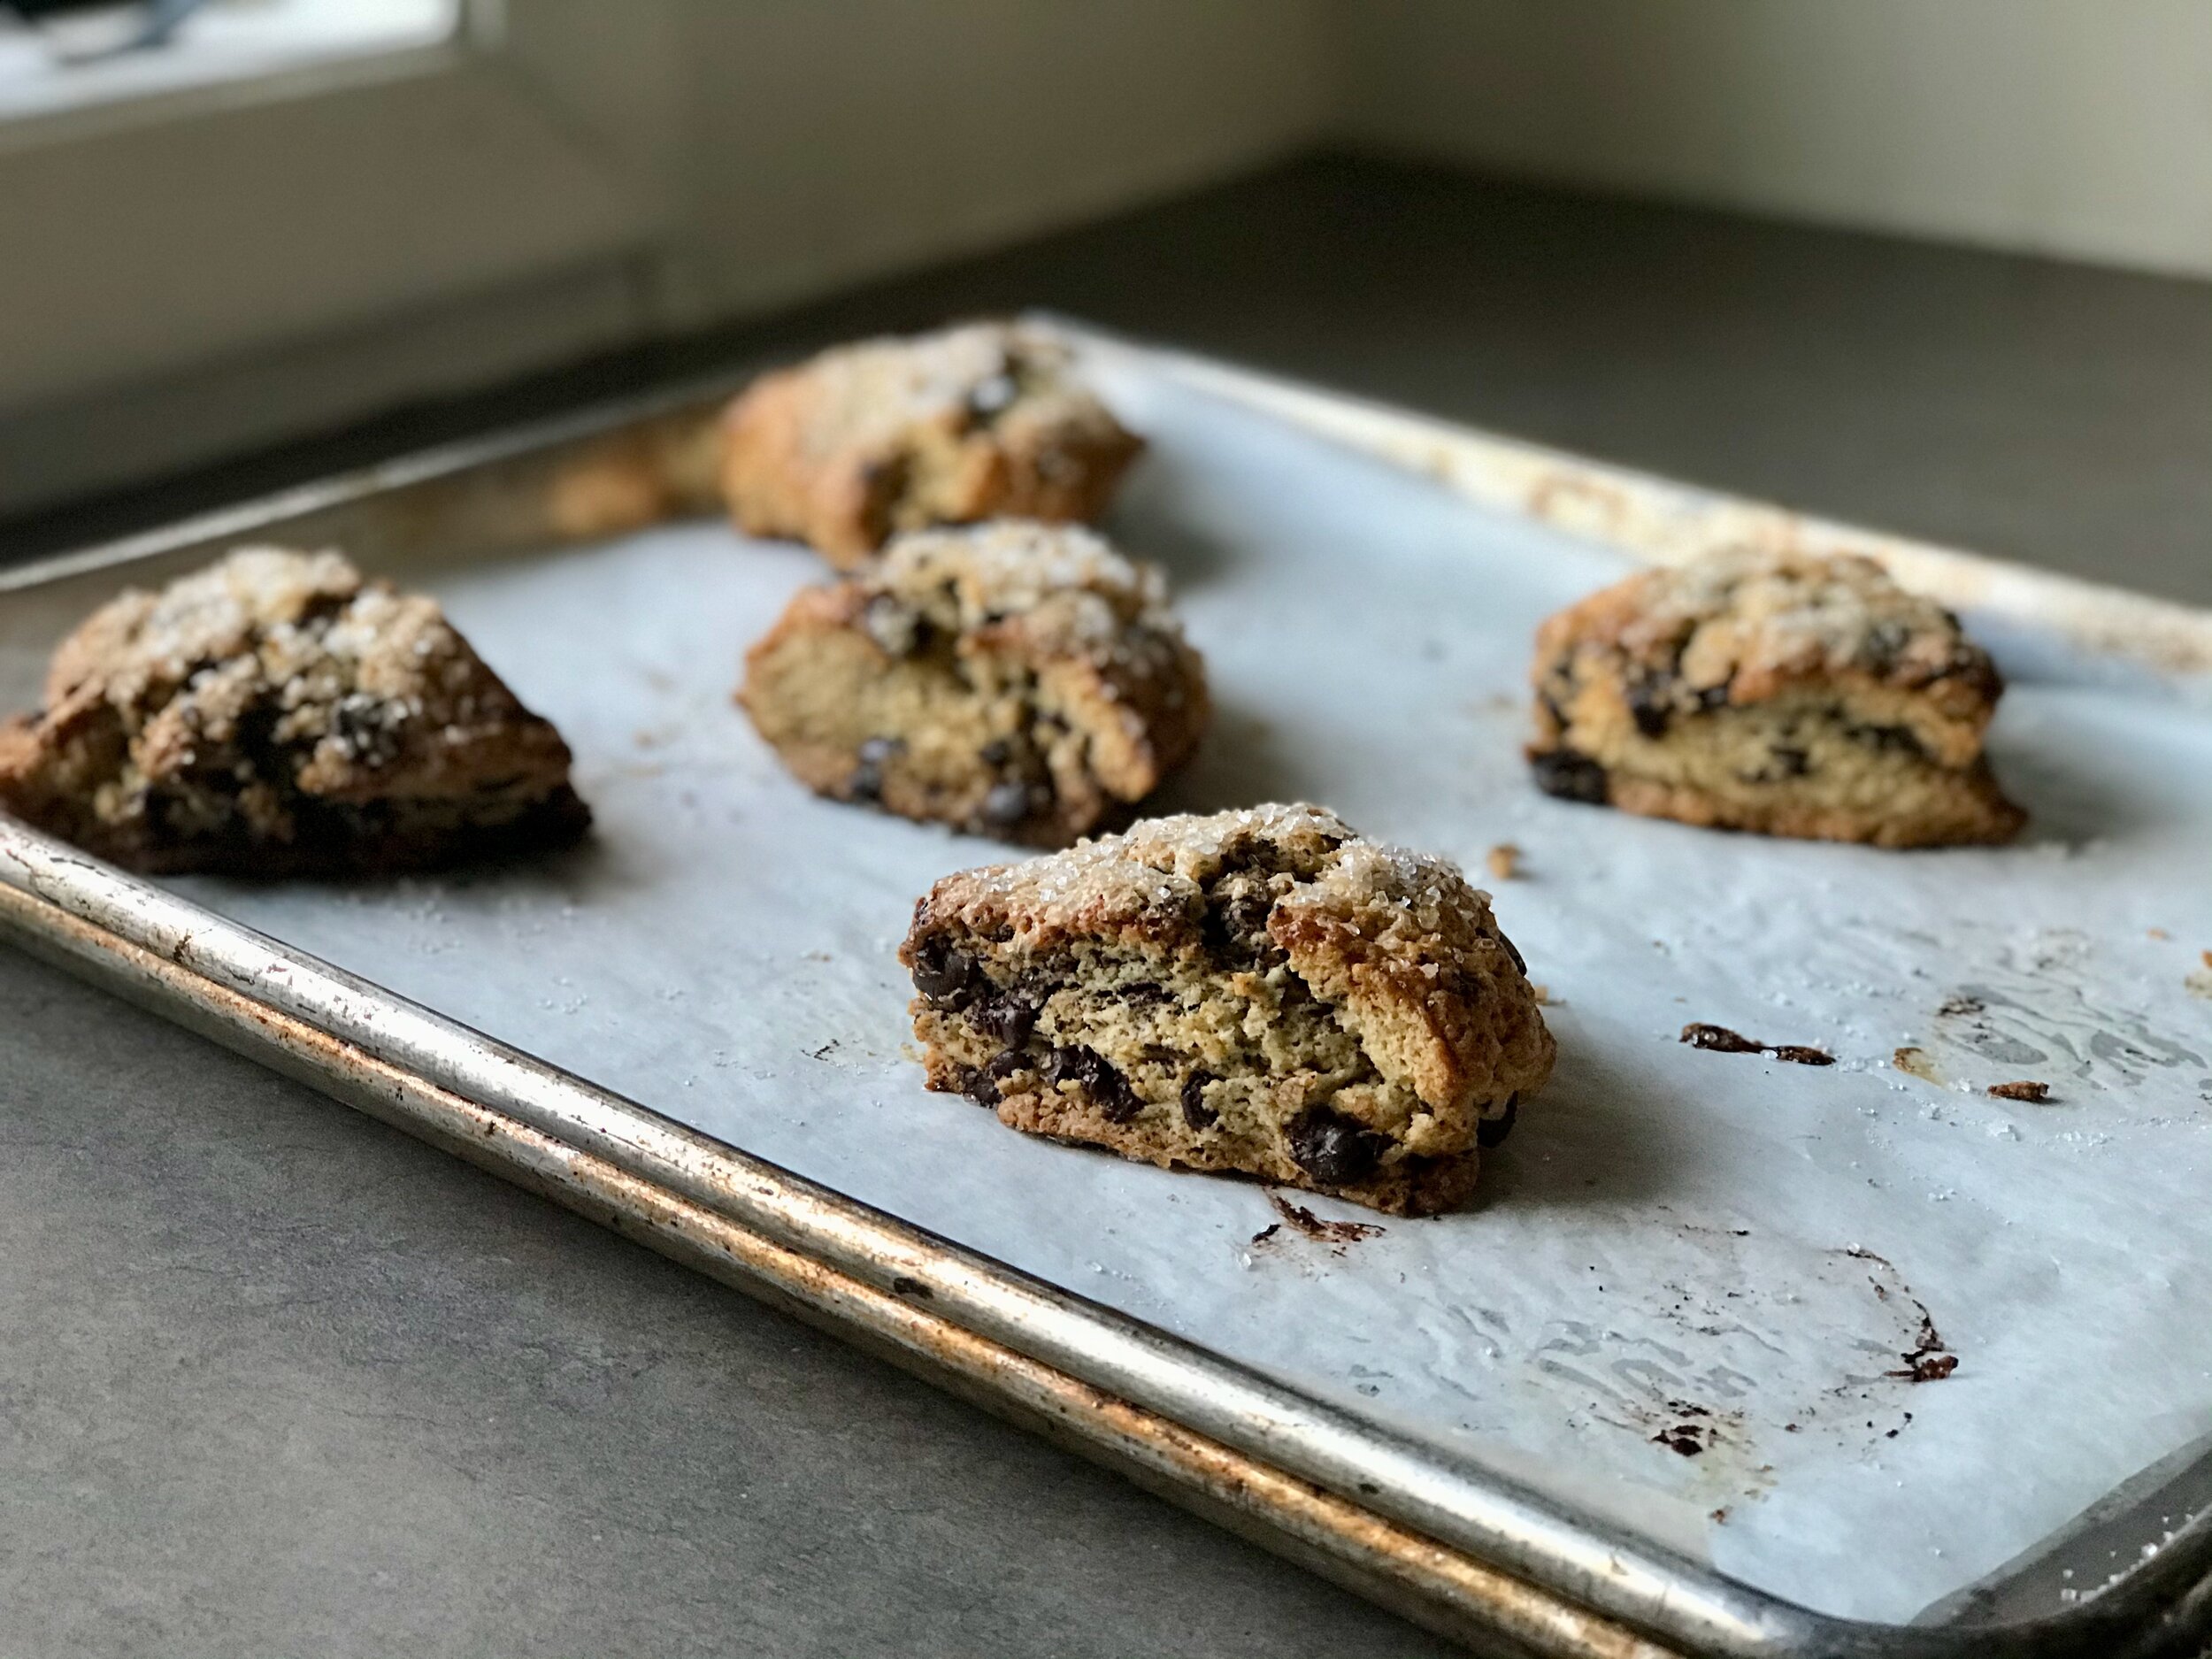
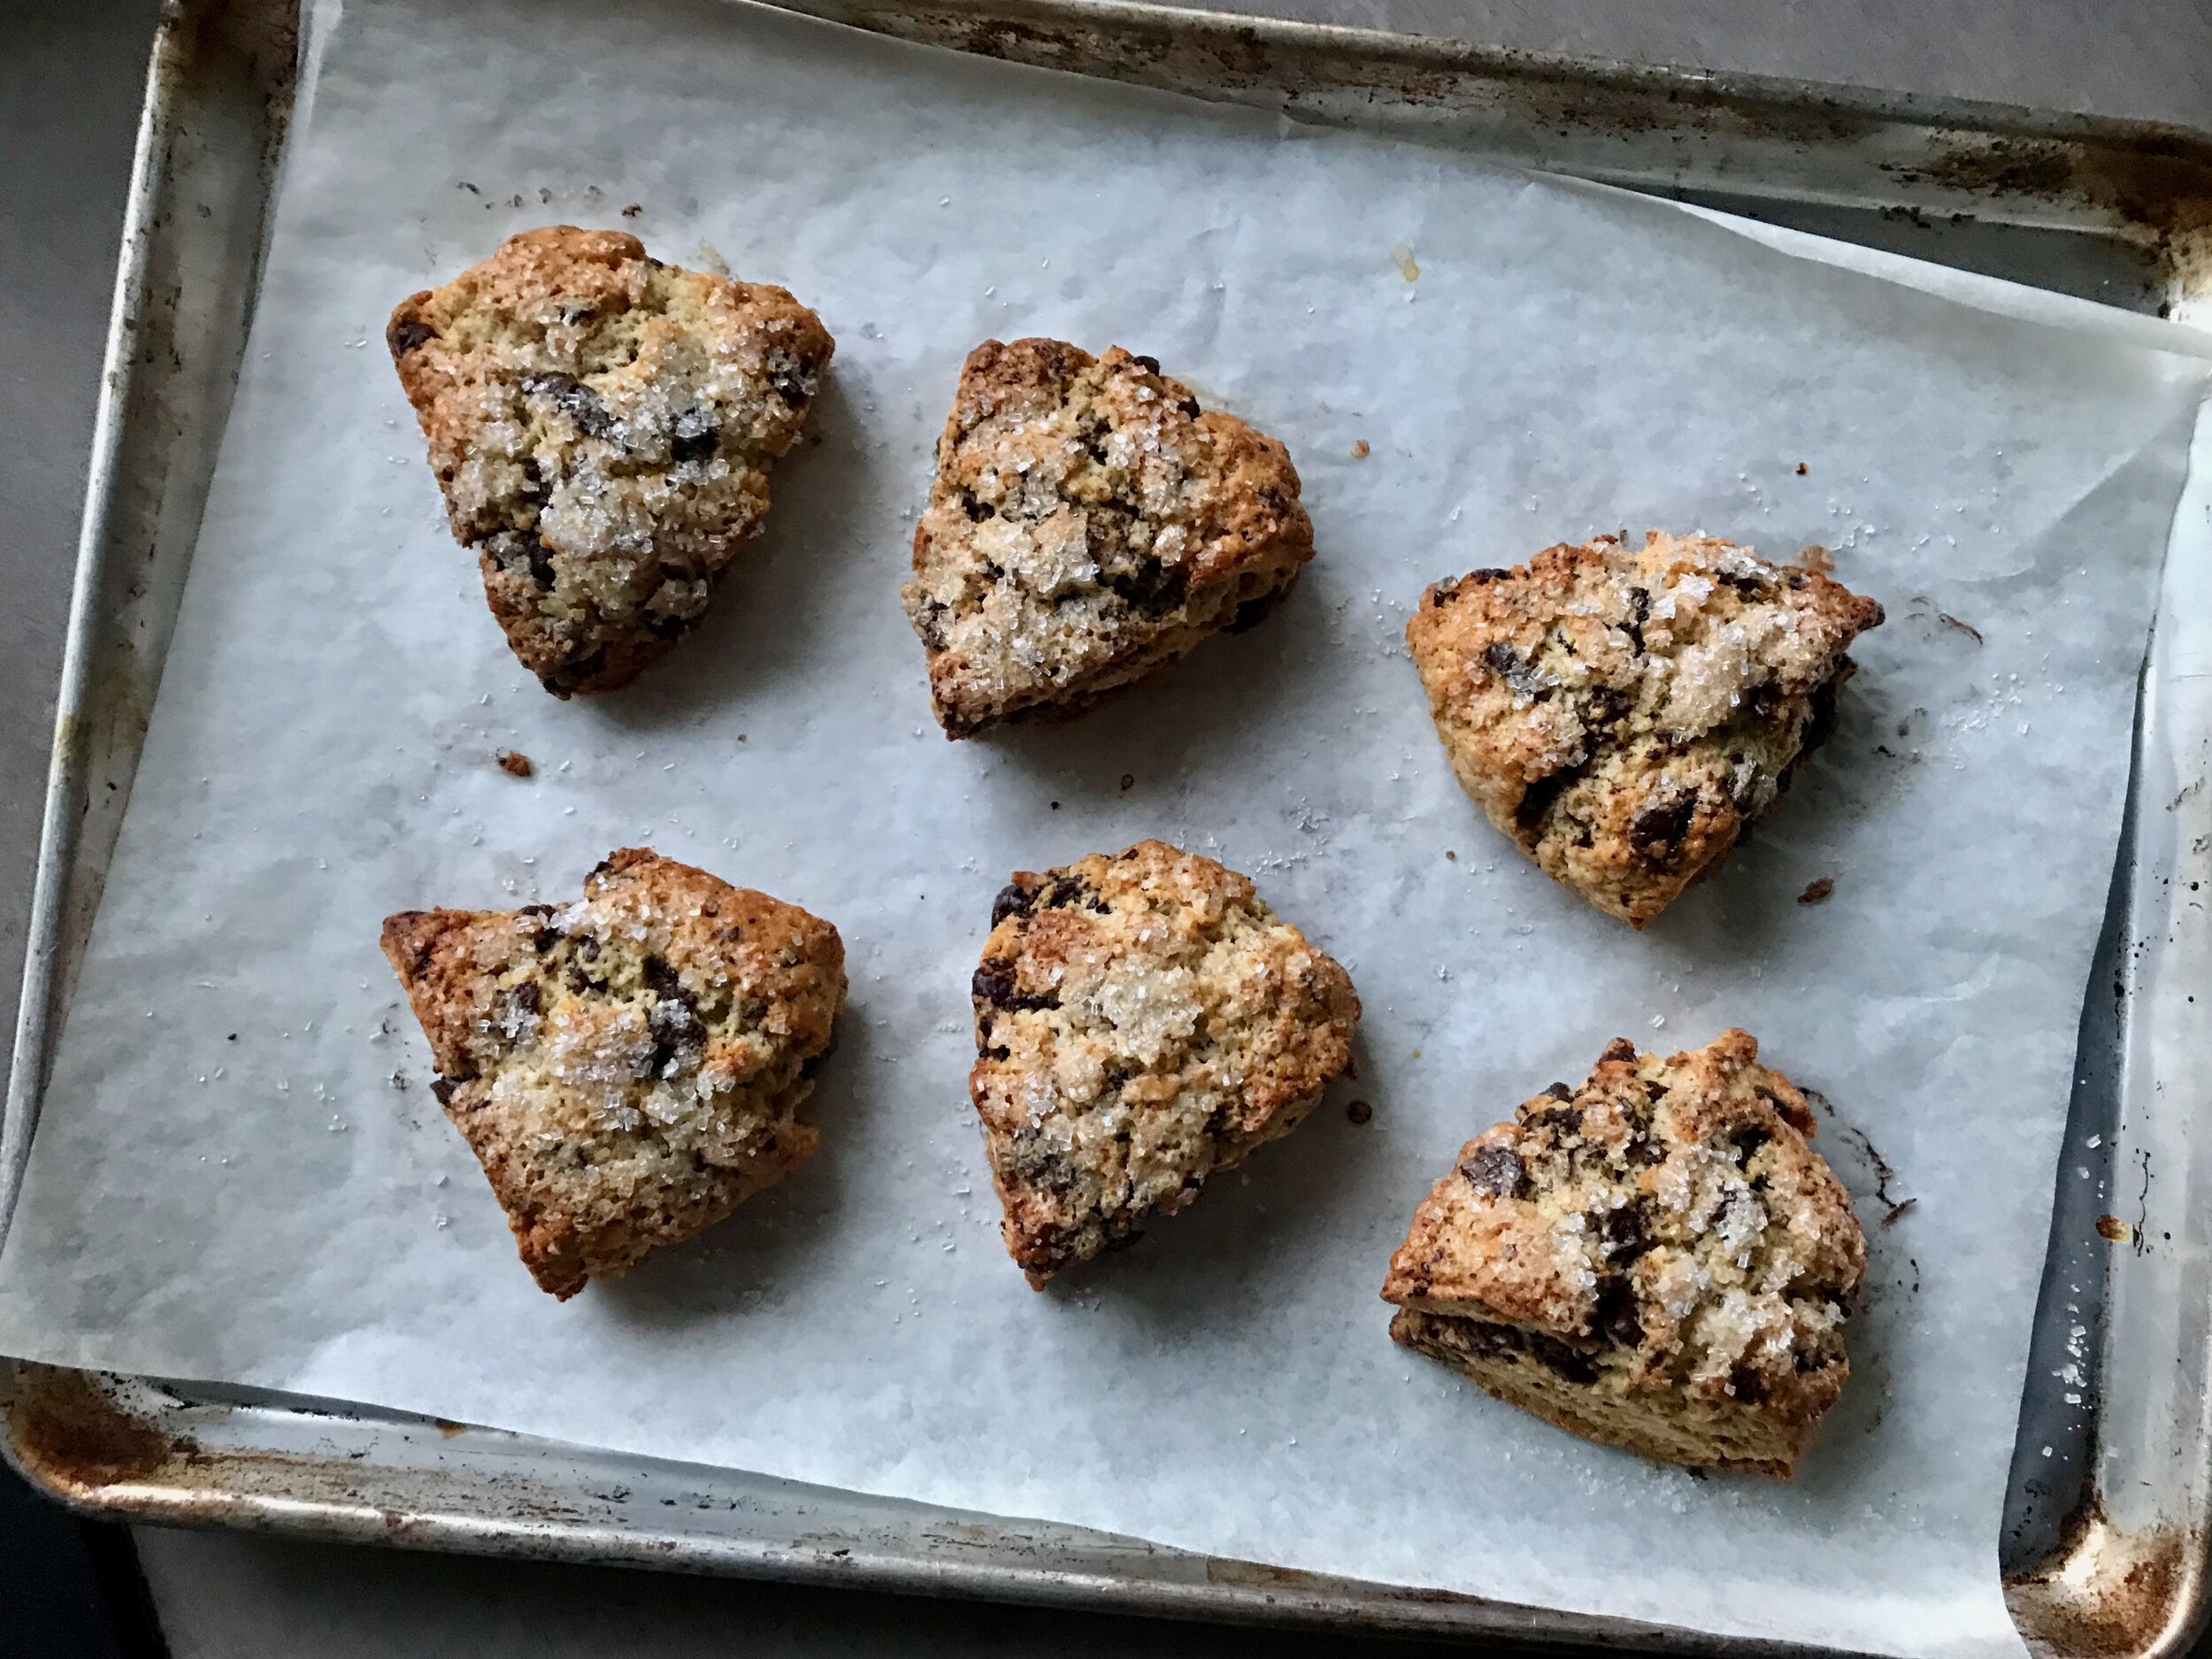
Chocolate Chunk Buttermilk Scones (with variations)

IMG_7336.jpeg

I absolutely love scones. Most scone recipes out there can be put into a few general categories; they can be made with just cream, with just butter, with cream AND butter, with butter and buttermilk, with an egg or without an egg. I personally don’t think something should be considered a true scone unless it has butter, cream, or both. But within this group I don’t discriminate, they’re all good if made well!

I had tried this recipe a few months back and wasn’t blown away, but thought that with a few tweaks they could be really good so I decided to try them again this week. I’m glad I did as they turned out really well. The instructions in the original recipe was a little finicky in my opinion, calling for you cut the butter into only half of the dry ingredients, and then transferring to a new bowl and adding the remaining dry ingredients followed by the buttermilk. I didn’t find that this seemed to help at all, and I prefer to dump everything into the food processor at the beginning, cut in the butter, and then add the buttermilk before transferring to the counter to finish up the mixing and shaping.

I also made some changes to the recipe itself. I did only make half a batch of the original recipe so that is reflected below. I increased the sugar by about 50% because I like a sweeter scone, and also decreased the salt. The original recipe called for 2.5 teaspoons of kosher salt which is way to much my opinion. I ended up only using 1/2 teaspoon for the half batch (so 1 teaspoon in the full batch) which is significantly less than called for but I much preferred this amount of salt. I want to state that I am NOT afraid of salt, I love salt, I typically like a little more salt than is called for in a lot of recipes but not in this one. I think the decreased amount of salt is much better, but do as you will.

The original recipe is for a triple ginger scone with chocolate chunks and included ginger (ground, fresh grated, and crystalized), nutmeg, orange zest and black pepper along with the chocolate. I decided to skip the ginger and spices and just included chocolate chunks and a little cinnamon. In the end it doesn’t really matter what put in the scones. When you start with a good base you can customize however you would like and it should turn out just fine!

———————————————————————————————————————————————————————————————

Chocolate Chunk Buttermilk Scones
Adapted from 177 Milk Street
Ingredients
Scone Base:

  • 227 grams/8 ounces (1.75 cups plus 2 tablespoons) all-purpose flour

  • 50-67 grams (1/4 -1/3 cup) sugar

  • 2 teaspoons baking powder

  • 1/4 teaspoon baking soda

  • 1/2 teaspoon kosher salt (I used Mortin)

  • 128 grams/4.5 ounces (9 tablespoons) butter

  • 142 grams/5 ounces (5/8 cup) buttermilk

Additions:

  • 3/8 teaspoon ground cinnamon (added with the dry ingredients)

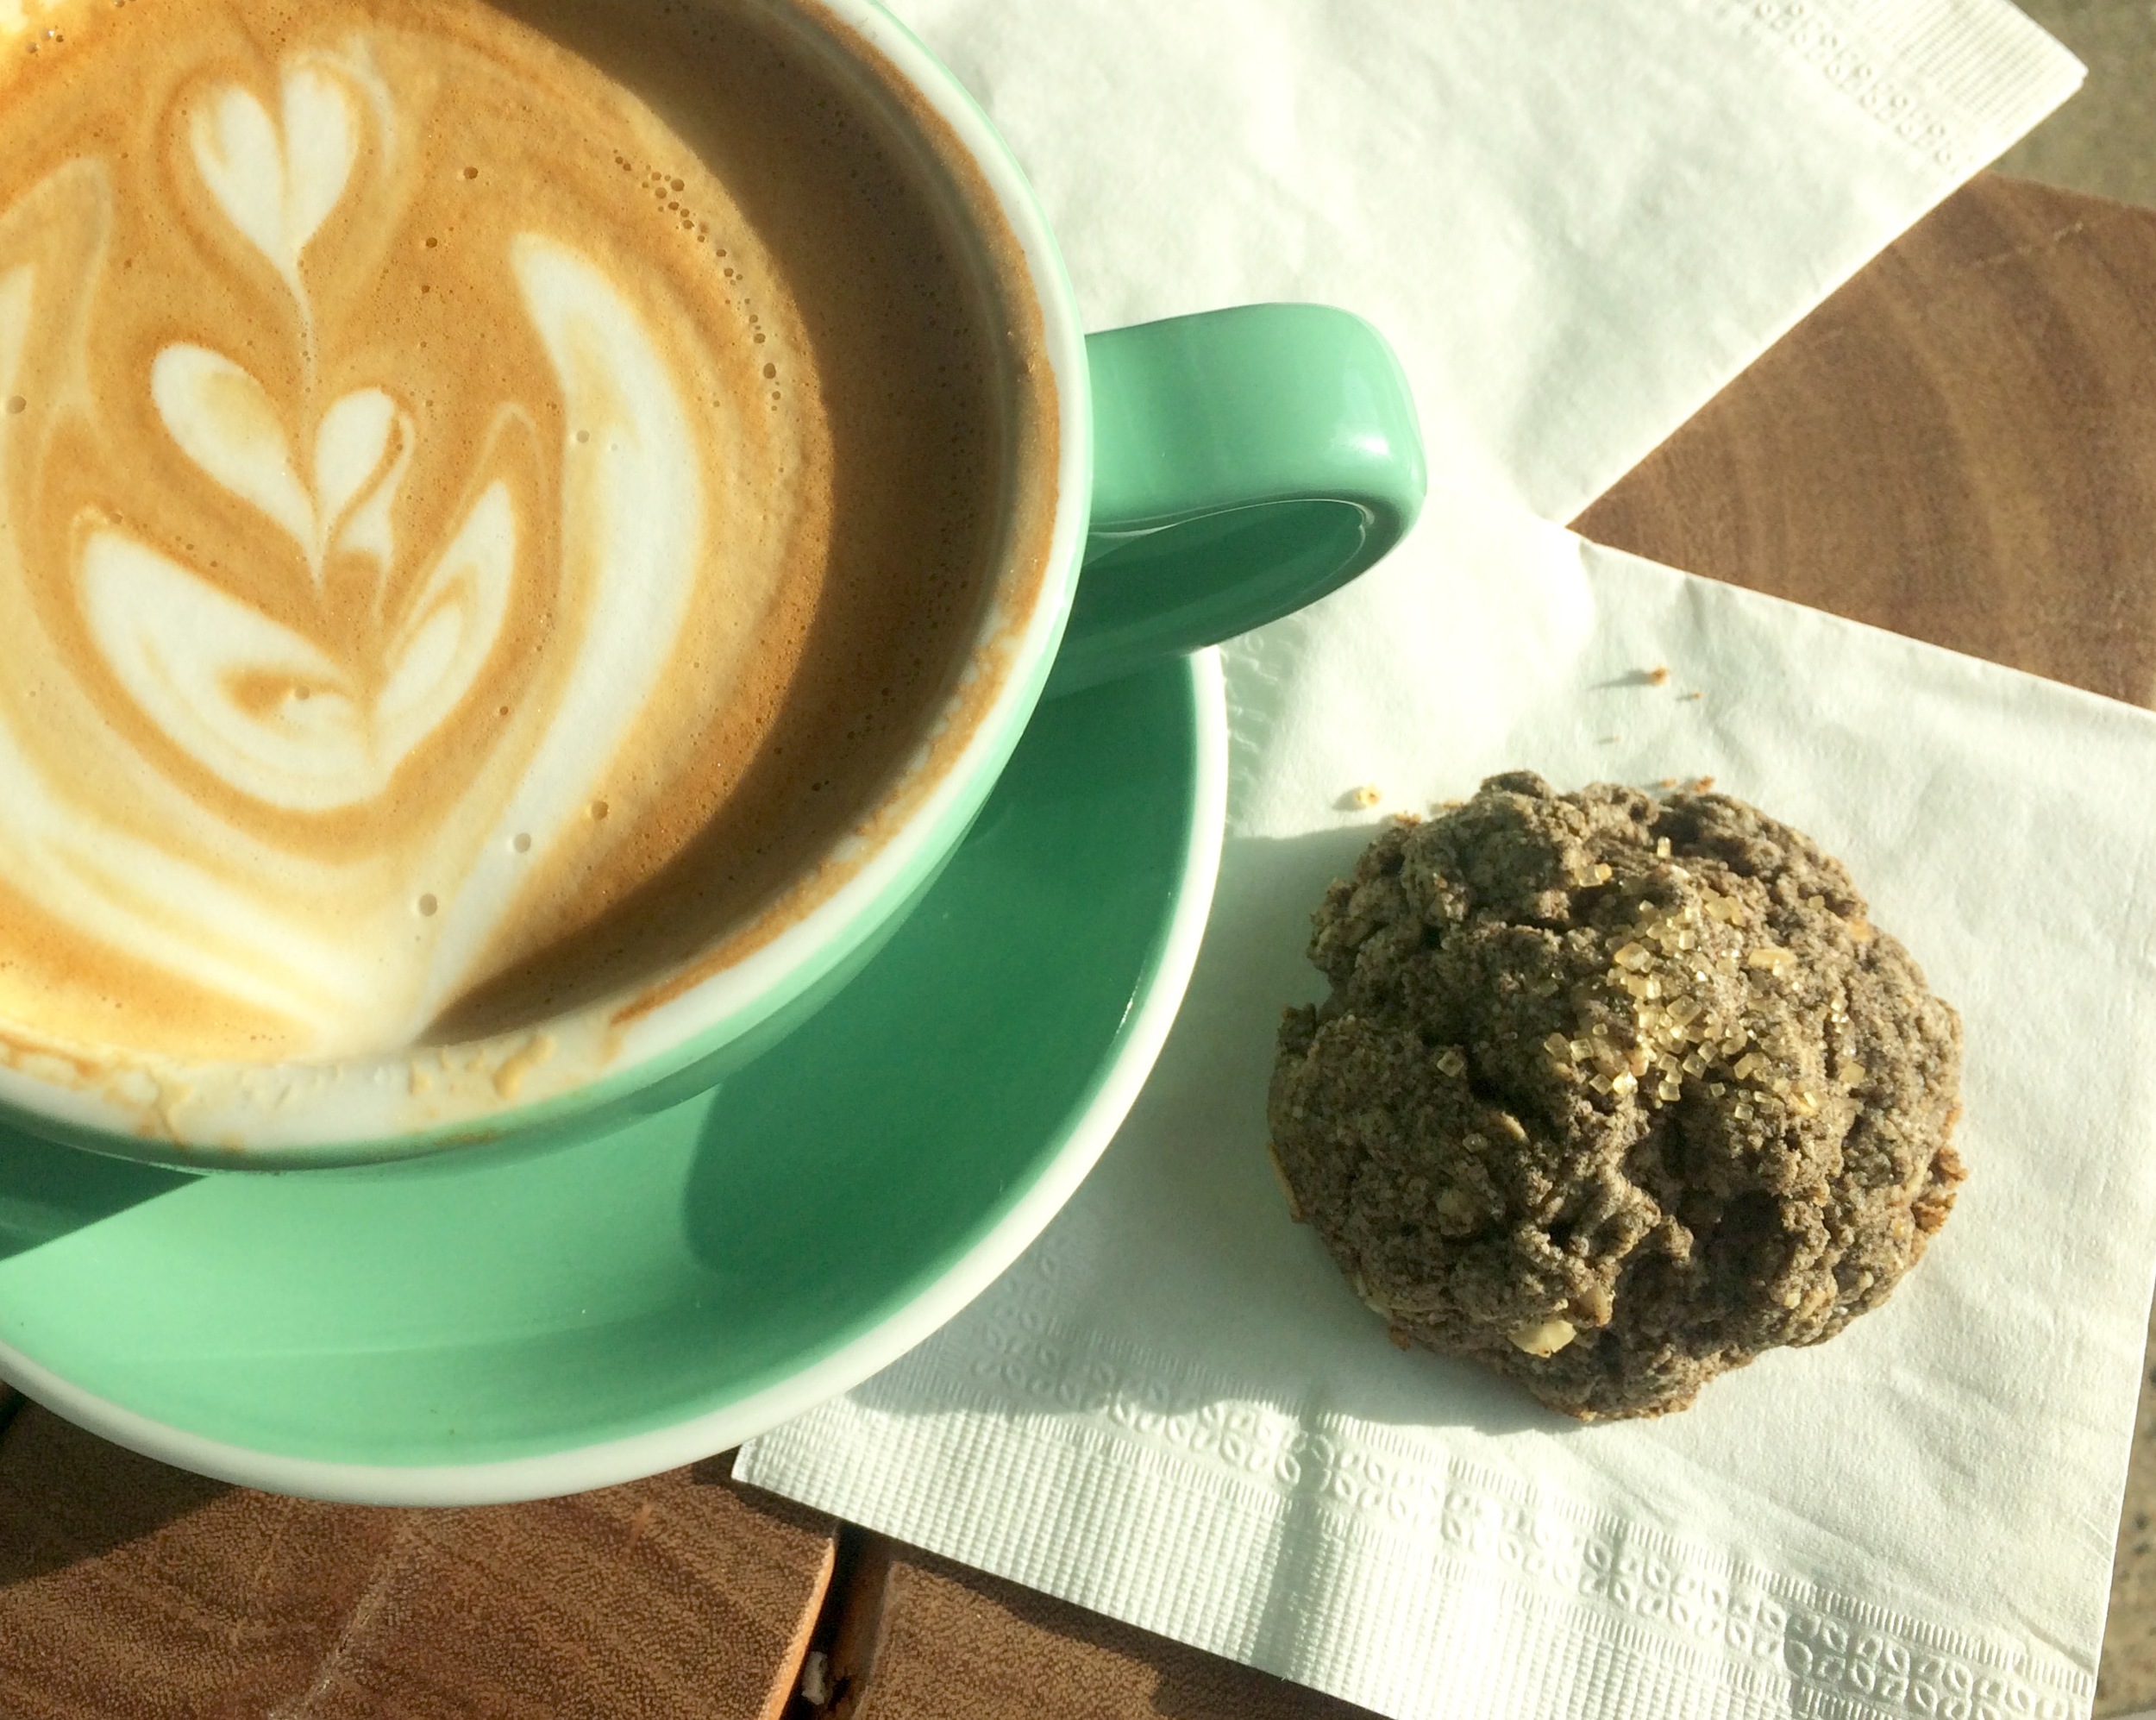
  • 80 grams/2.8 ounces (about 1/2 cup) chocolate chunks

Topping:

  • 1 egg, lightly beaten and thinned with about 1 tablespoon water, for brushing on top

  • Sparkling sugar, for topping

Directions
Heat the oven to 375°F. Line a rimmed baking sheet with kitchen parchment. Place the flour, sugar, baking powder, baking soda, salt and cinnamon in the bowl of a food processor and pulse a few times to combine. Add the butter and pulse until it is in large pea-sized pieces, 10-12 pulses.

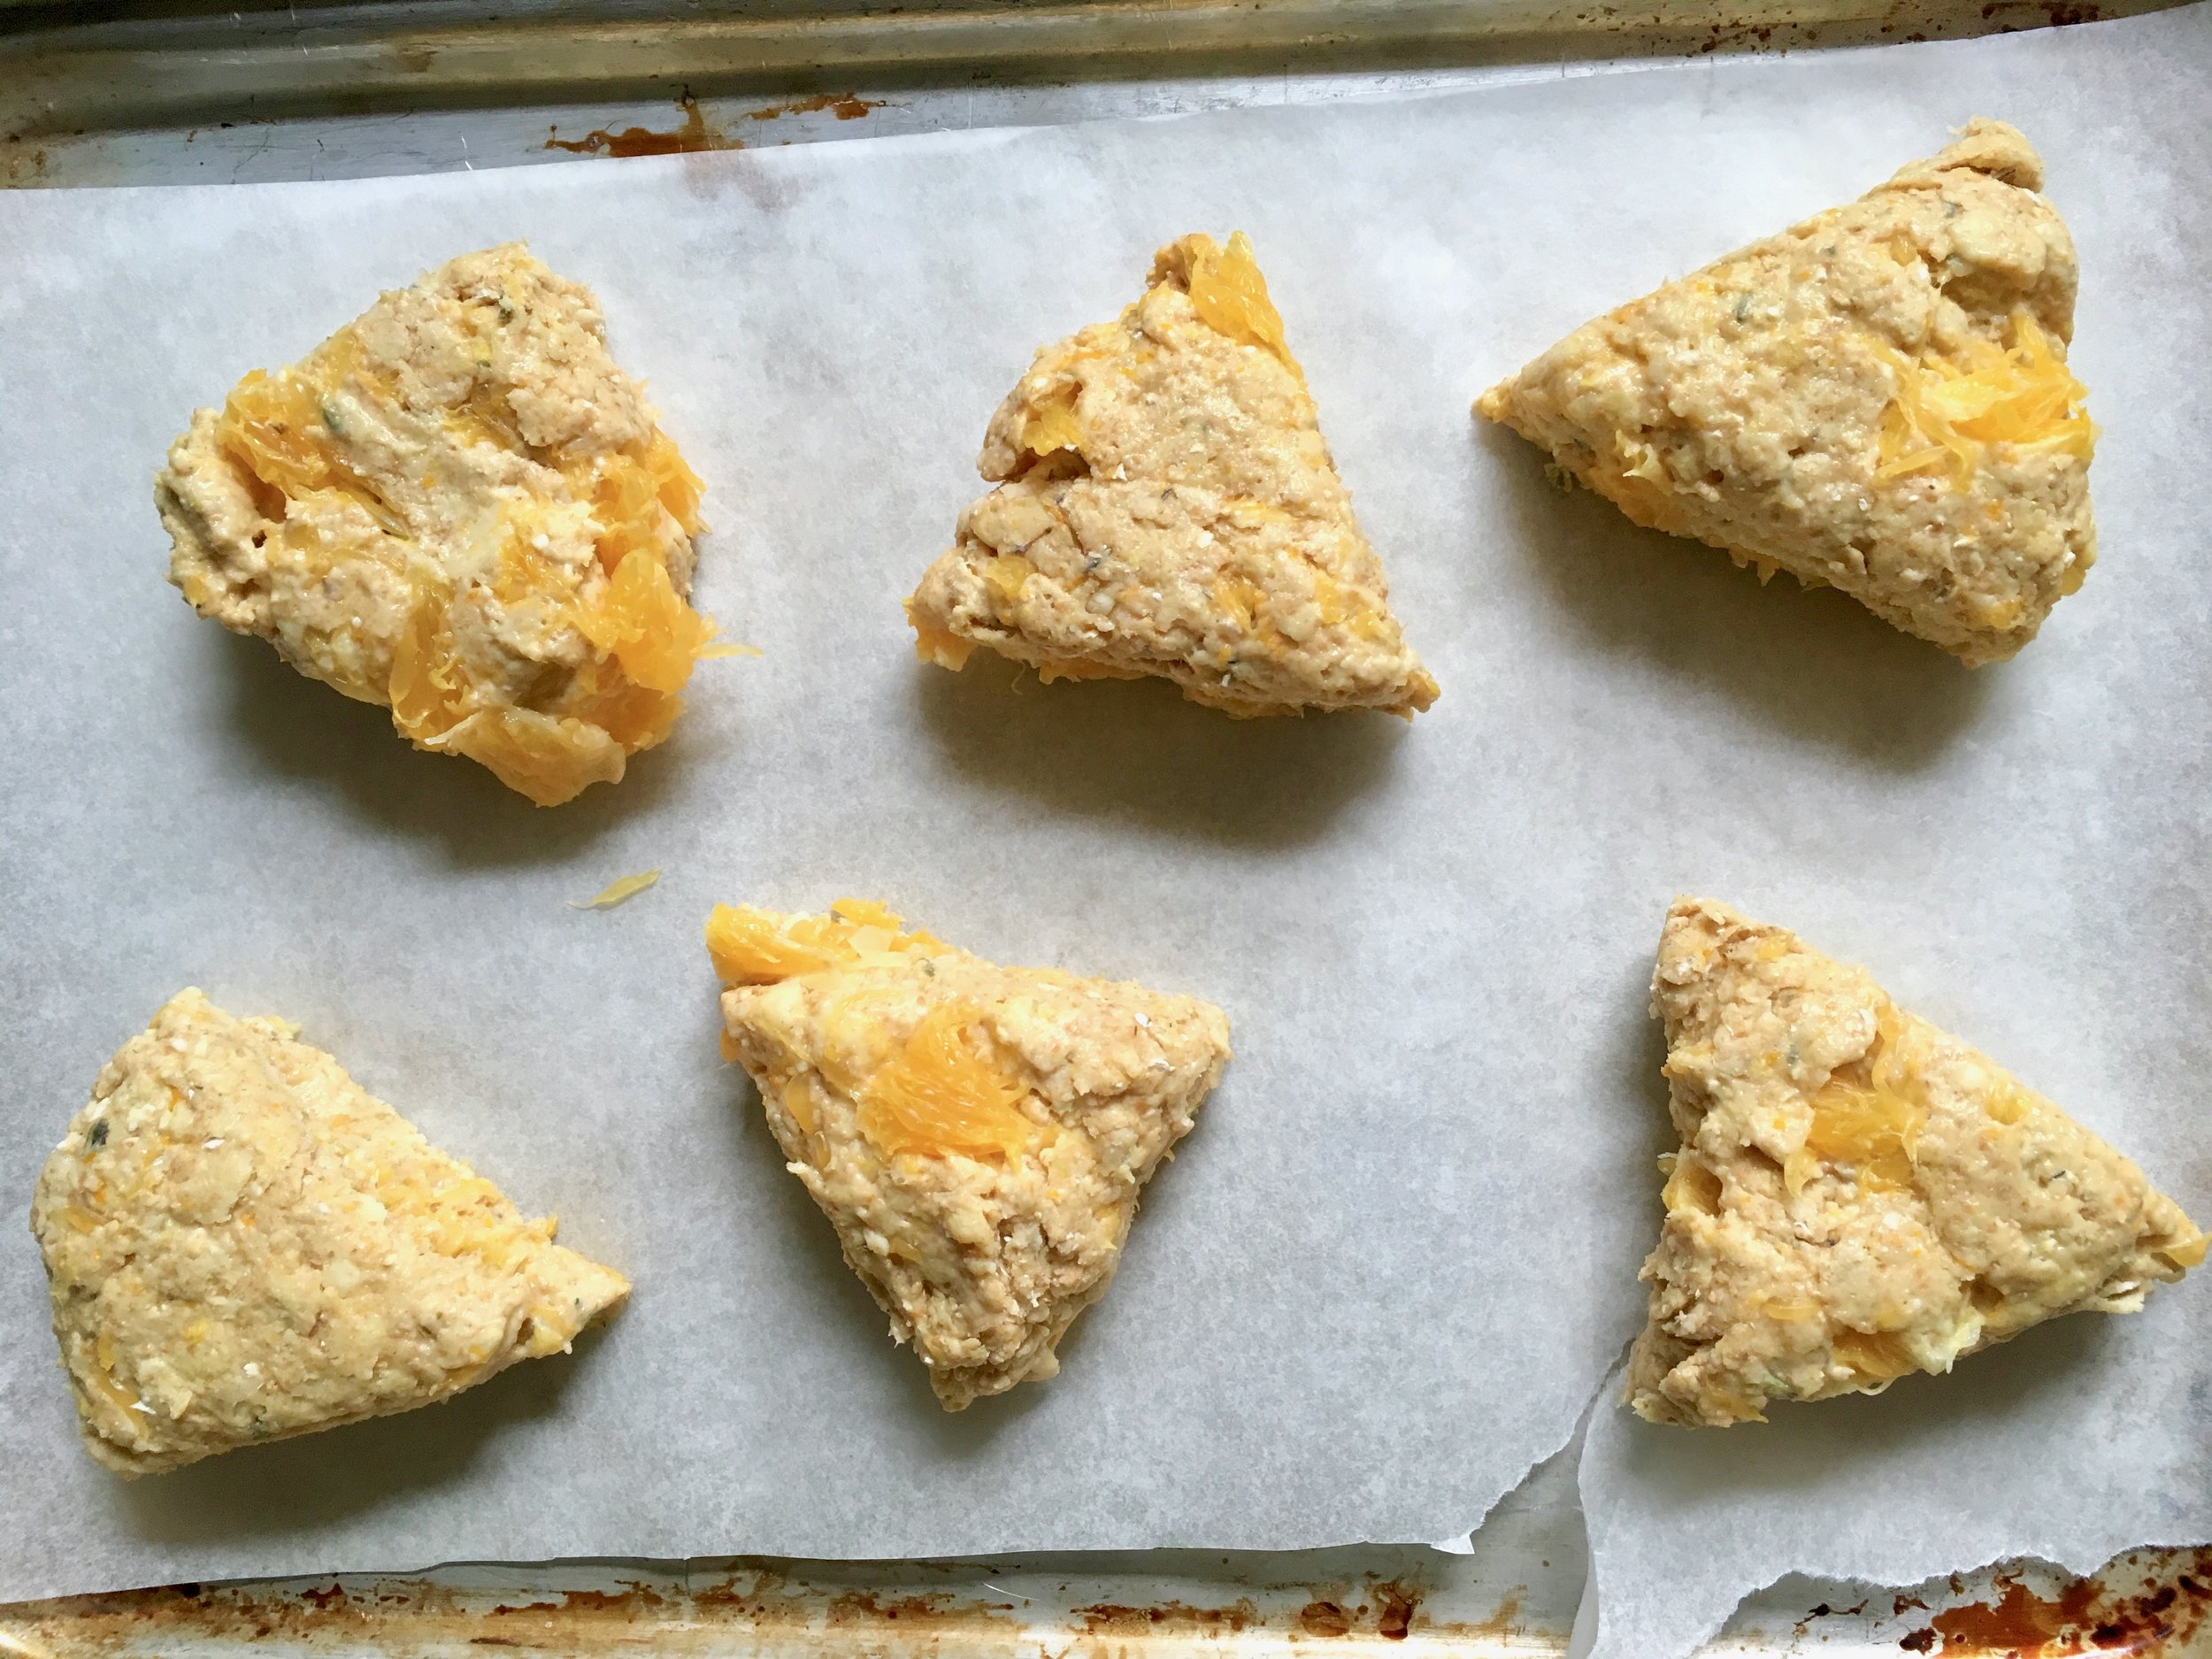
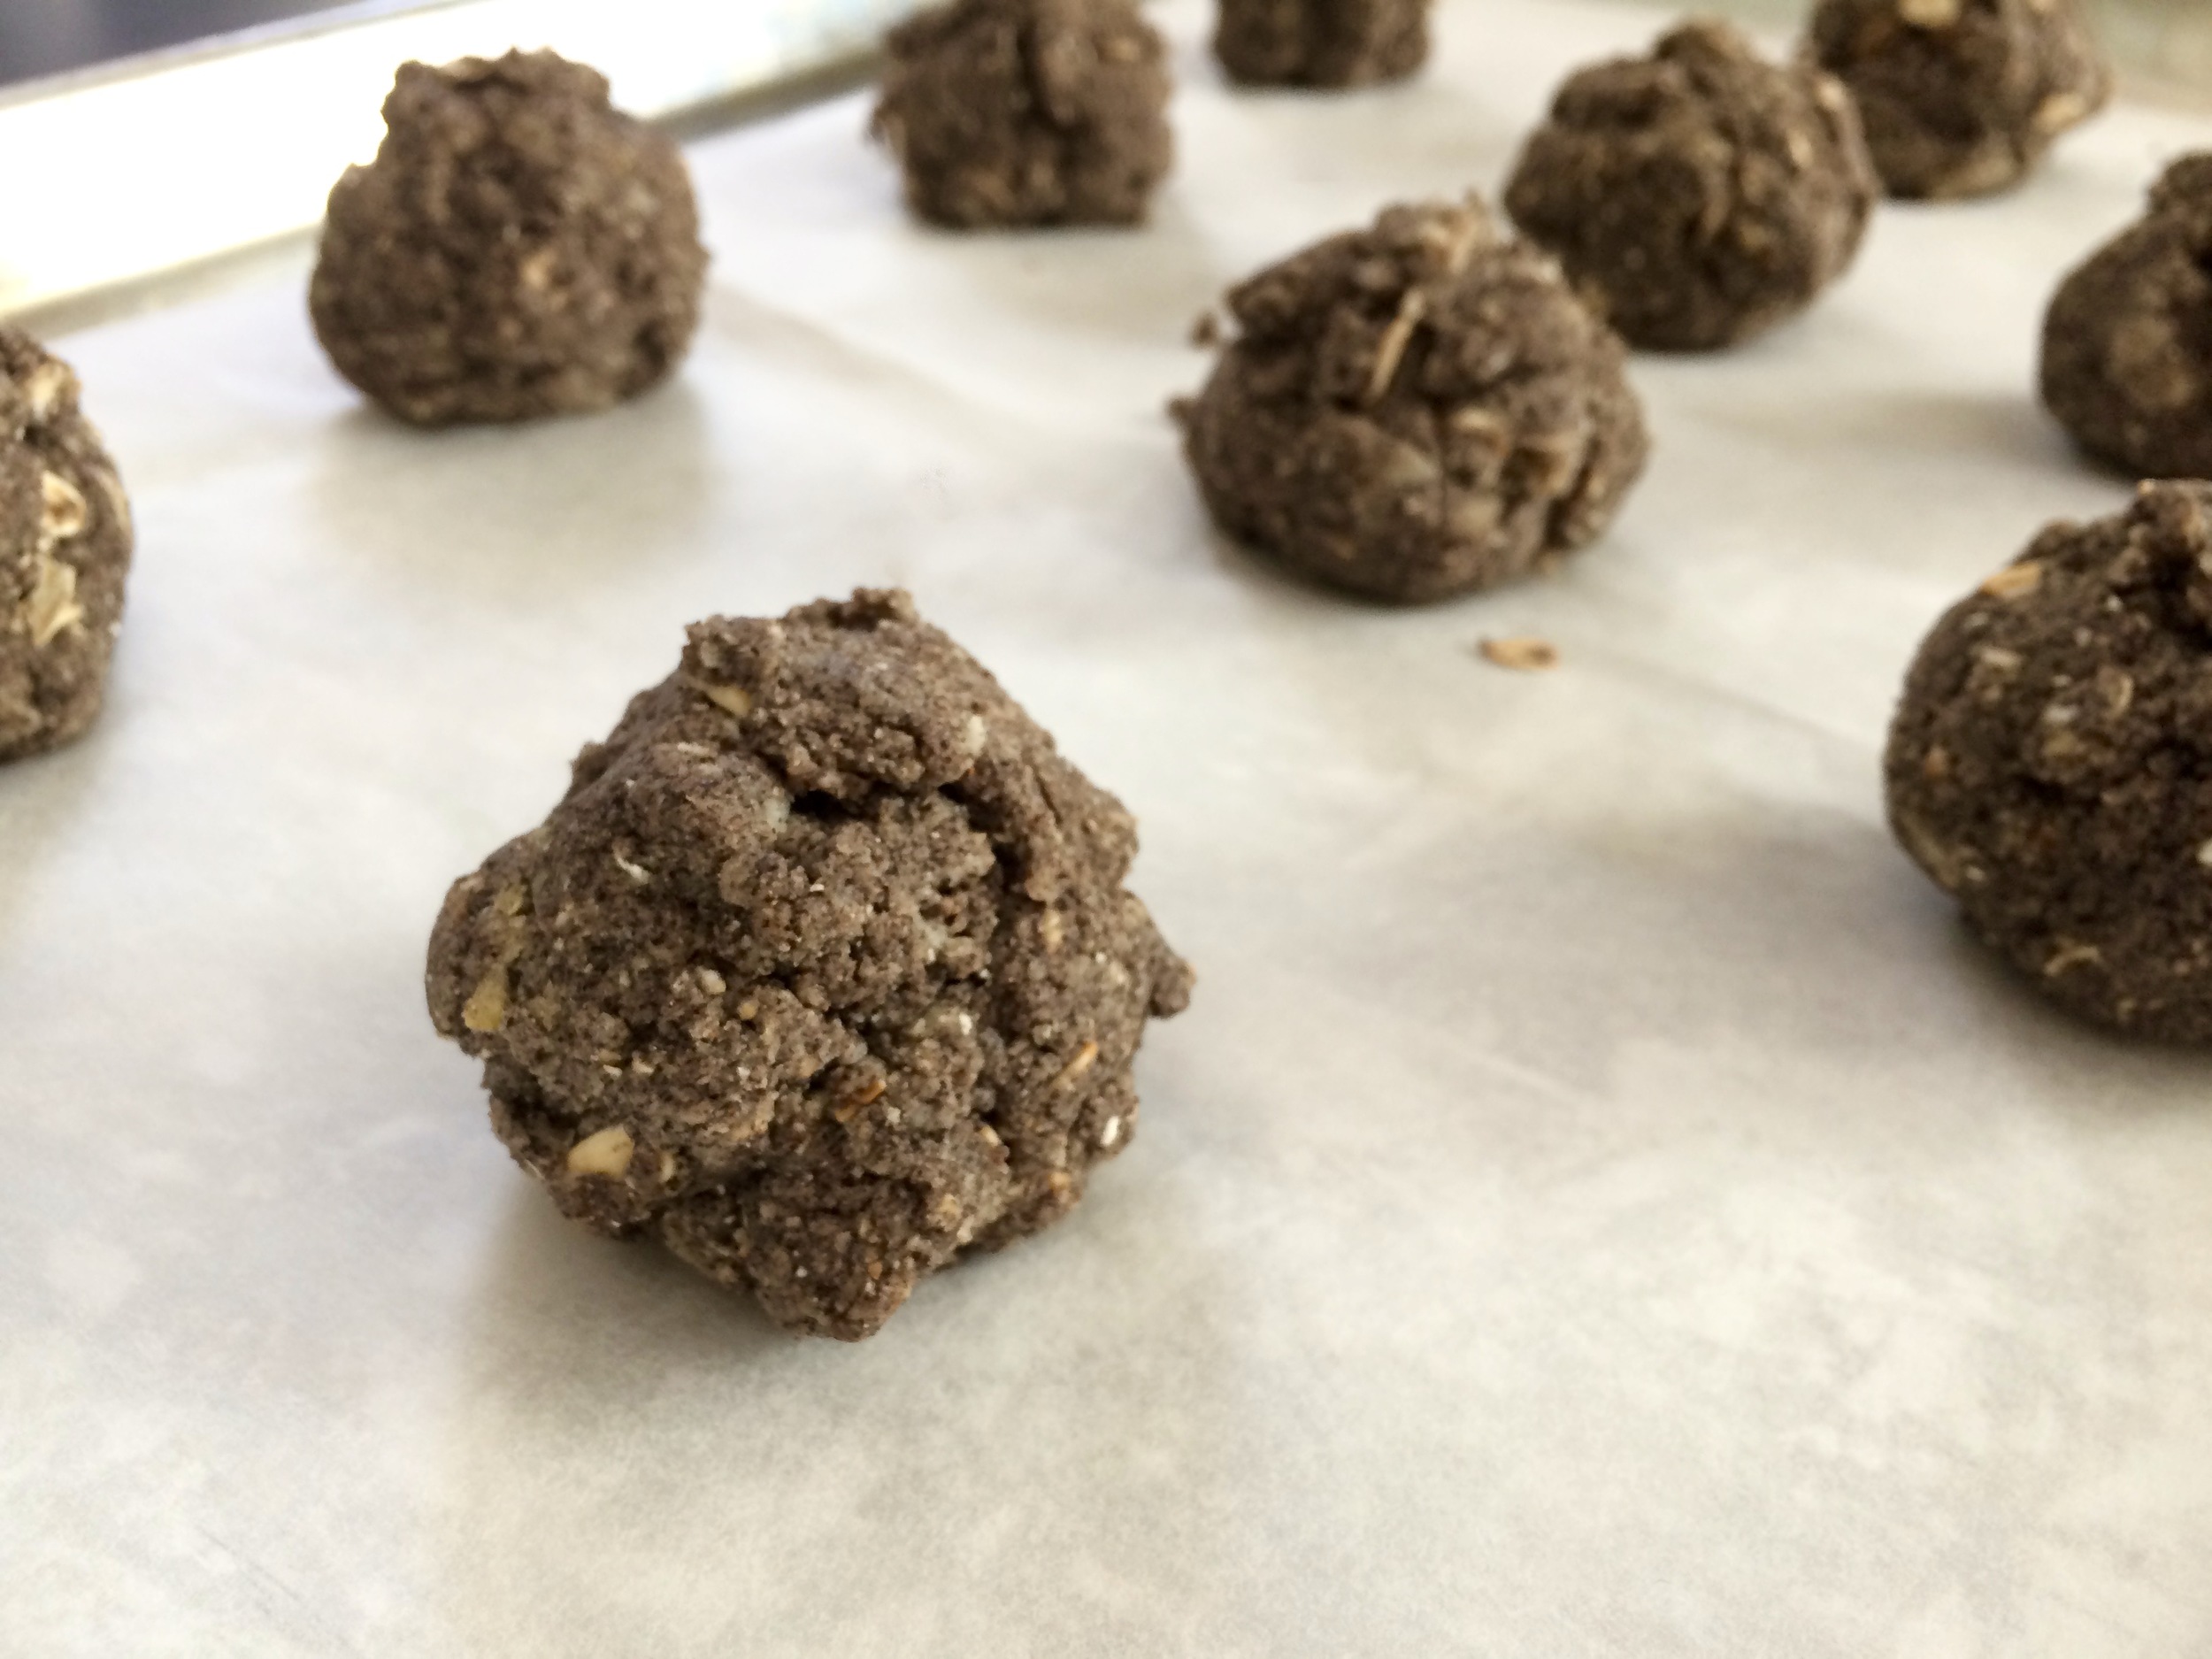
Add the buttermilk and run only until everything is evenly moistened and an even sandy texture. It won’t completely come together into a cohesive dough but will still be quite crumbly, this is okay. Transfer the loose dough to the counter and scatter the chocolate chunks on top. Knead a few times to bring everything together and evenly distribute the chocolate.

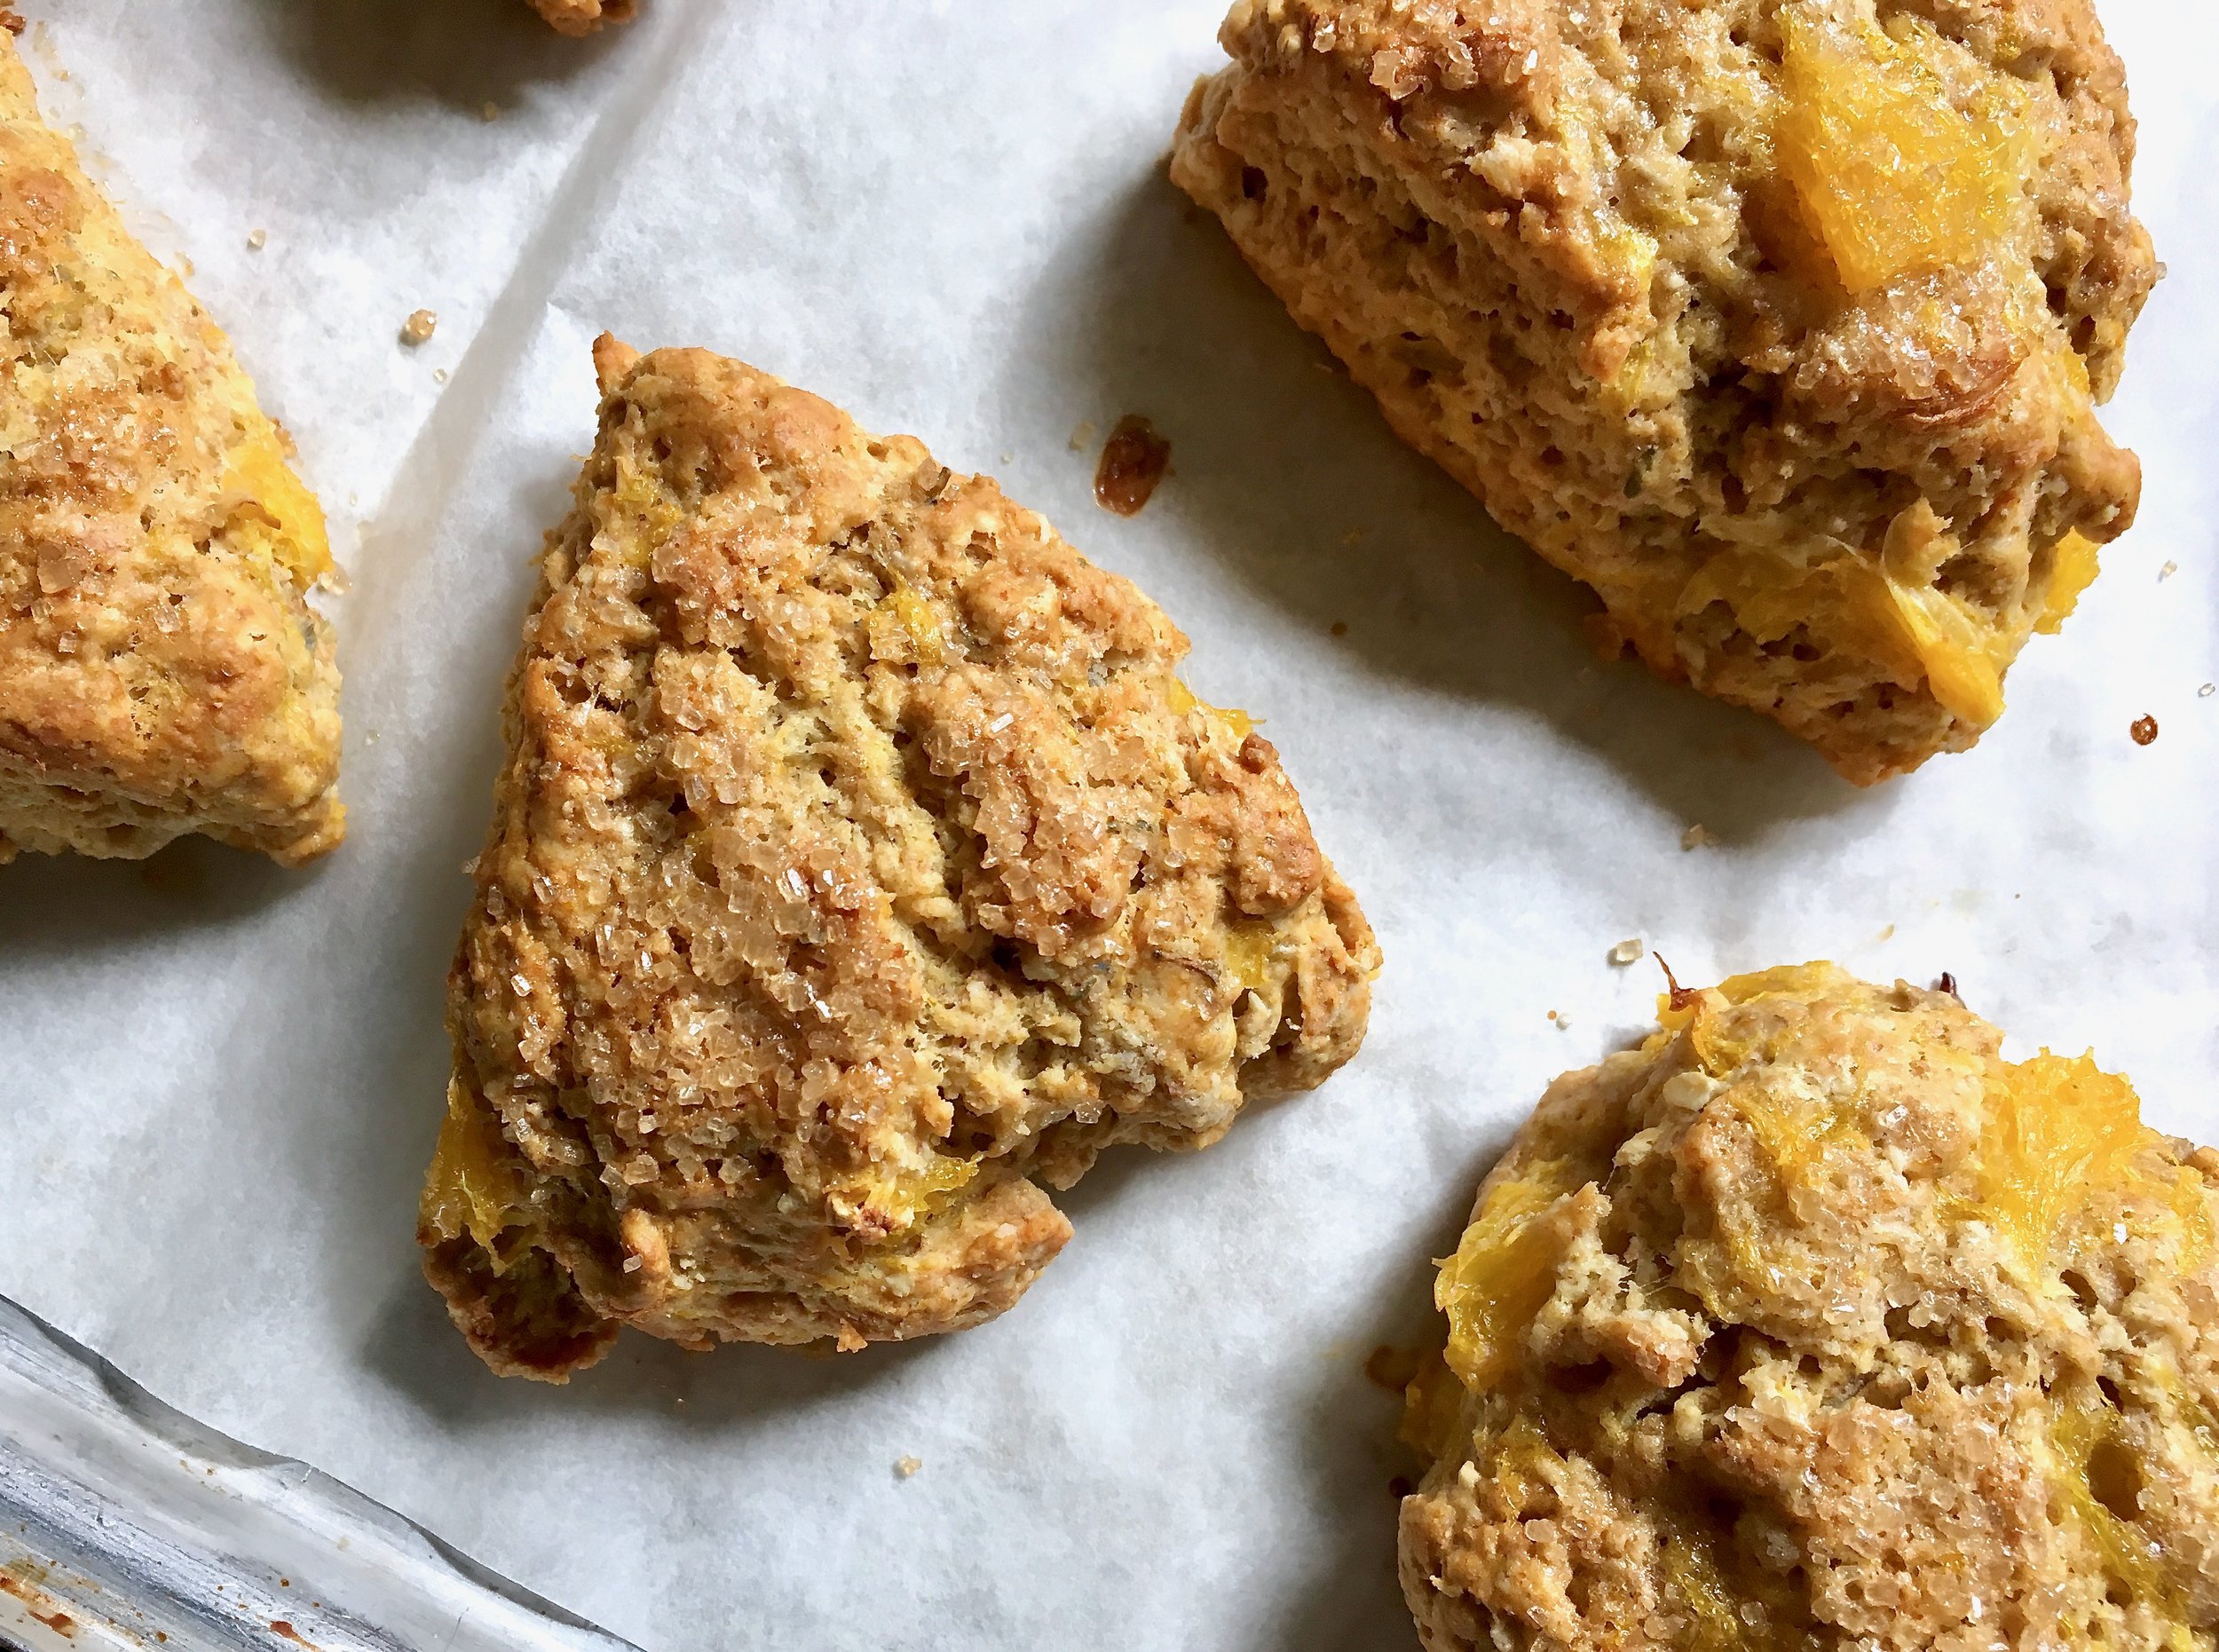
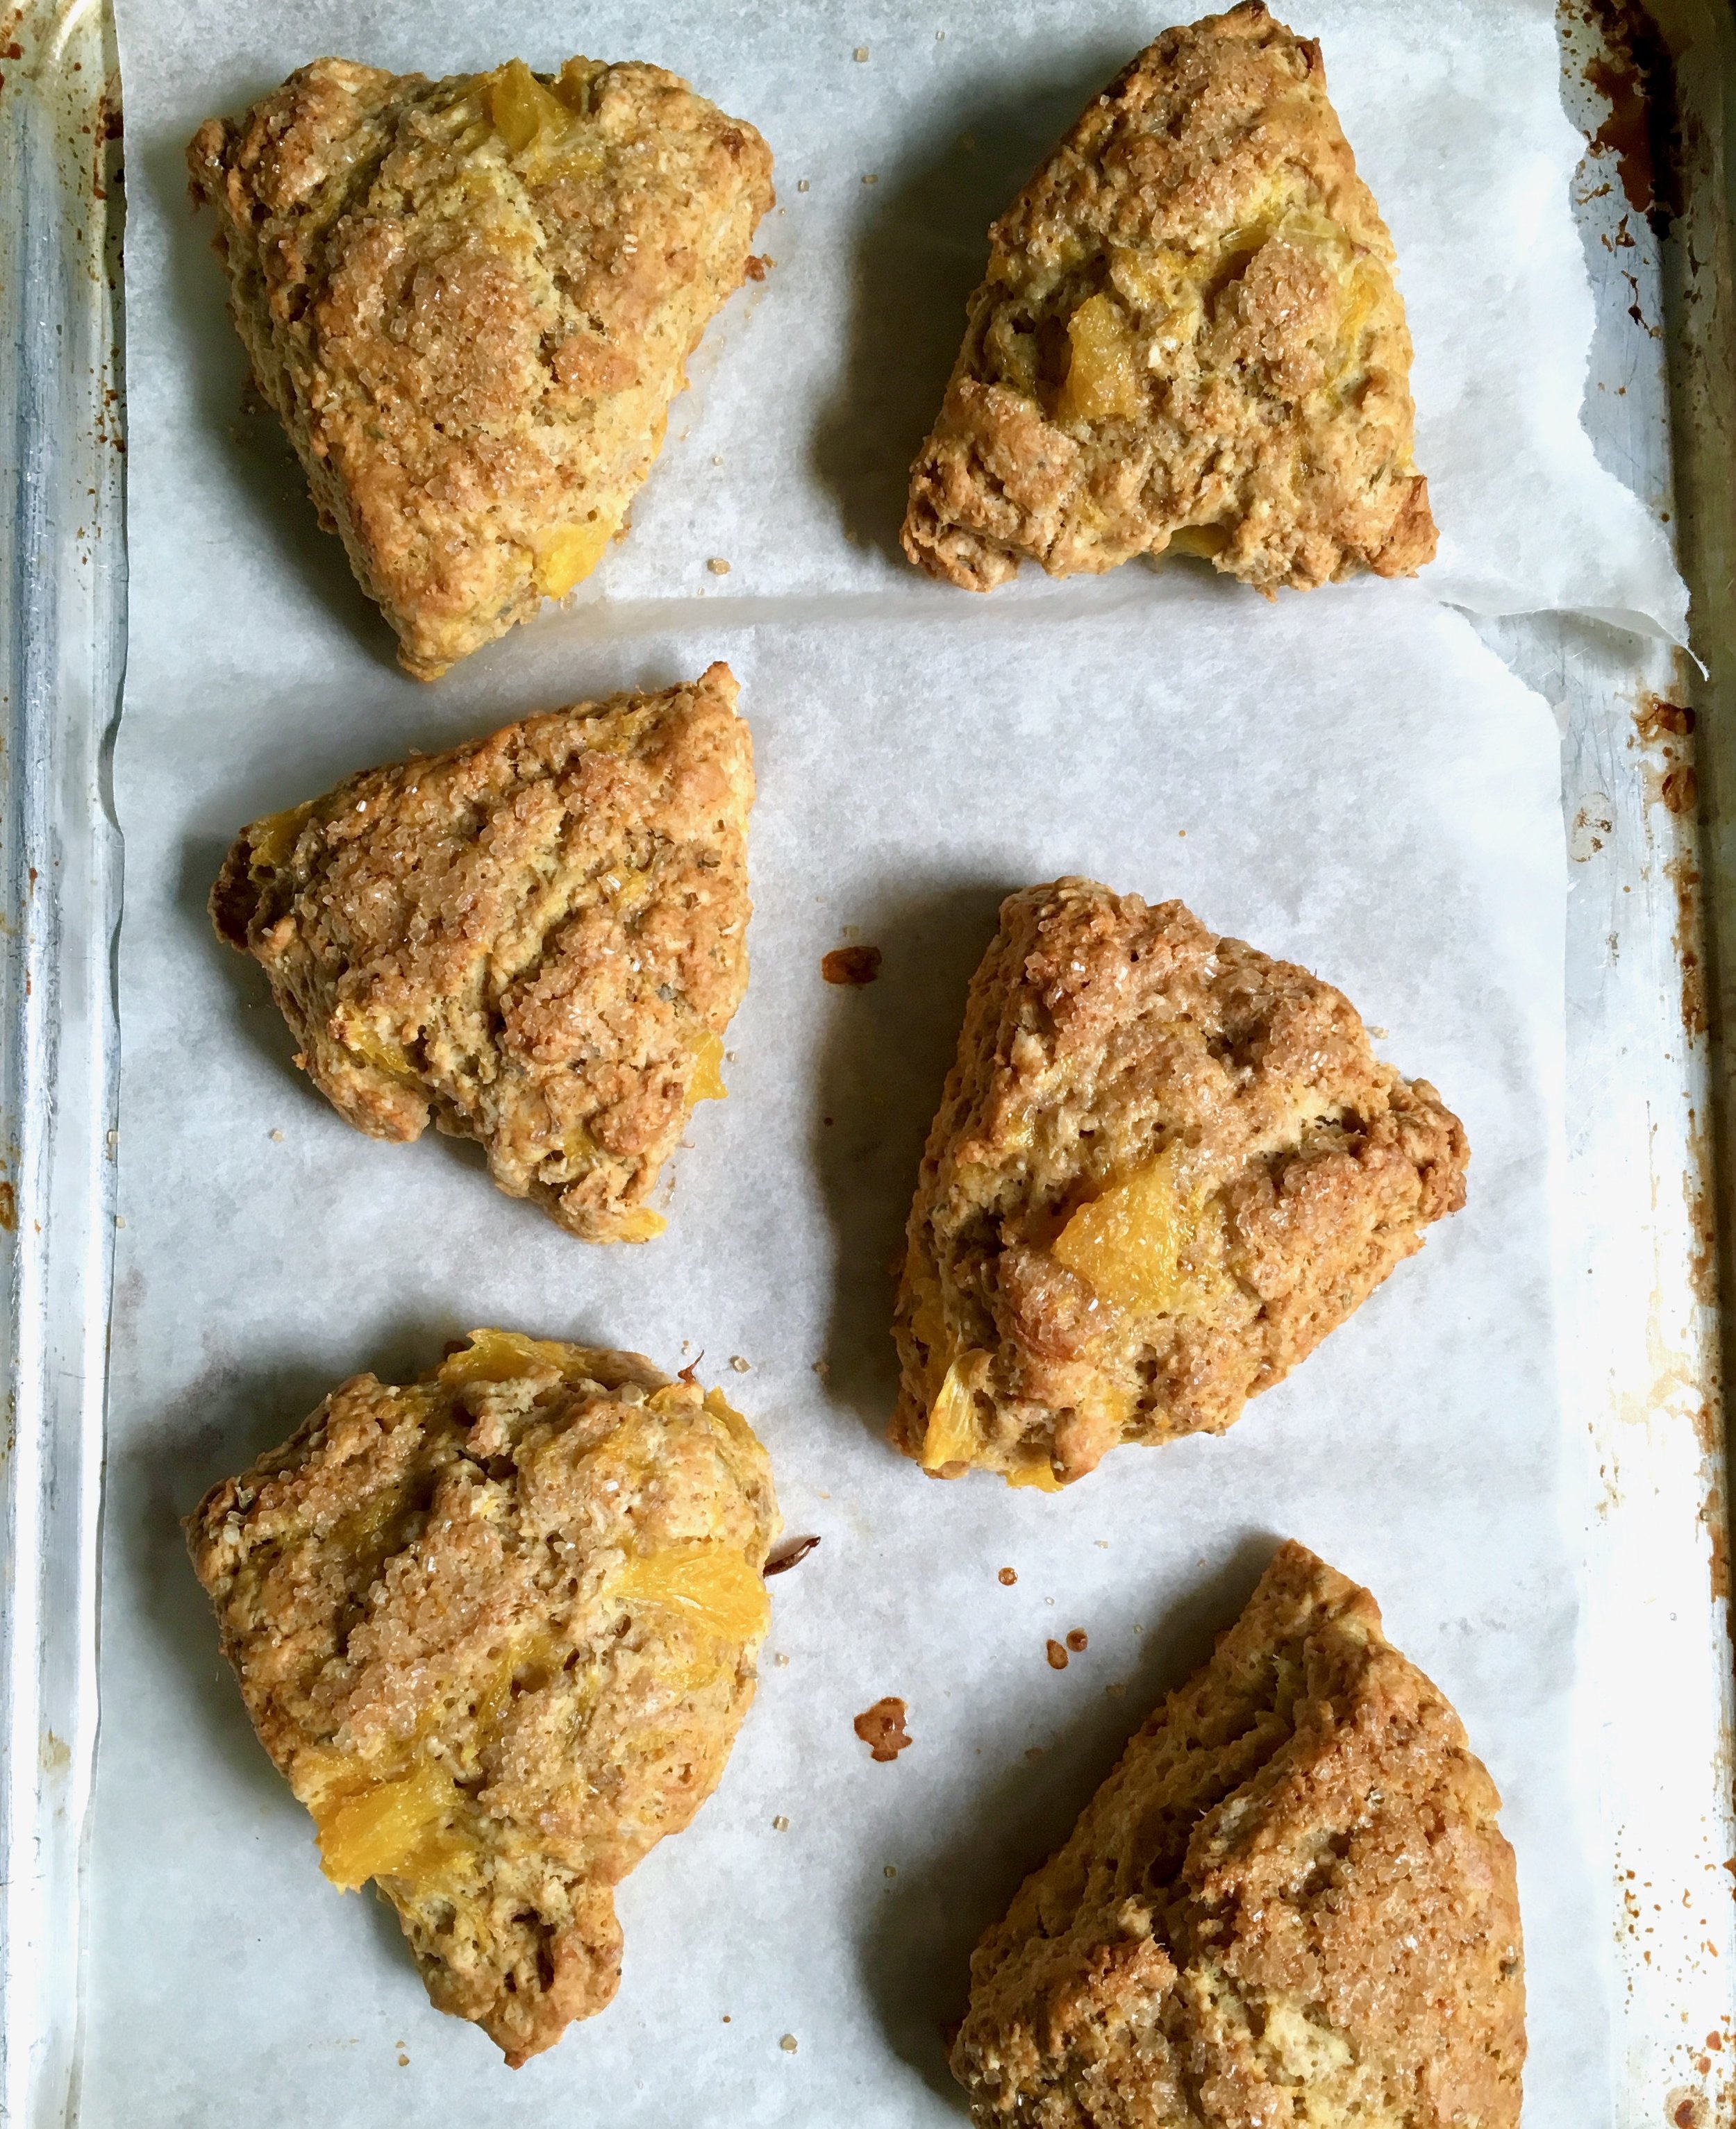
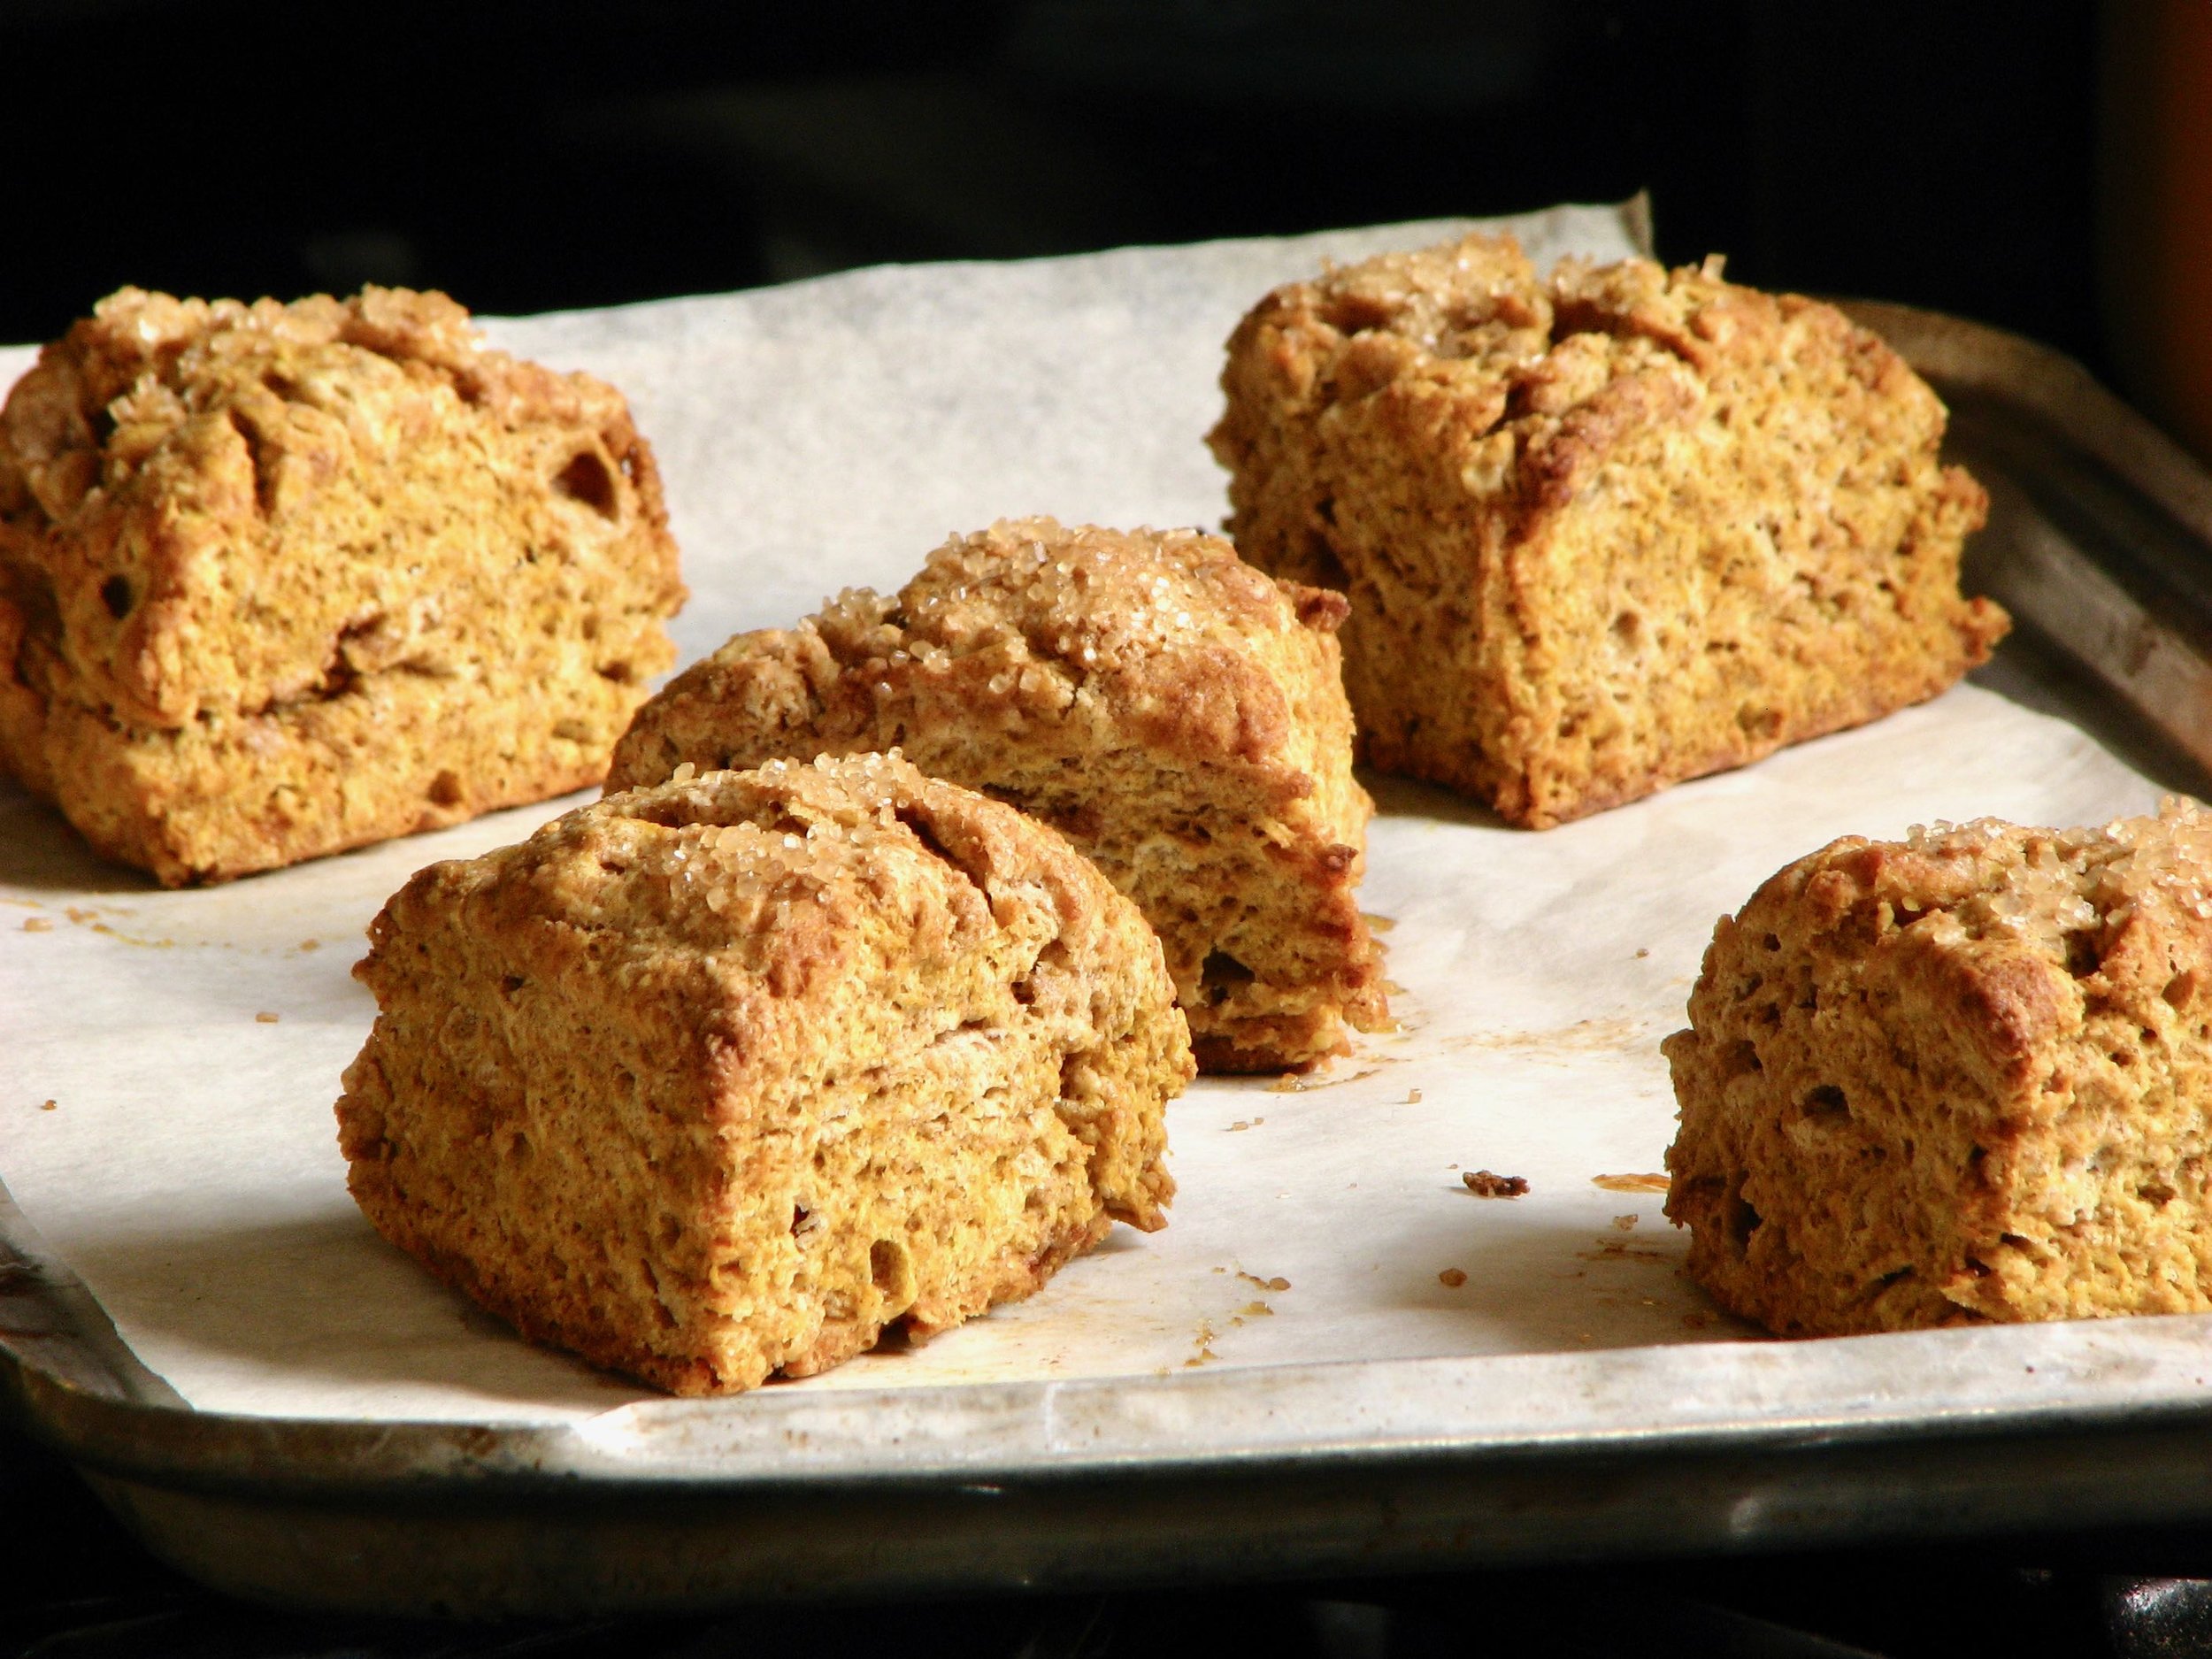
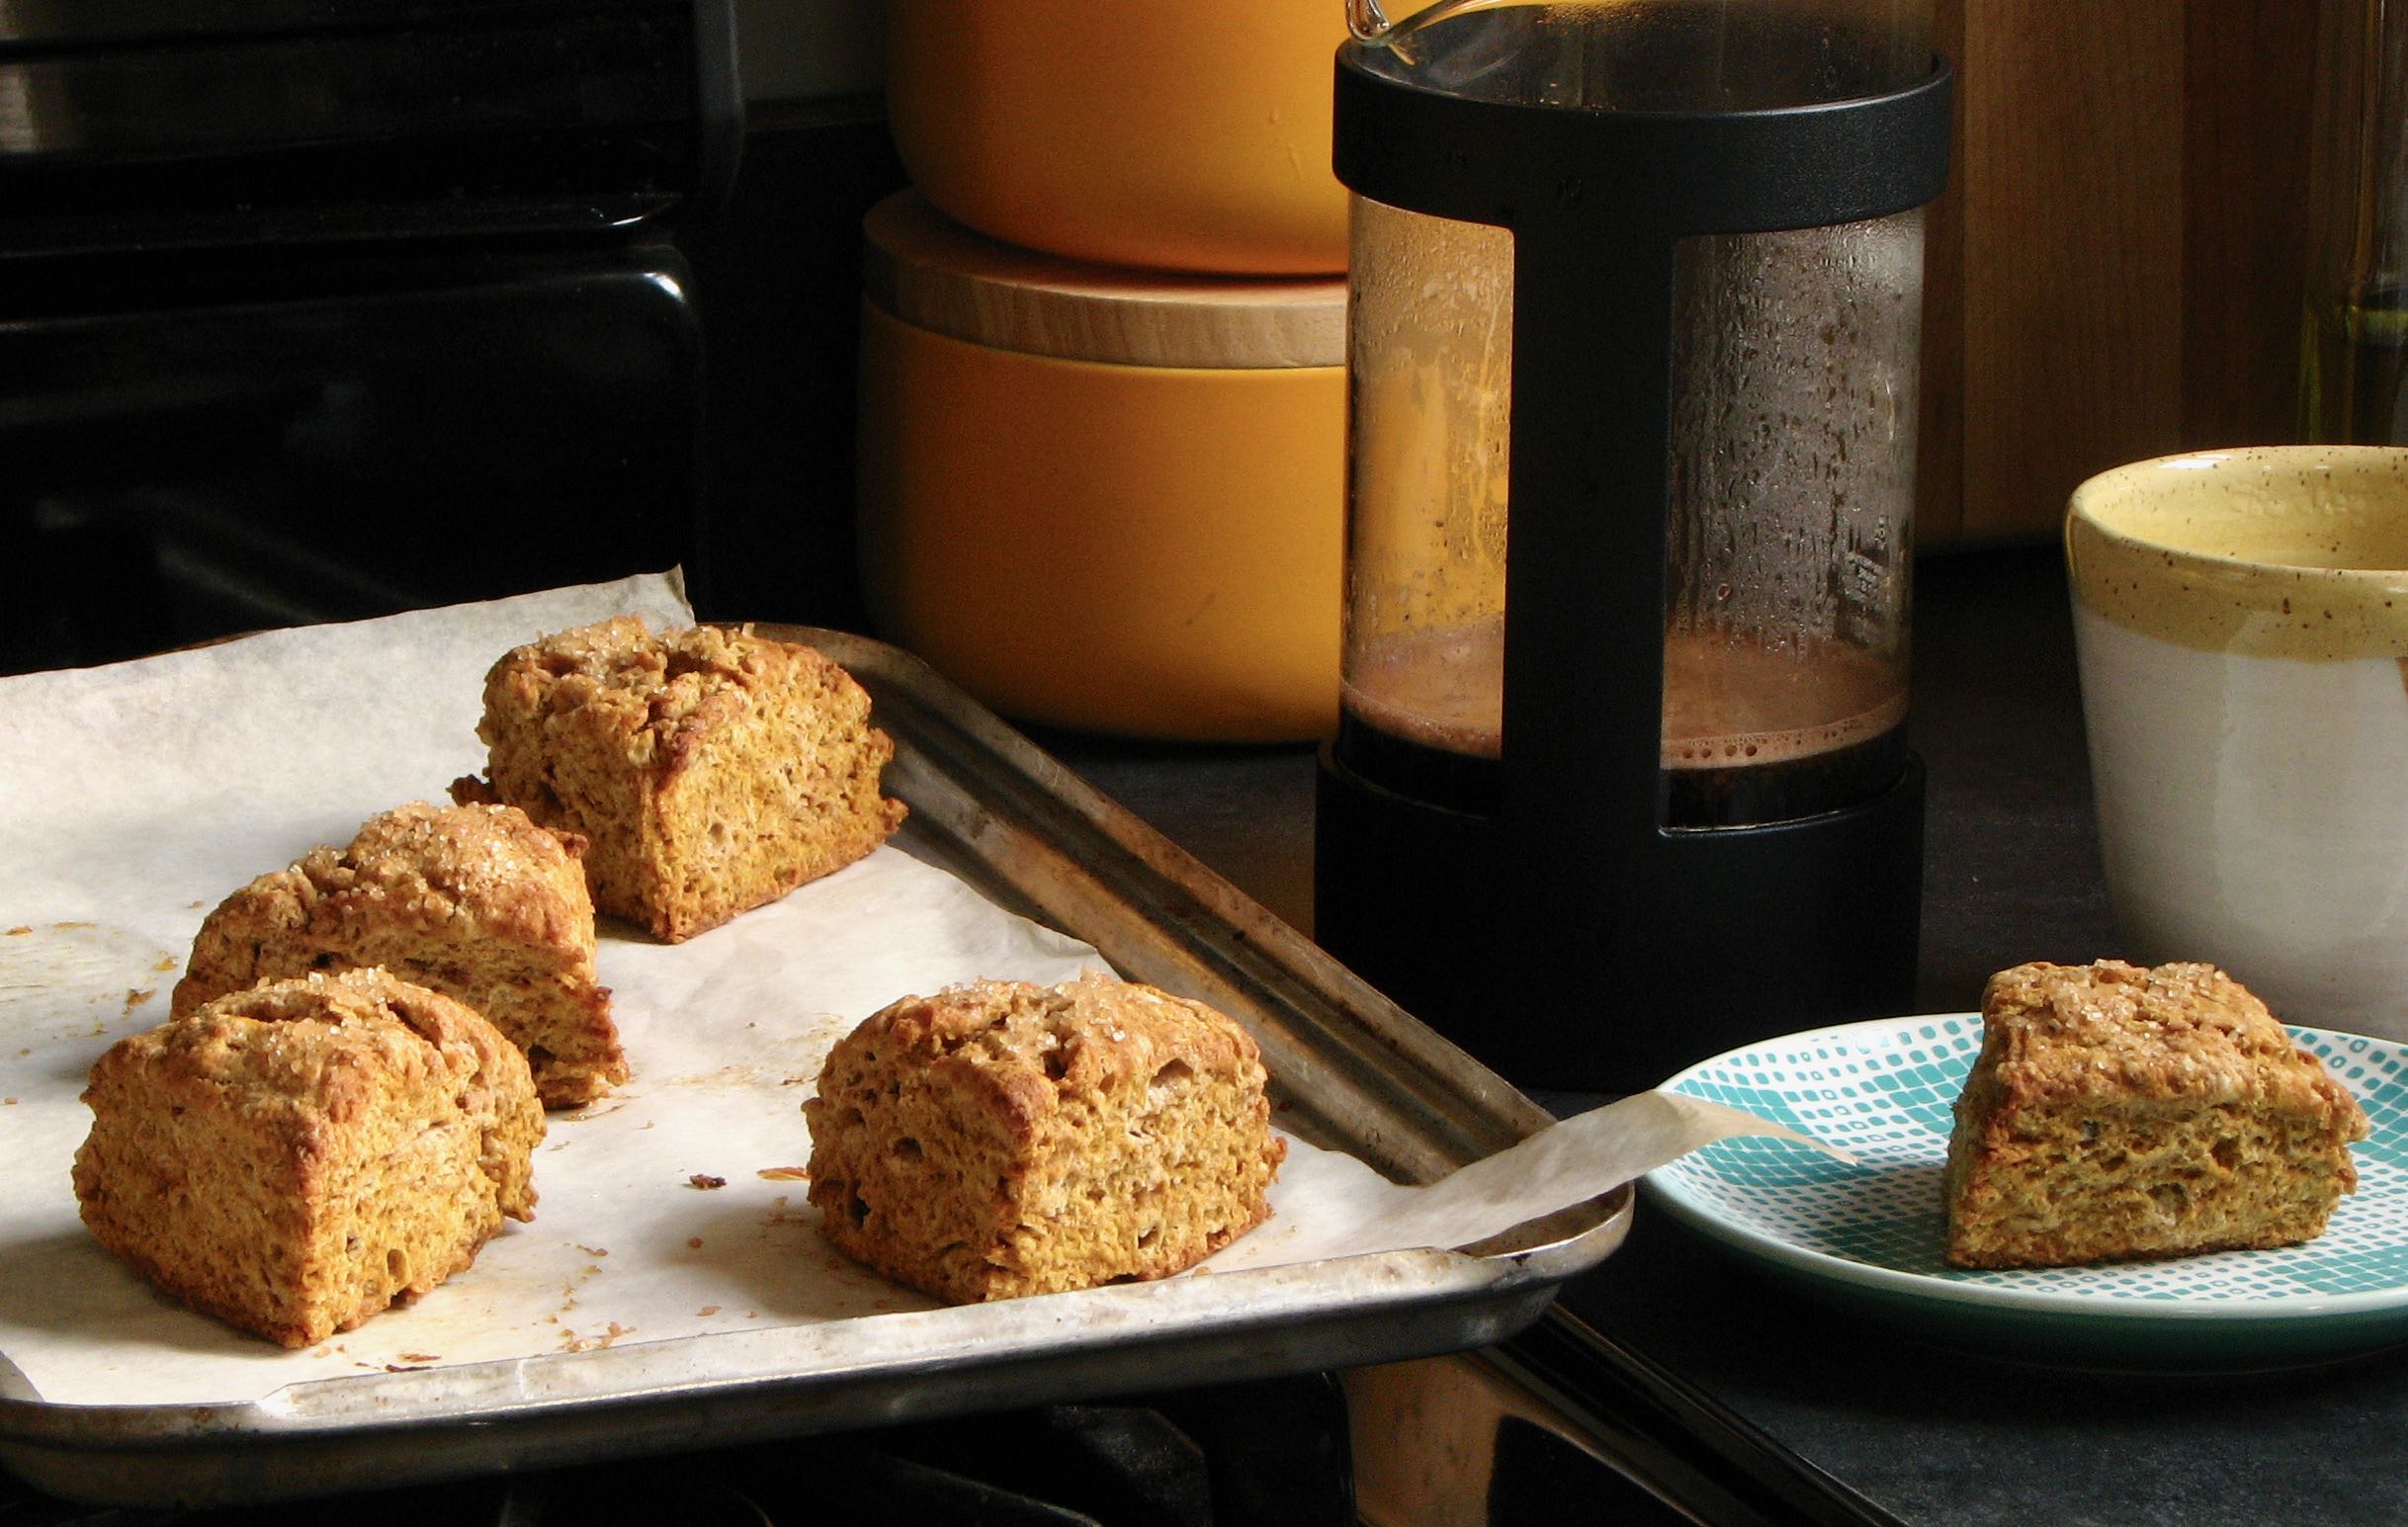
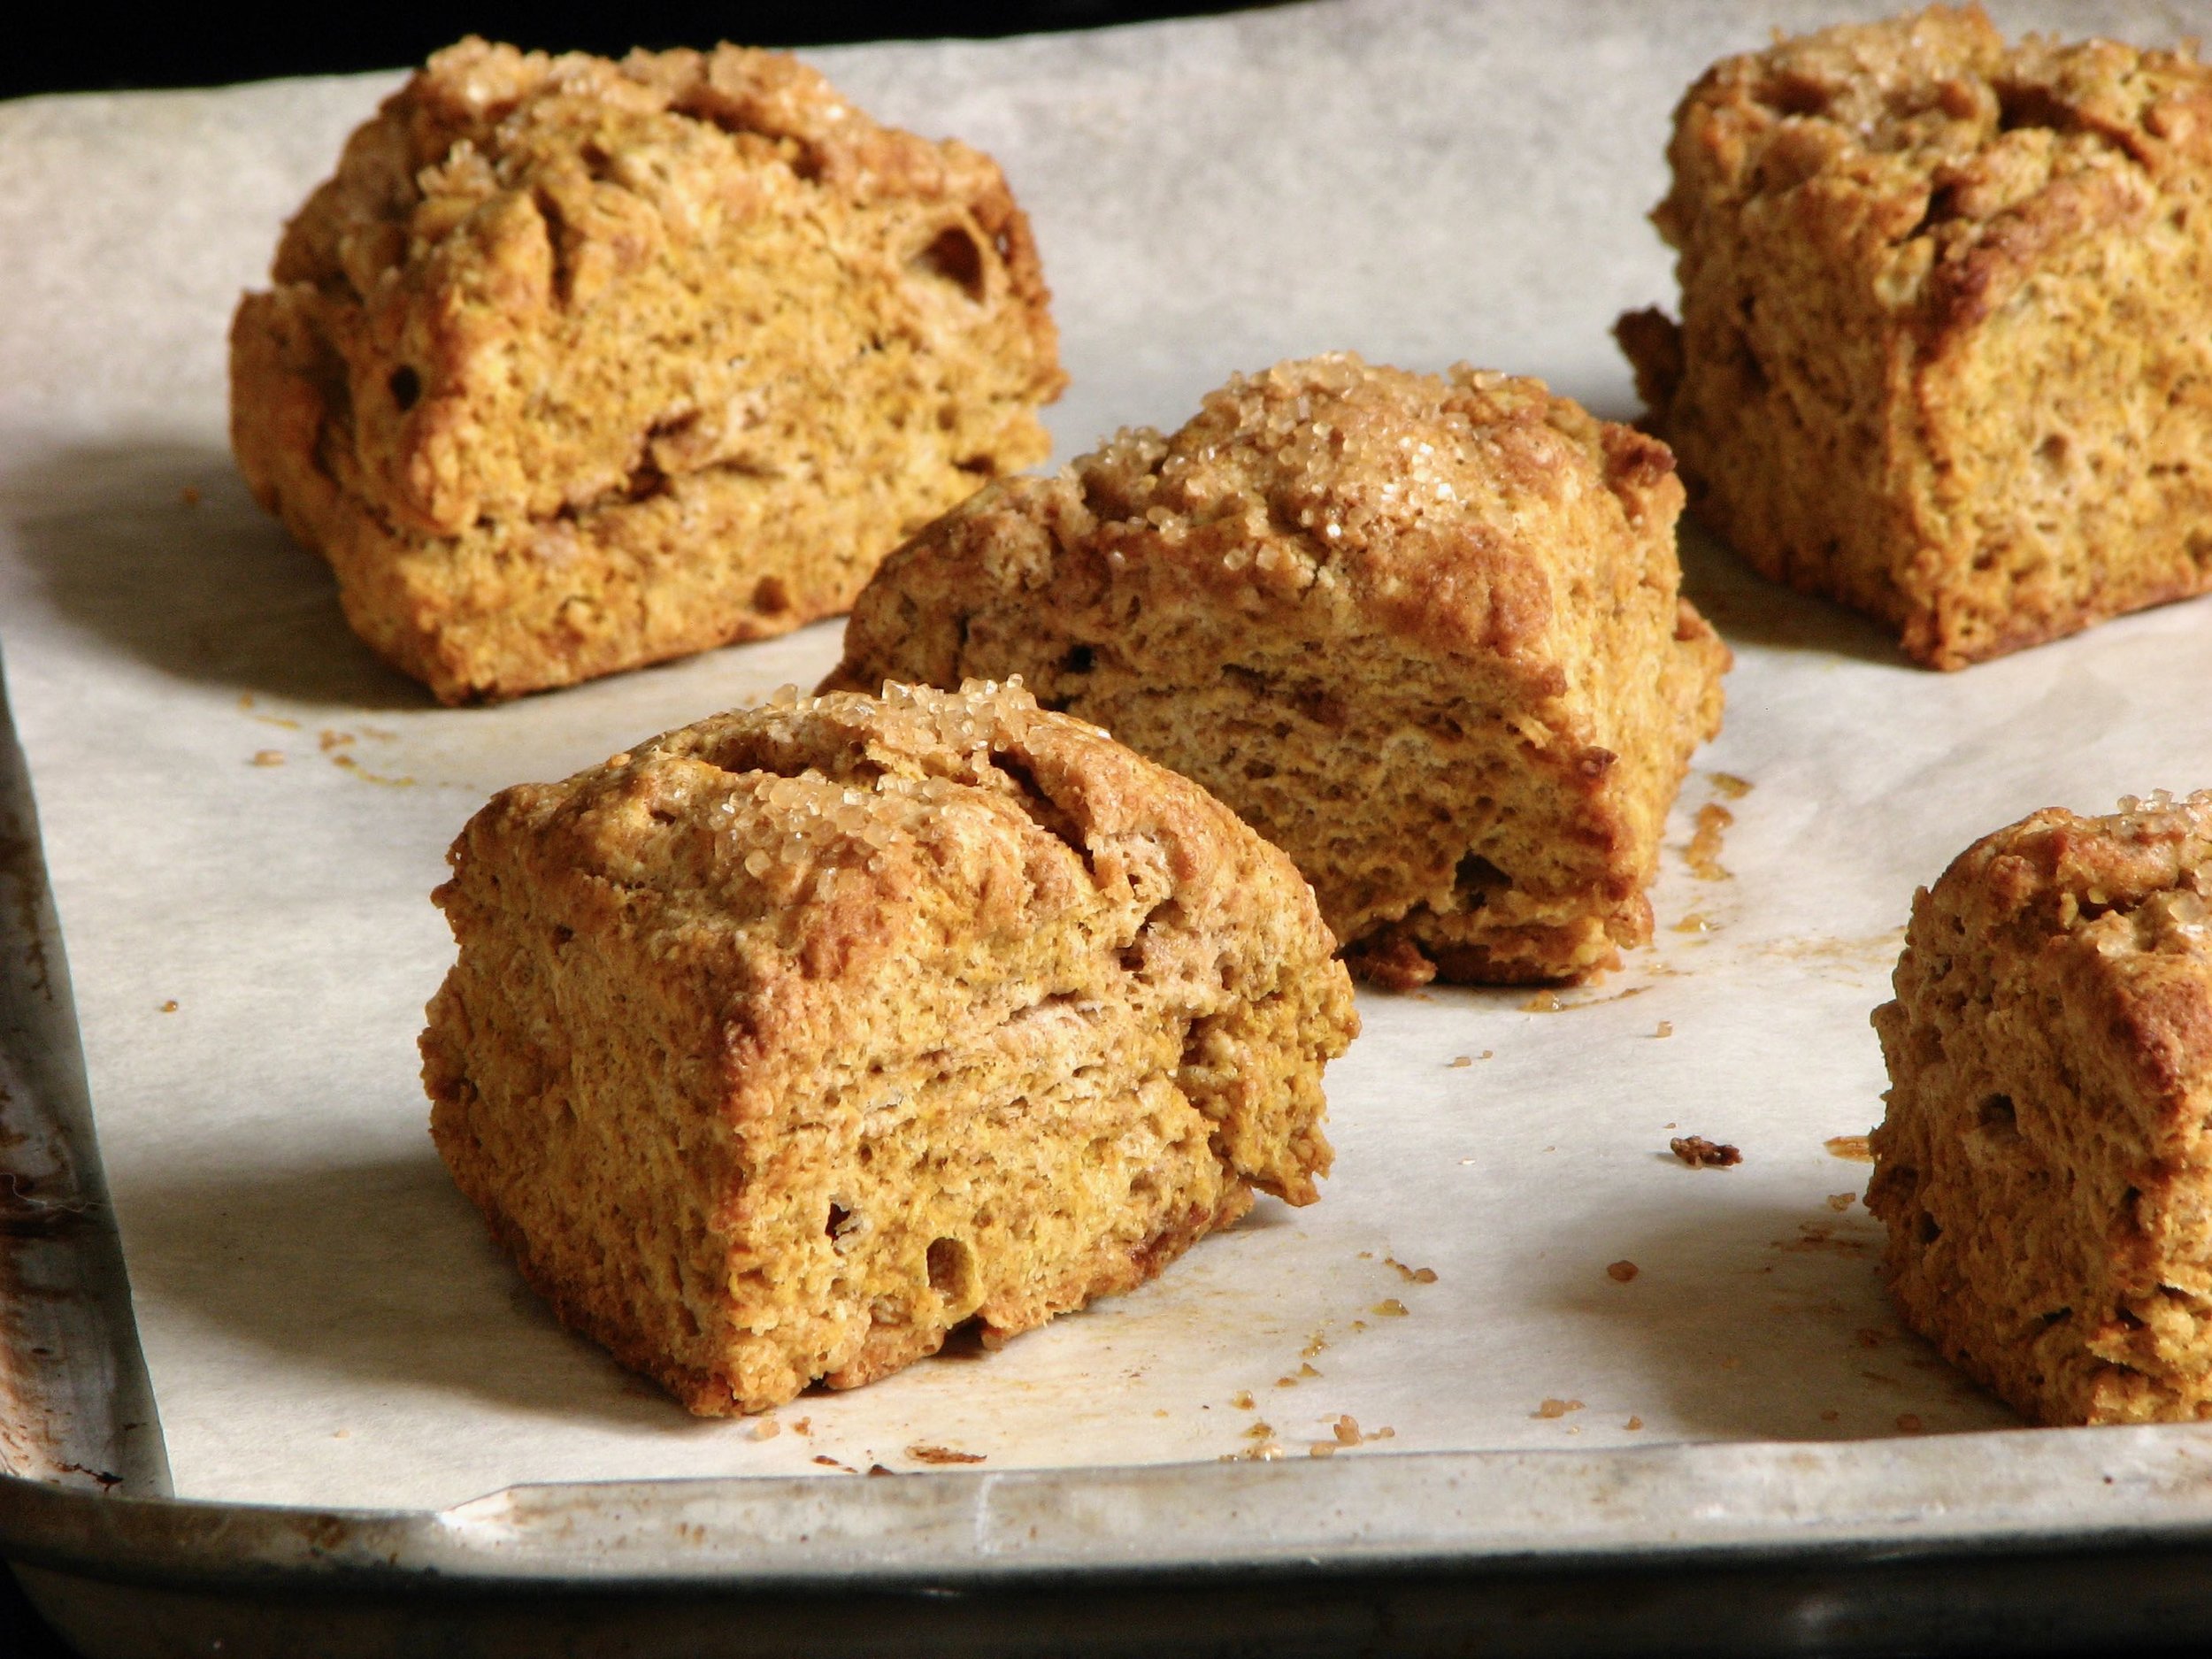
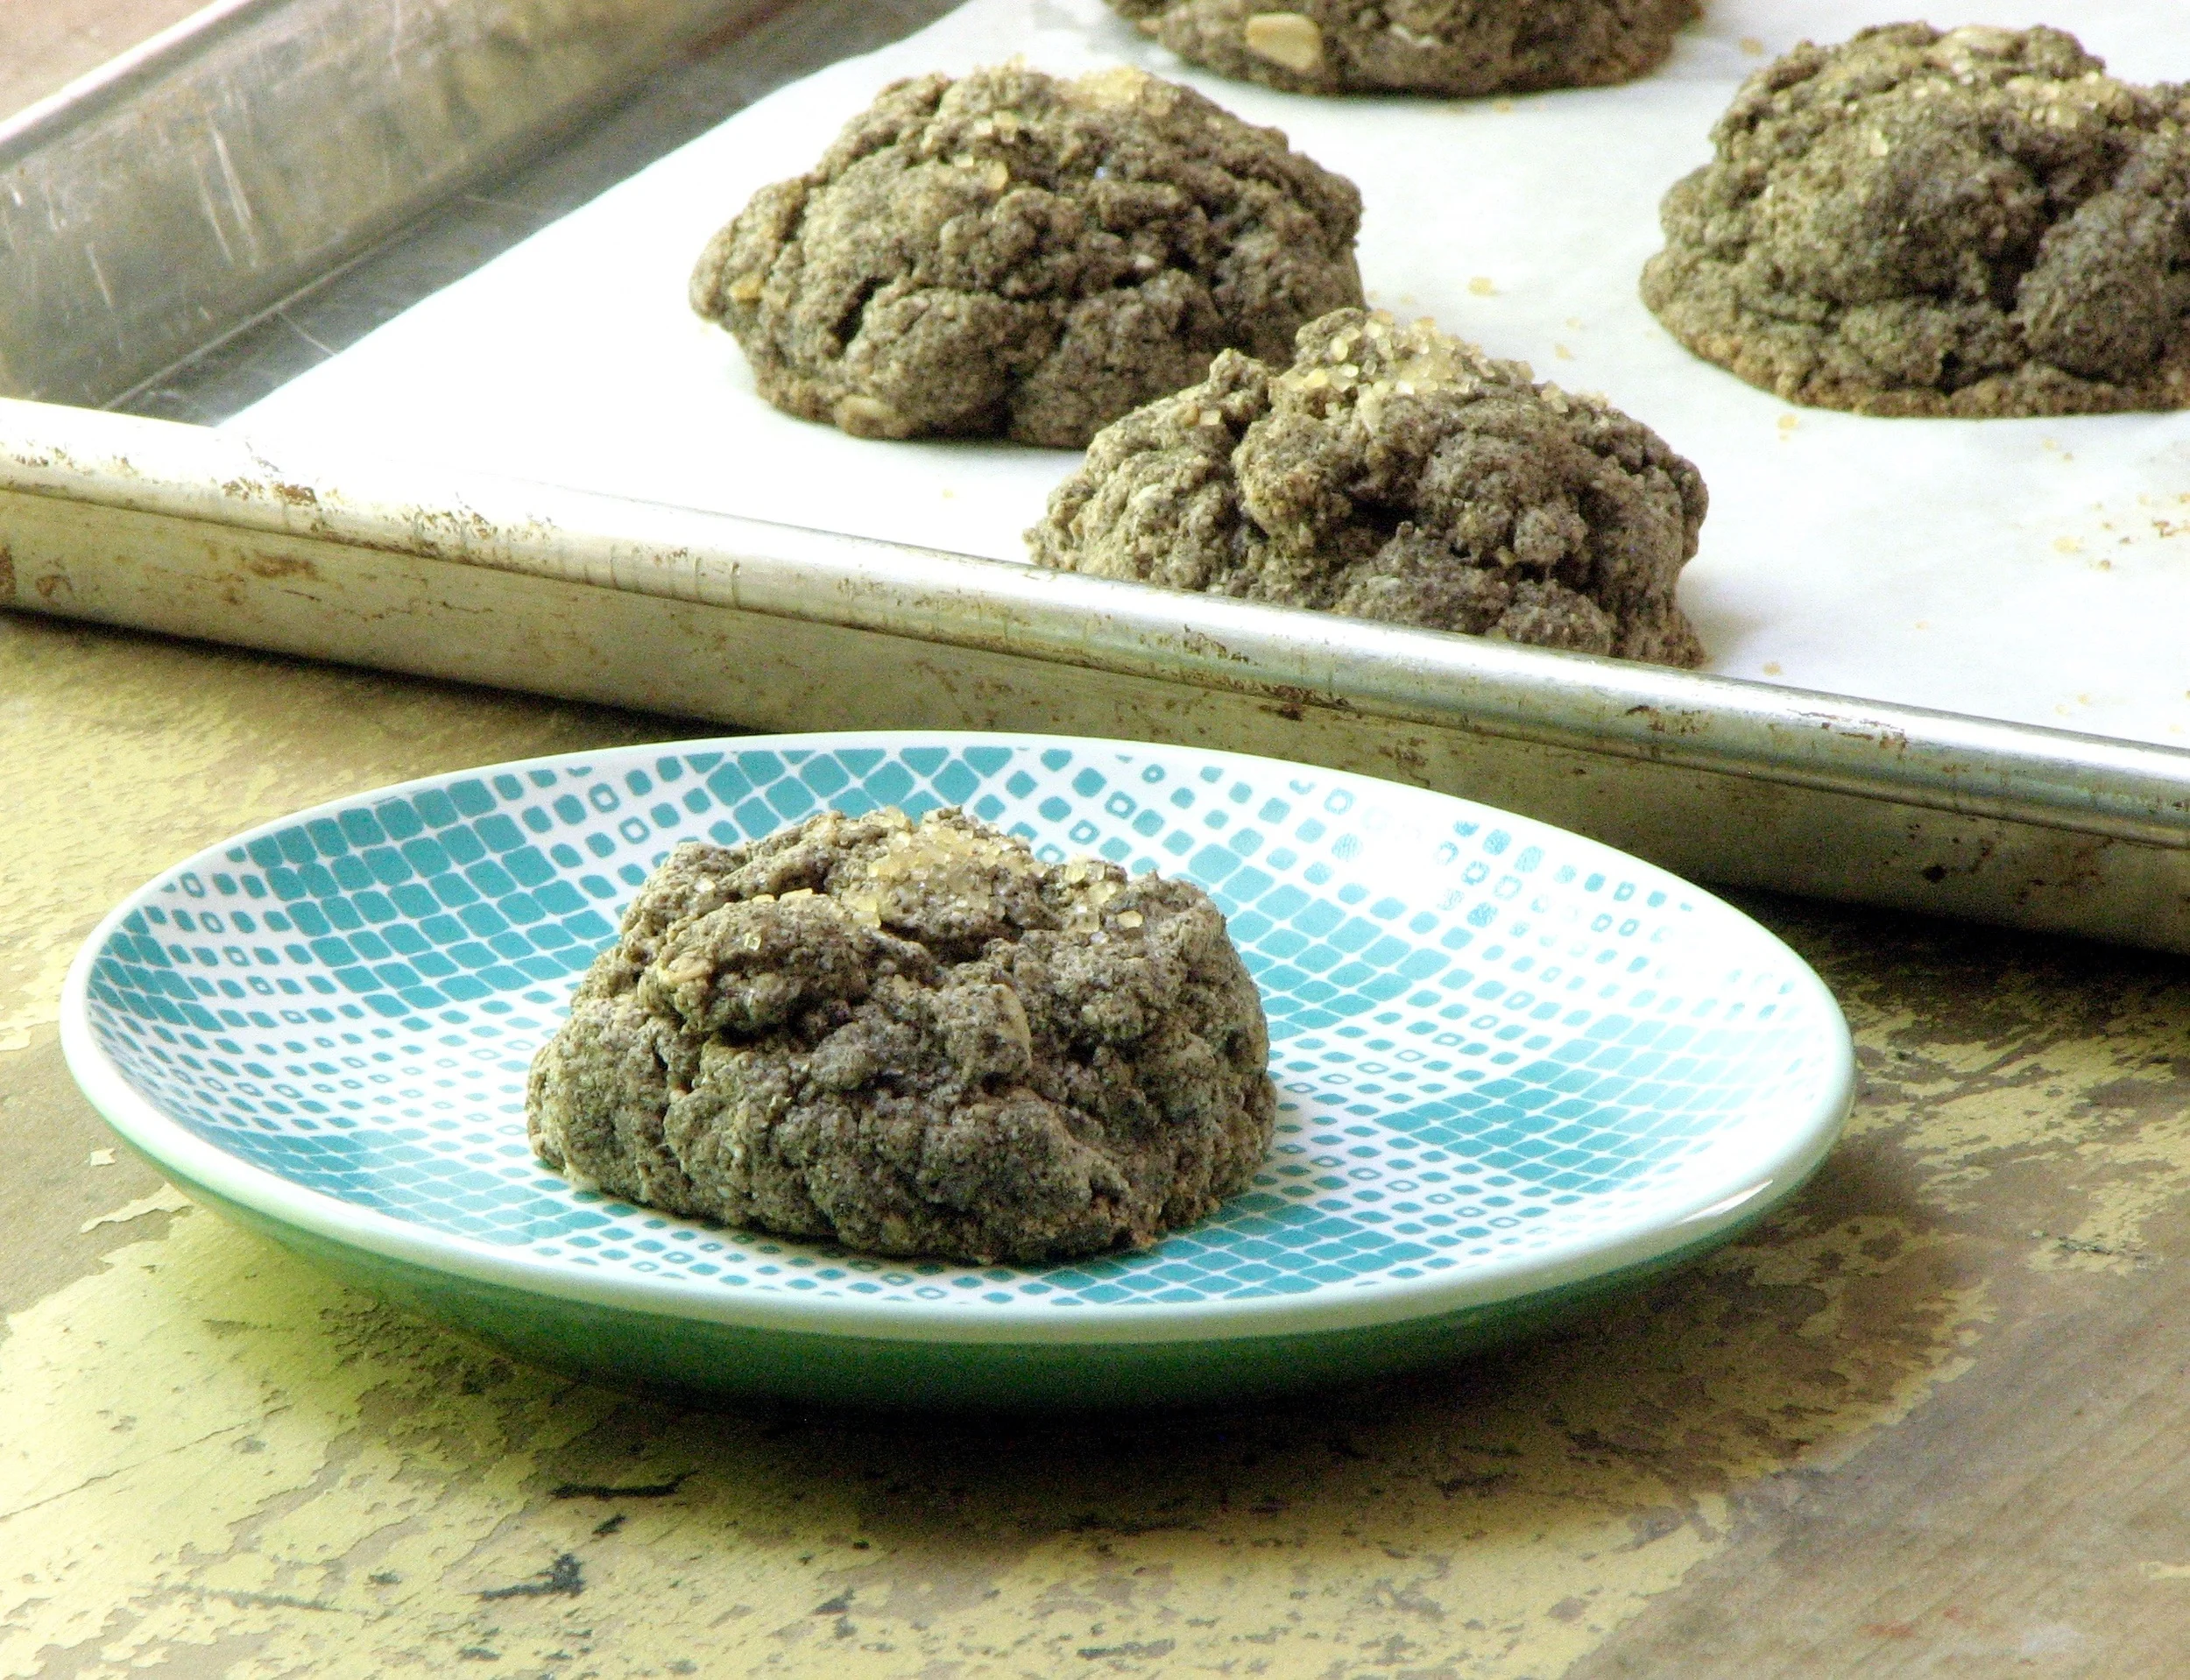
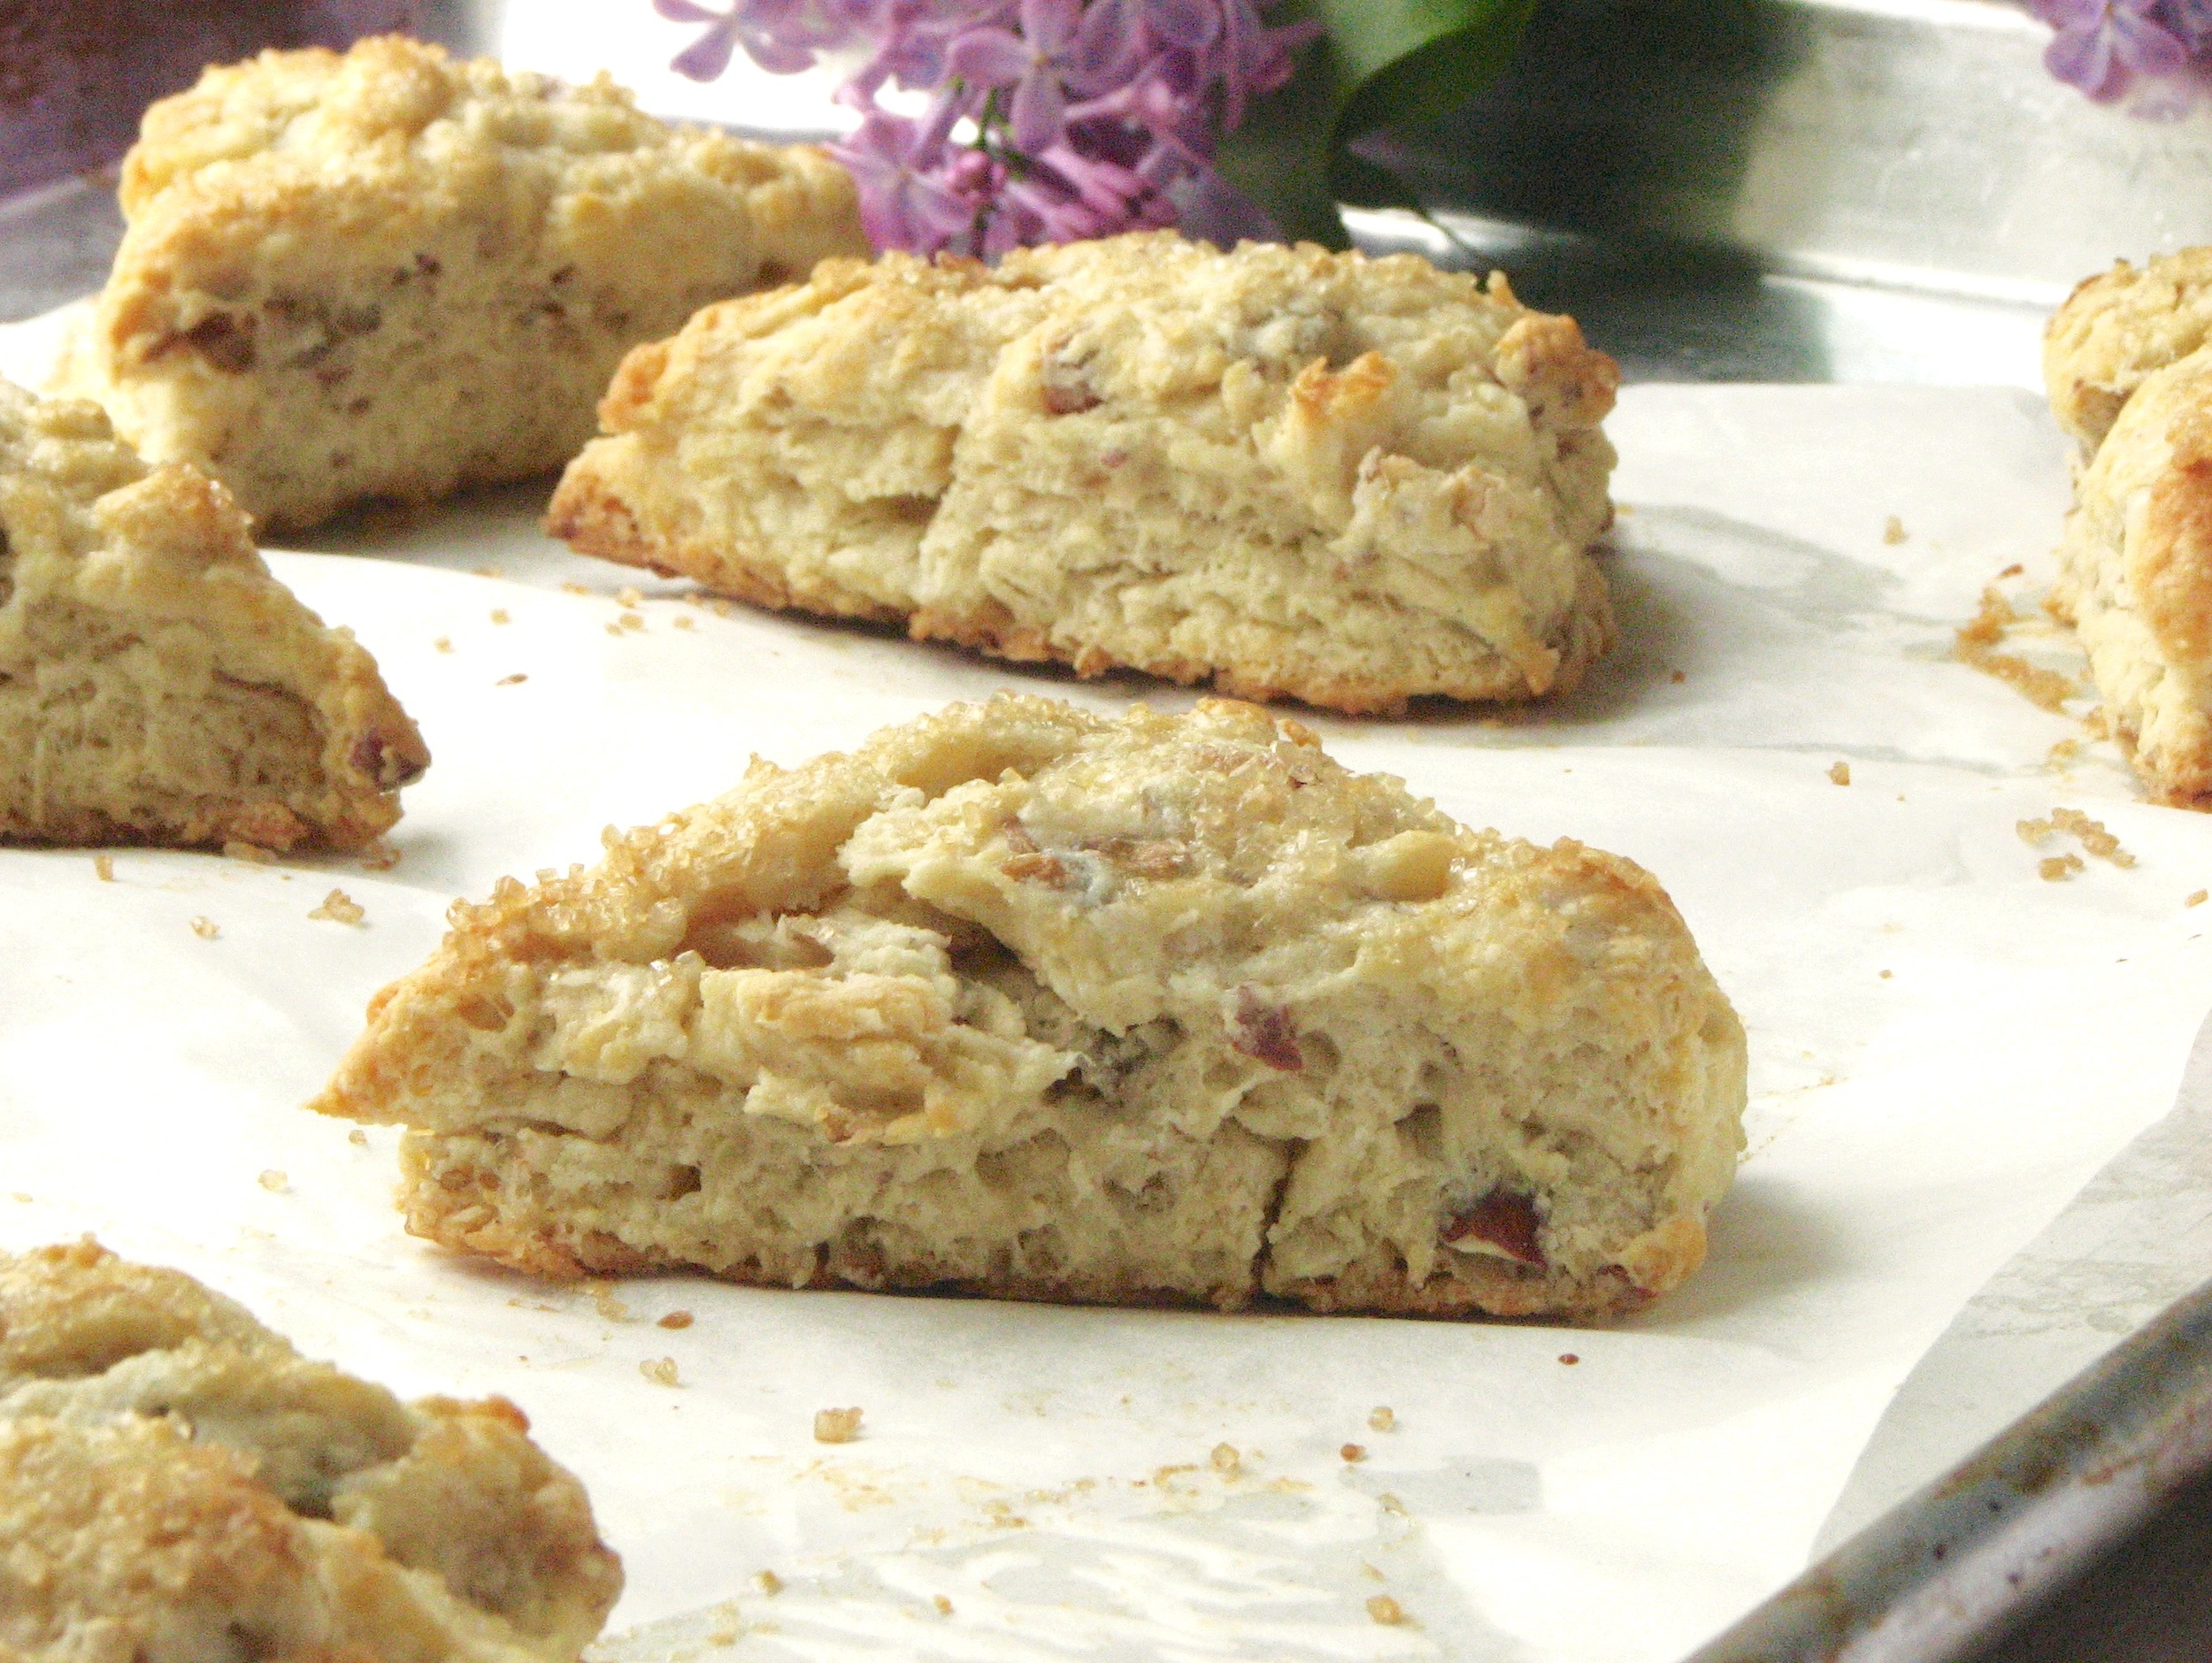
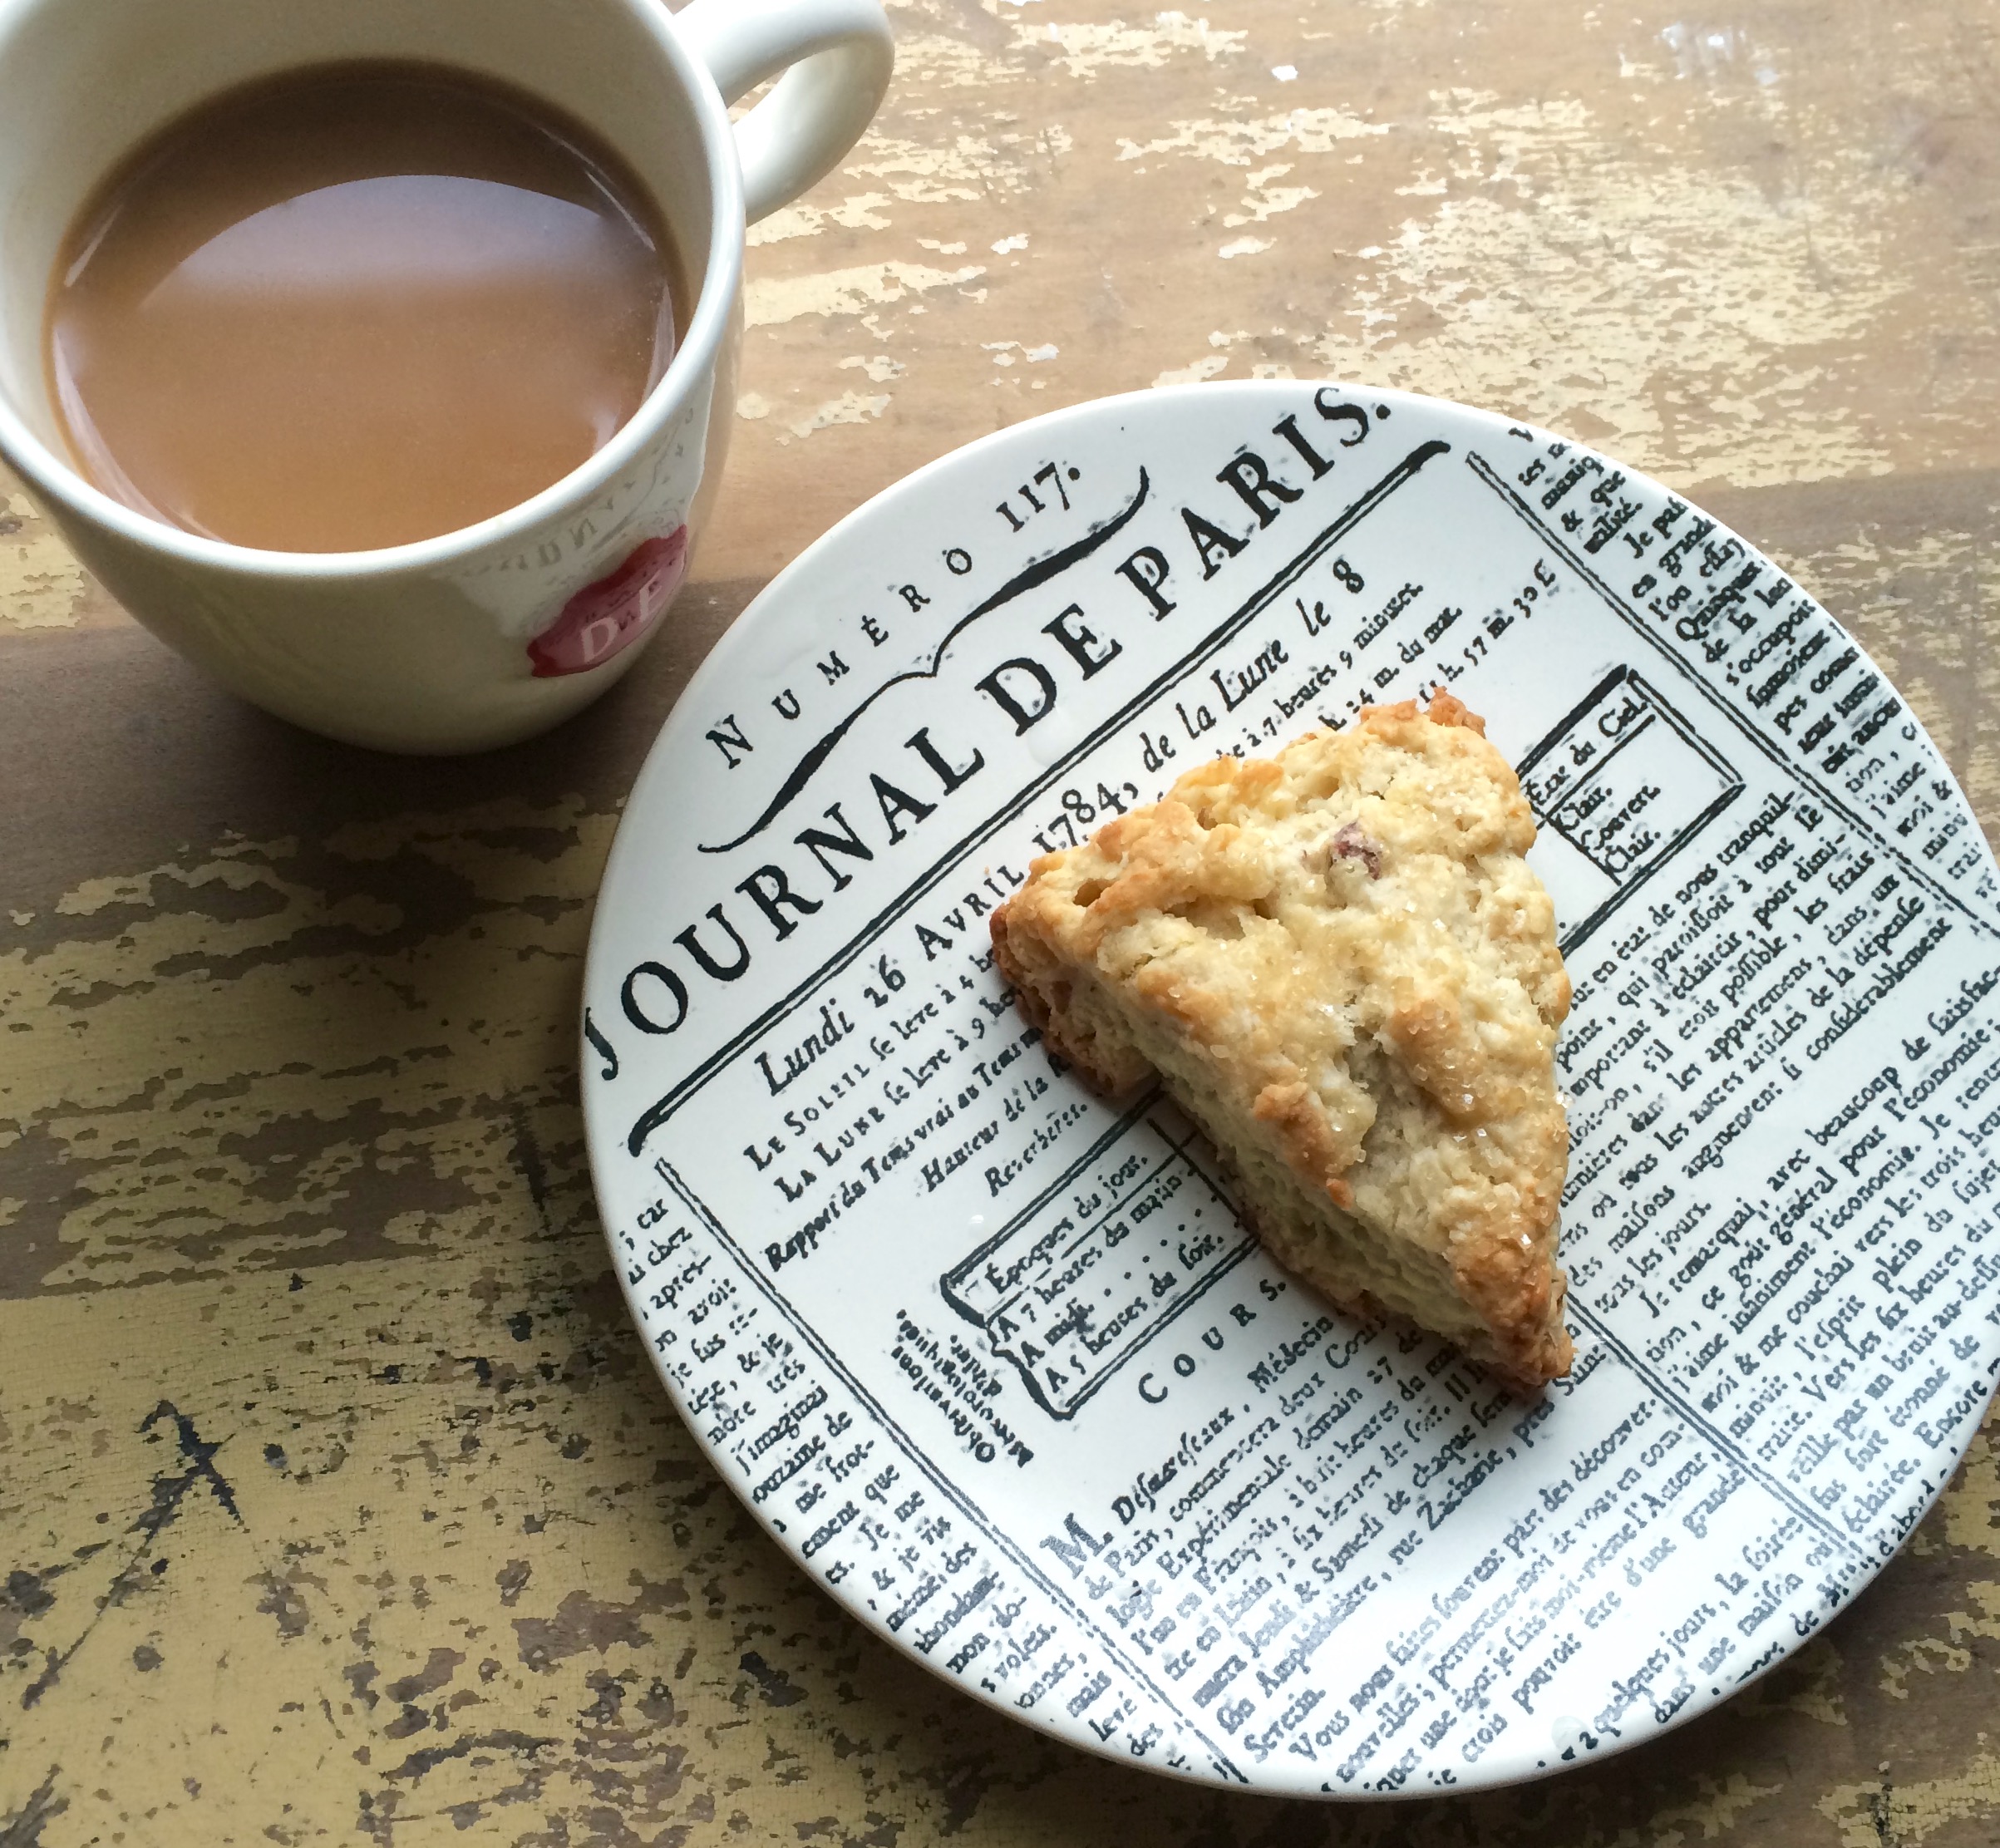
Shape the dough into a circle (approximately 5 inches in diameter and 1 1/2 inches thick). Cut into 6 even wedges with a pastry scraper. Transfer scones to the baking sheet and brush with the egg wash. Cover each scone with a nice sprinkling of sanding sugar.

Bake until the scones are deep golden brown, 27 to 30 minutes, rotating the baking sheet halfway through. Cool on the baking sheets on wire racks for 5 minutes, then transfer directly to a rack and cool for at least another 5 minutes. Serve warm or at room temperature.

Variations:

IMG_7423.jpeg

Lemon Lavender Buttermilk Scones
I personally found this a little too lemony which is saying something for me. I do love lemon. But I added the zest of an entire lemon which was too much for me. It wasn’t bad in the least, I just would have preferred less. It really reminded me of a lemon poppyseed muffin so if you like those then you will love these! So add as much lemon zest as you’d like!

The tablespoon of lavender was subtle but perceptible. Maybe with a little less lemon you’d taste more lavender. I thought it was a nice subtle lavender flavor. A little more wouldn’t be bad though. To the base add:

  • Zest of up to 1 lemon (see note above)

  • 1 tablespoon dried lavender

IMG_7531.jpeg

Date Walnut Buttermilk Scones
This one turned out great! The buttery and nutty walnuts melt into the scone and give it such a nice rich flavor. The dates are just tiny pockets of sweetness that you almost don’t notice! I would have added more dates but I only had about 8-10 Deglet Noor dates in the pantry. I plan on making these again with Medjool dates and adding even more. I’d add more walnuts too. I didn’t measure either of these, but probably no more than 1/2 cup total. I want MORE! :)

  • 1/2 teaspoon cinnamon

  • Pinch of cardamom

  • Chopped Dates, to taste

  • Chopped walnuts, to taste
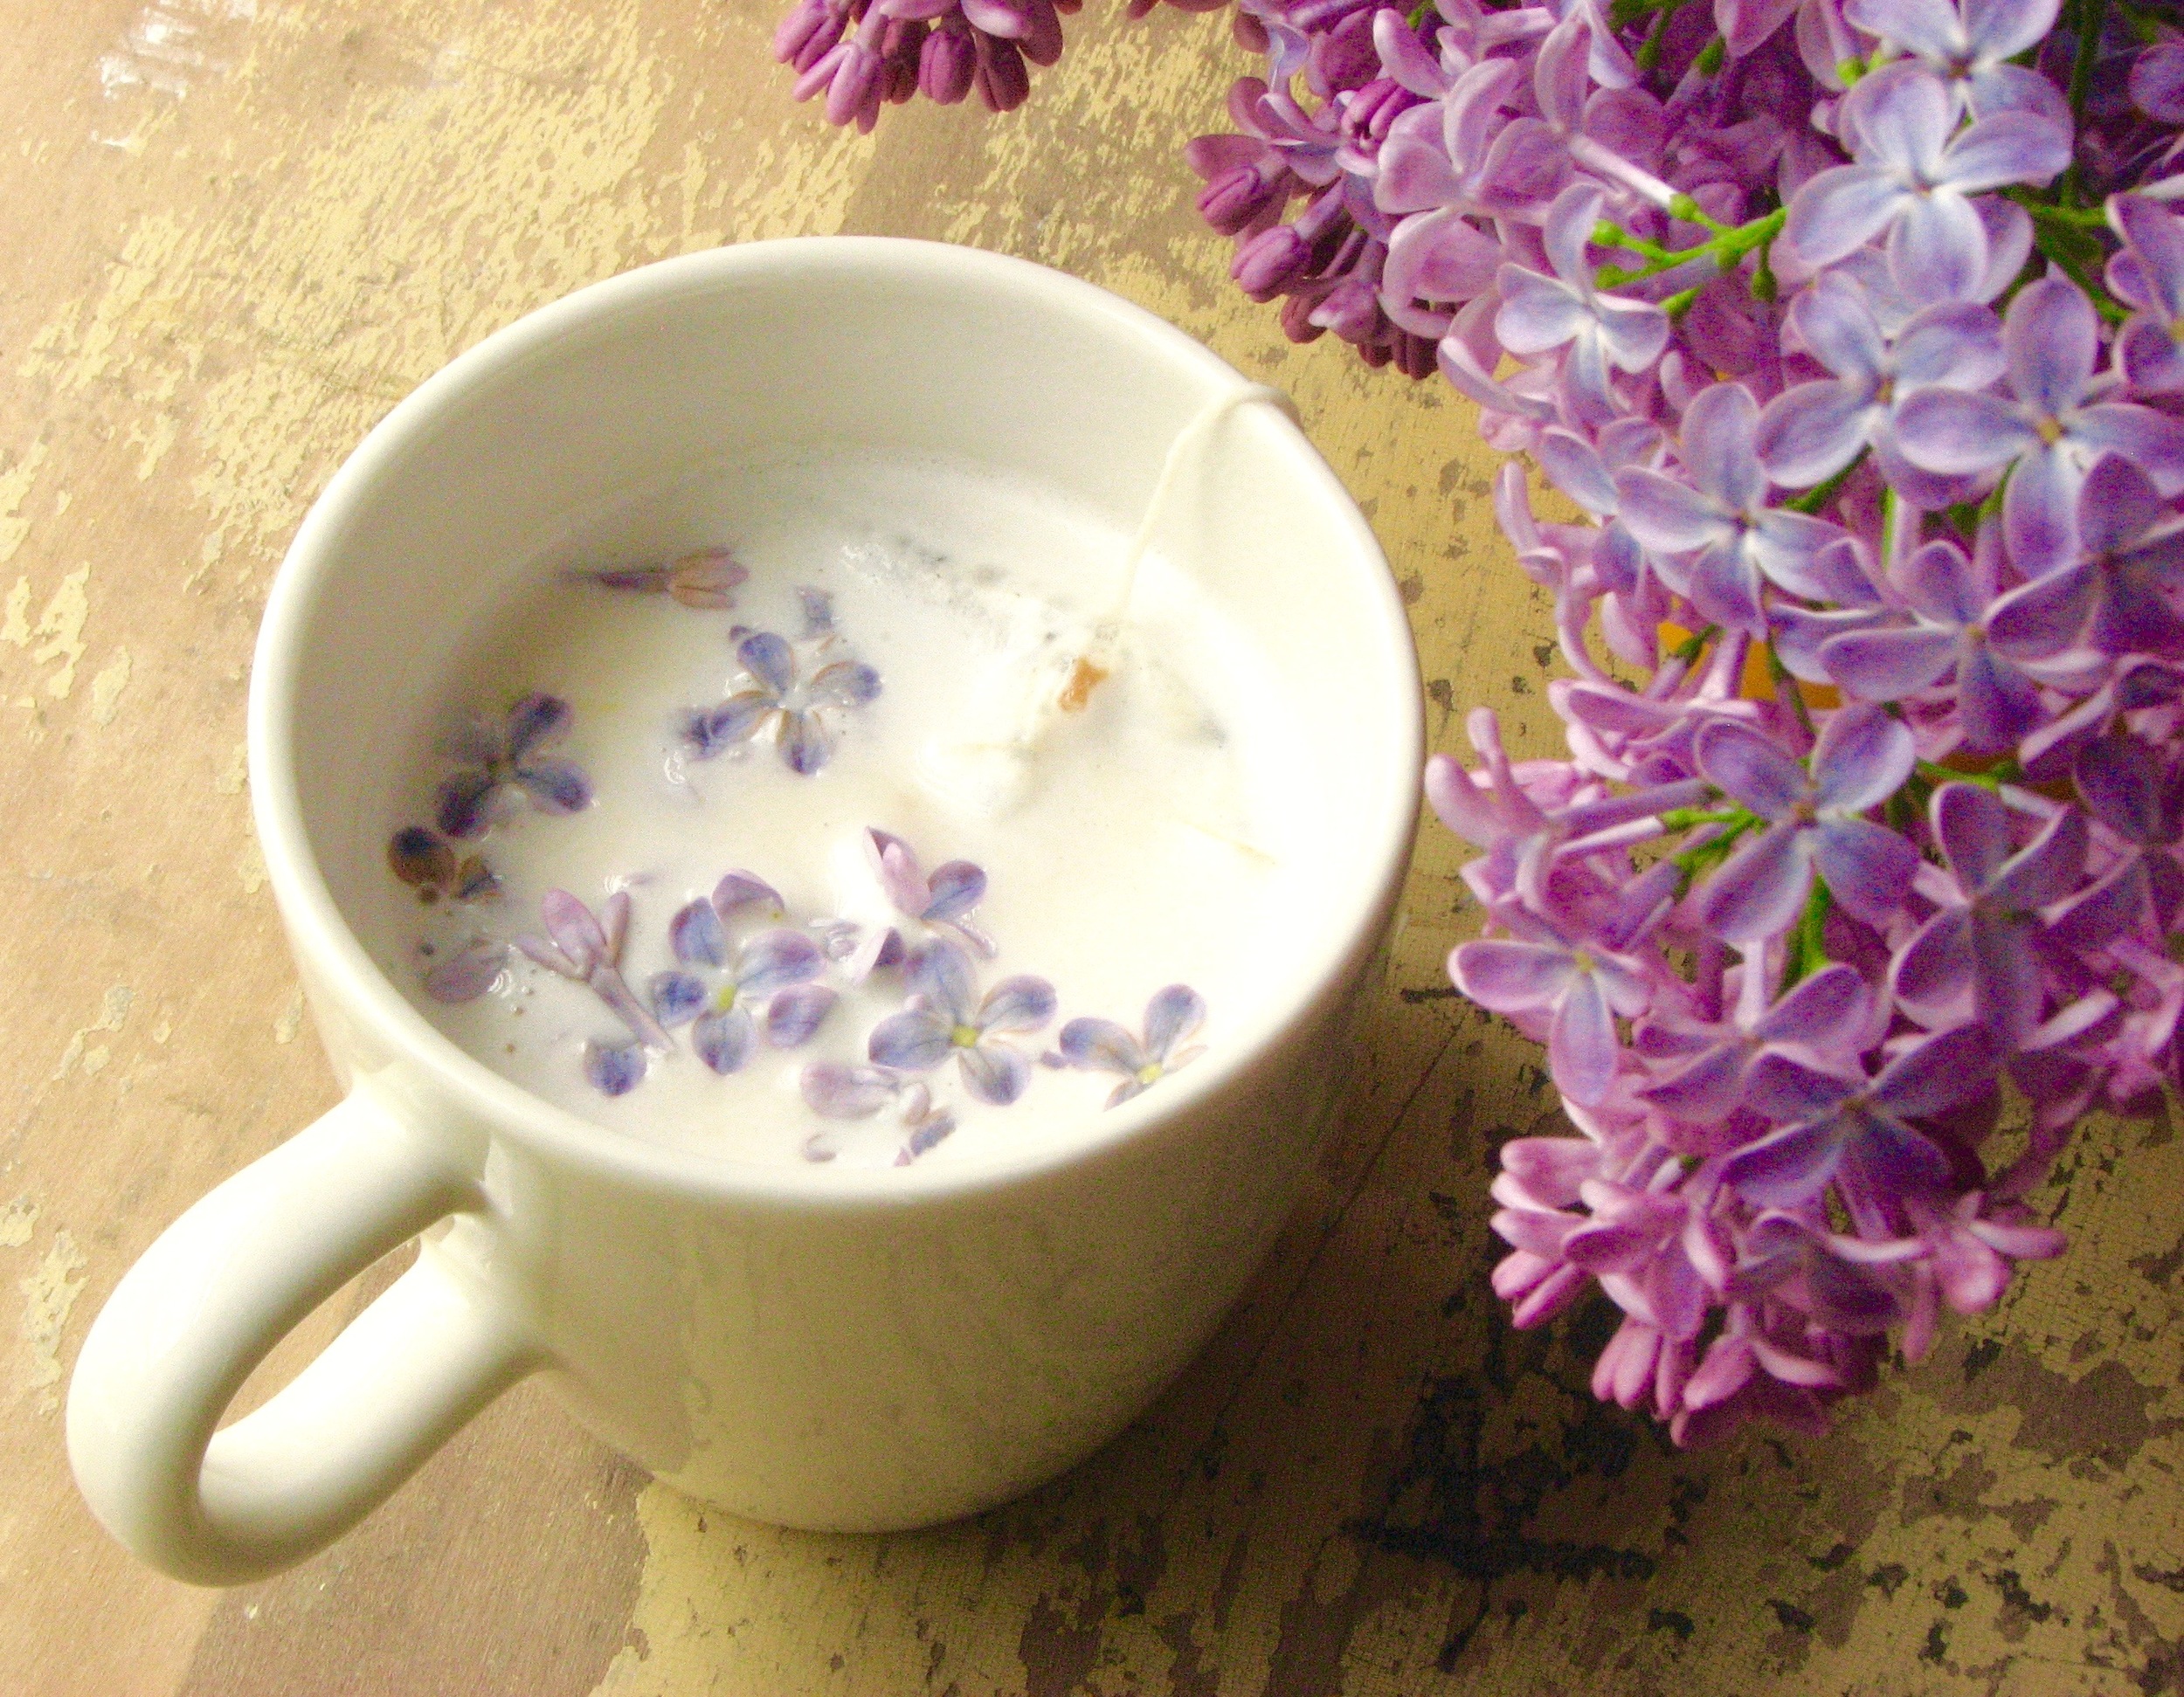
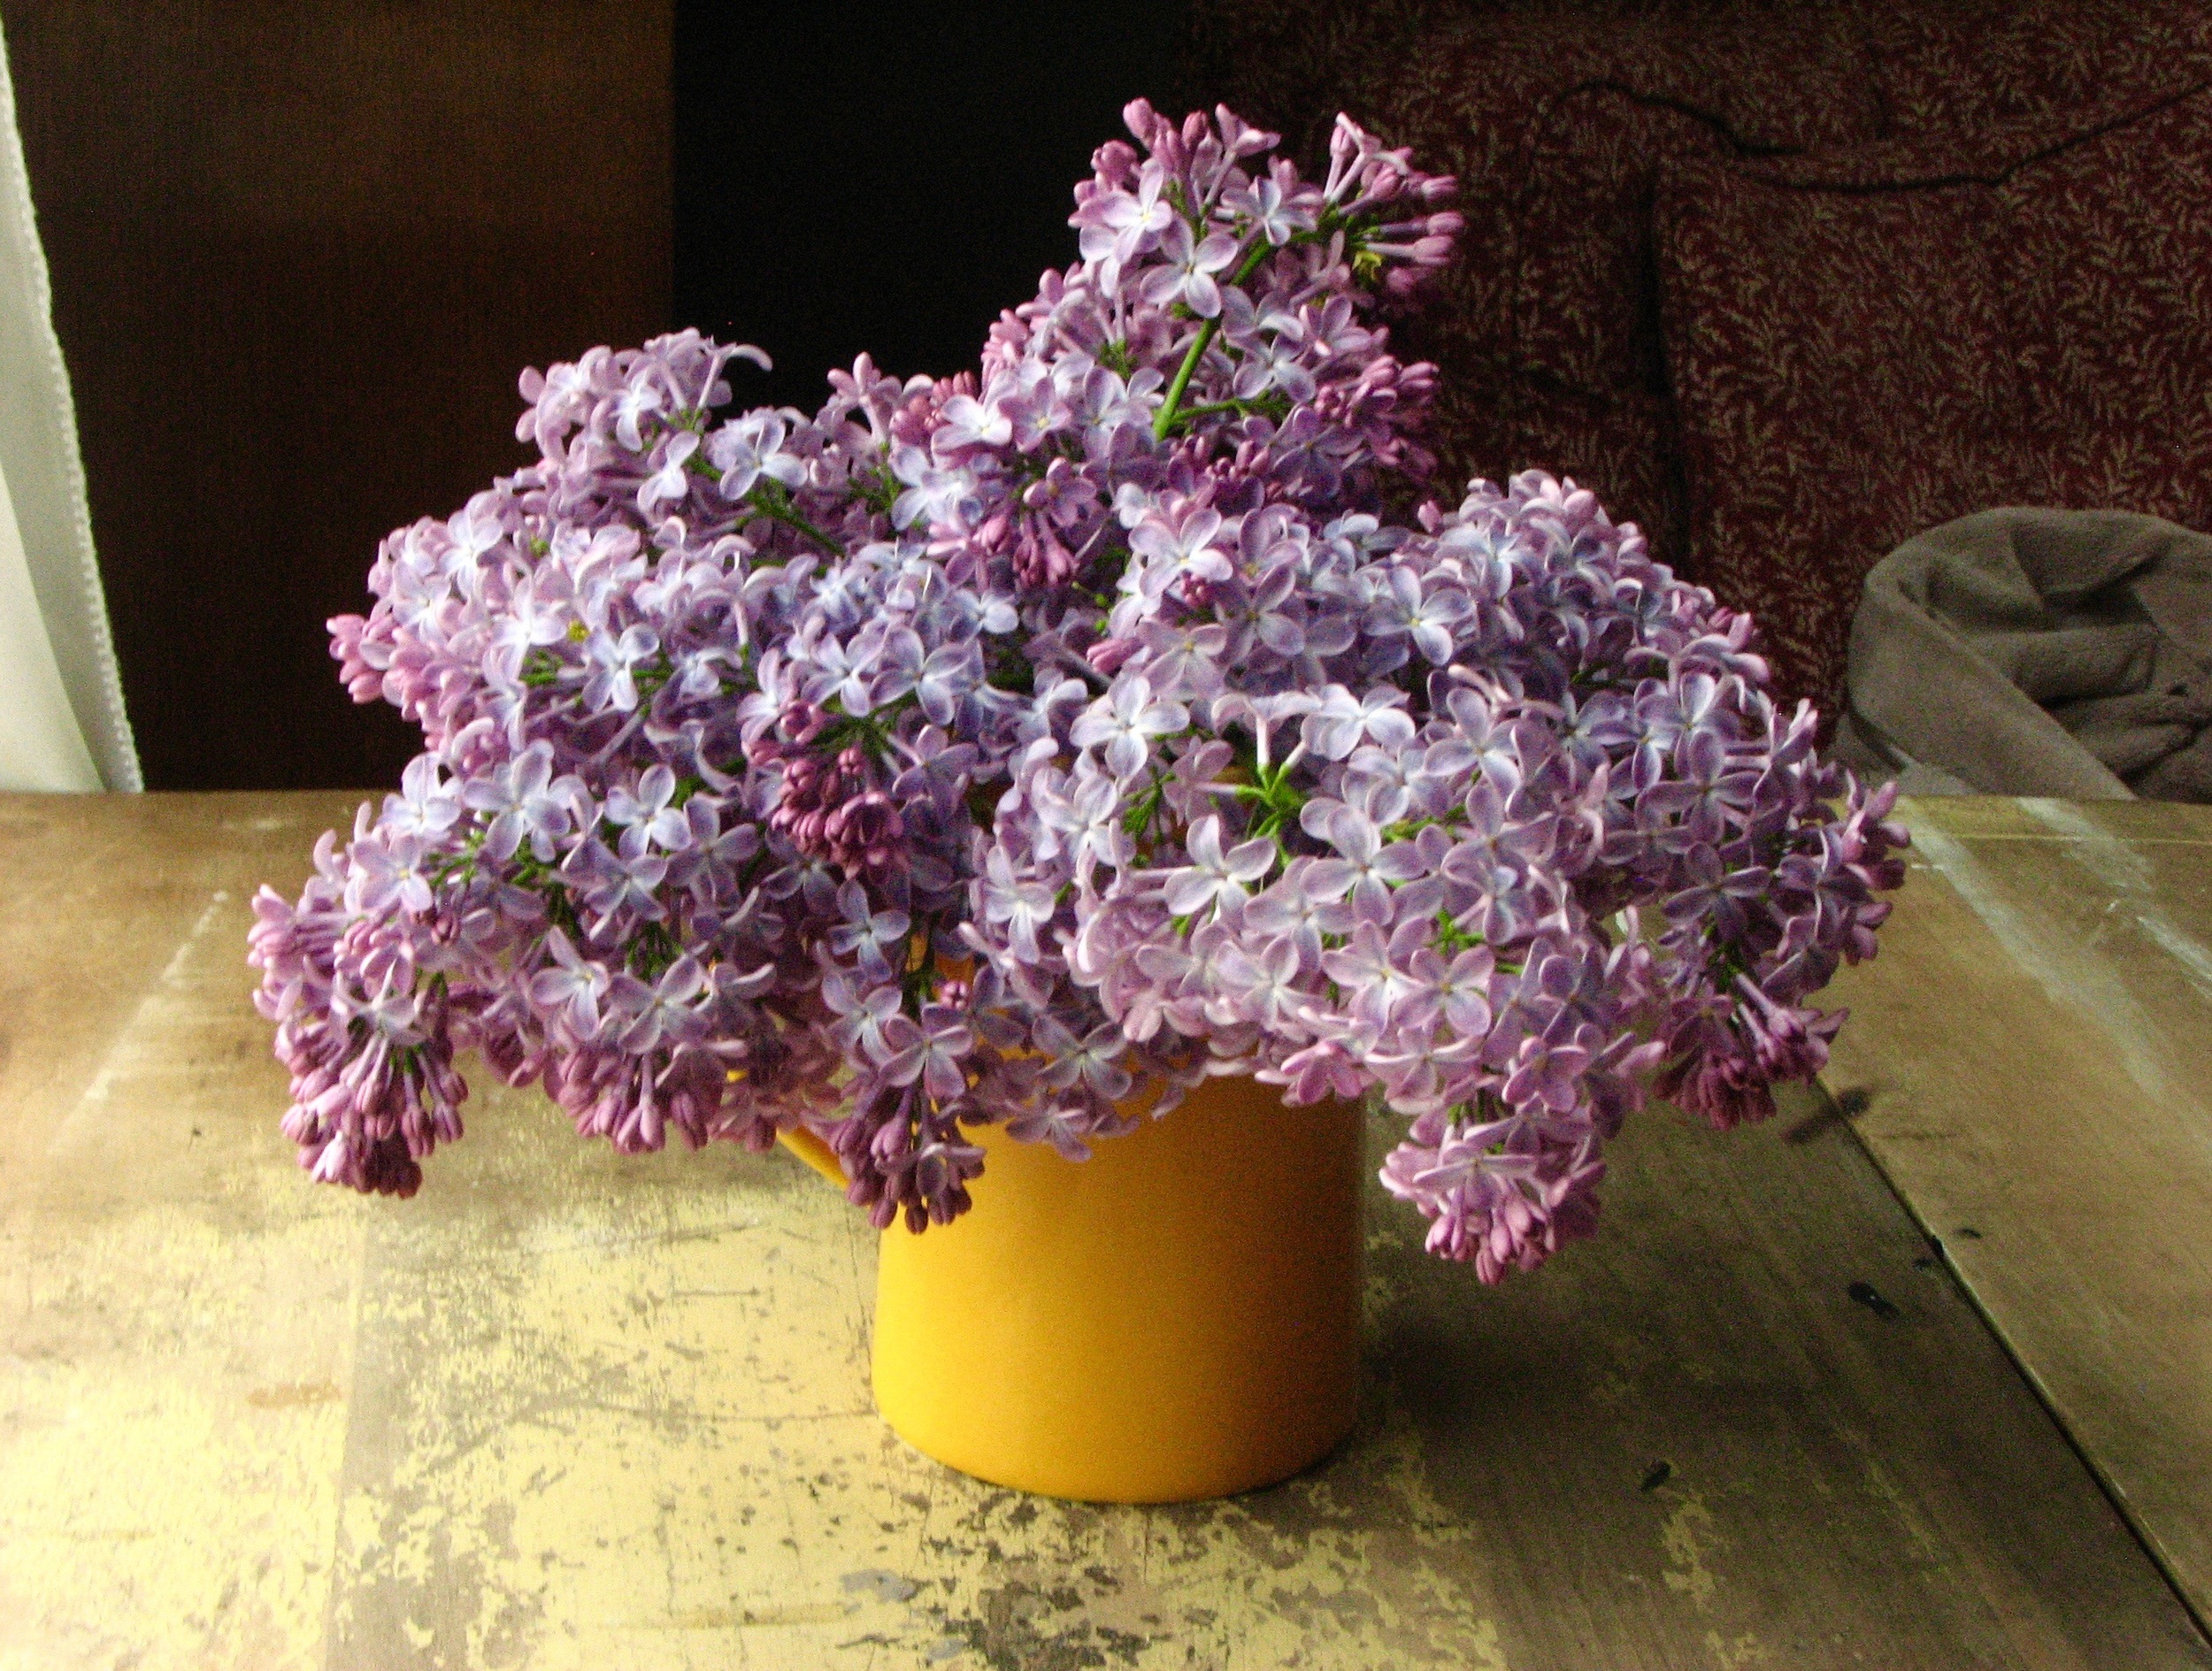
IMG_7944.jpeg

Lilac Almond Scones
I went foraging in my neighborhood and came home with a bag full of lilac blooms. They smell soooo good, but don’t last long. I’ll be honest, the flavor is so so mild that I actually didn’t taste it a whole lot in these finished scones, but they were still delicious and beautiful! It can be a little tedious to pull the lilac flowers off the blooms but it’s also relaxing and methodical. For a glaze, I mixed powdered sugar and water. No specific measurements, you just want it to be very thick so add water VERY SLOWLY! Drizzle and spread the first layer of glaze on the scones right after they come out of the oven and are still hot. This will help the thick glaze spread a little. You do have to play with it a little to spread out and cover the top. Then repeat the glazing a few more times as the scones slowly cool until you have the amount of glaze you desire. There’s no right or wrong. For these scones, add the following to the scones base:

  • 1 cup fresh lilac flowers

  • 1/2 cup slivered almonds

  • Powdered sugar and water (to glaze)

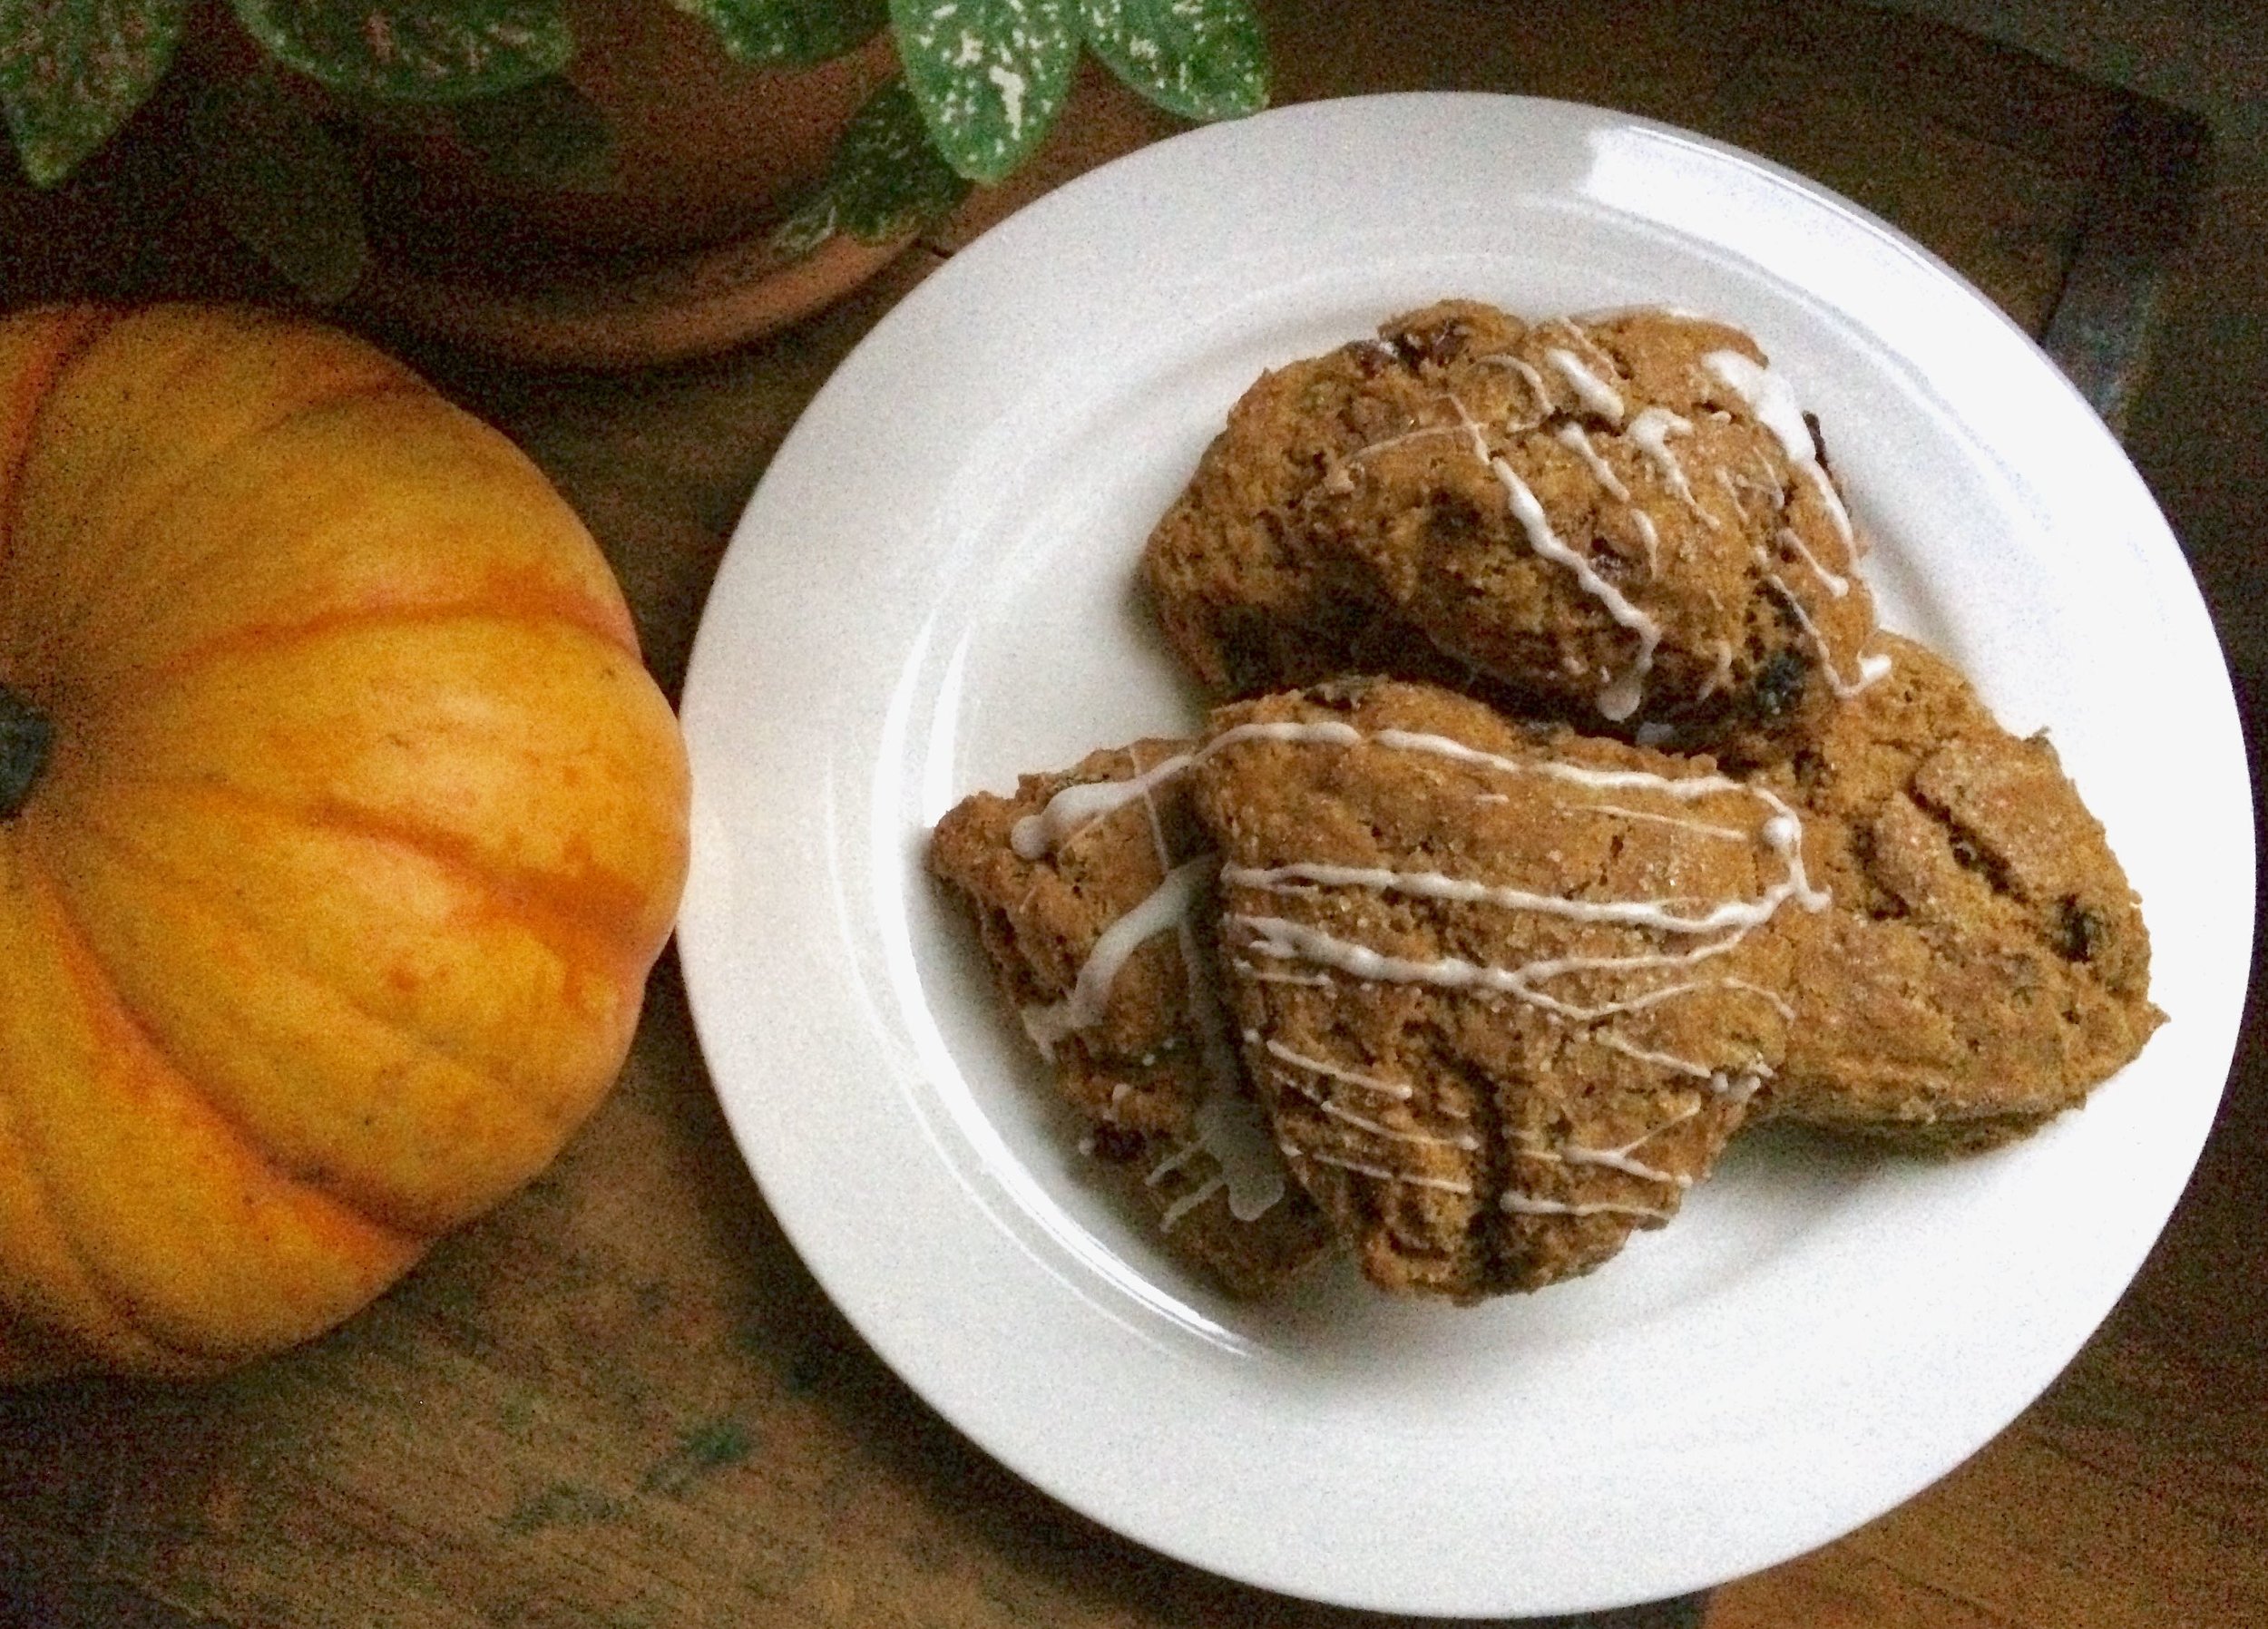
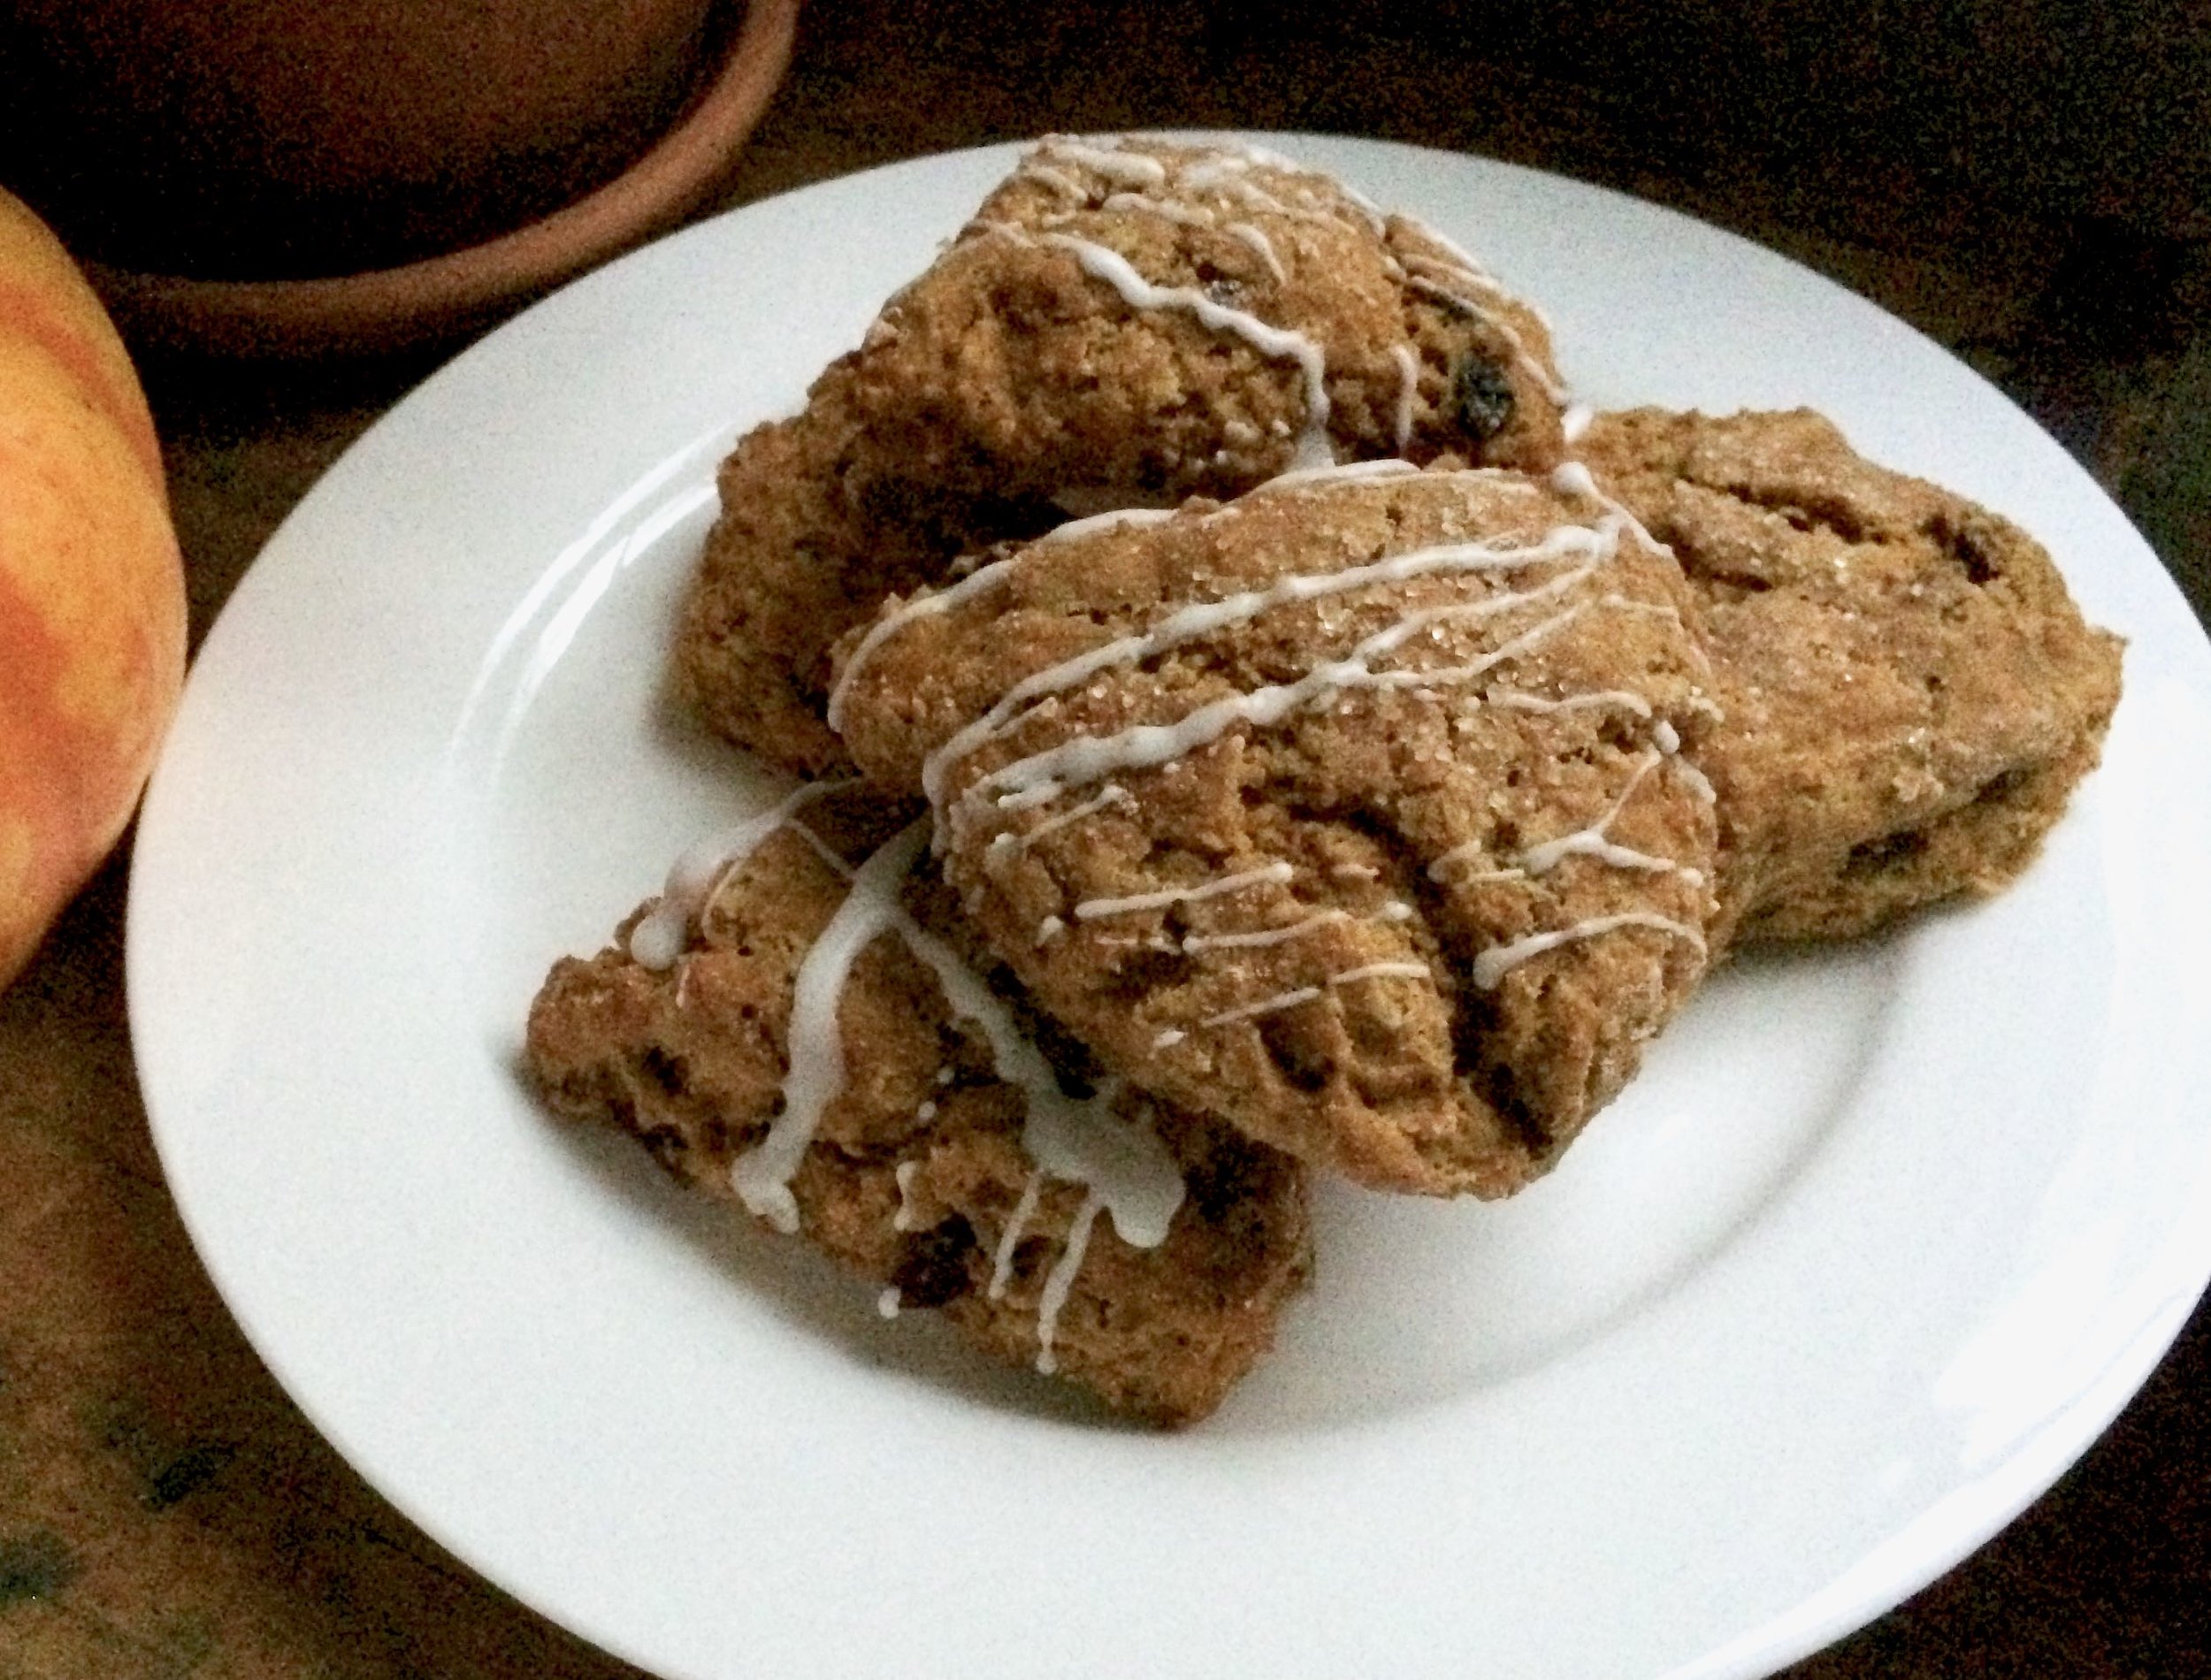
Lavender Honey Scones
I had this combination at a local coffee shop a year or two back and loved it! They unfortunately no longer make it, so I’ll just have to make it for myself! One tablespoon of the lavender was perfect for me. A strong lavender flavor, but not overpowering or “soapy”. If you’re not so sure about lavender then add a little less. If you want to see how far you can push it then add a little more (at your own risk!). I topped these with a simple glaze that contained a little honey. I don’t have exact measurements because for glazes I just go by feel and looks. You want this glaze to be very thick to start as it will melt and spread on top of the hot scones. I add the glaze on top of the scones immediately after they come out of the oven. It’s easiest to do this in layers. The first couple of layers will melt a little more and spread out over the top as the glaze heats up. As the scones cool, the next layers will stay thicker and more opaque. It’s completely up to you how much you add, and how thick the glaze is.

  • 1 tablespoon dried lavender

  • 2 tablespoons honey, powdered sugar and water to glaze (just eyeball it, and make it THICK!)

Buttery Cream Scones

IMG_4699.jpg

I have been on the hunt for what I consider a “bakery style” scone for quite some time now. I have two awesome bakeries within walking distance that both have amazing scones and for some reason I could never quite find a recipe to compare. I have made some wonderful scones over the years, but sometimes I want a scone that makes me feel like I am actually at the bakery. Well, I think this recipe finally did it.

Simple and easy; this recipe uses both butter and cream as well as an egg. It came together easily and the dough wasn’t too crumbly. I’ve found through experimentation that I want cream in my scone. Every. Time. This is what gives it that melt in your mouth tender lightness. Half-and-half, and buttermilk are both find, but cream is the definite winner.

The second key to my quest for the perfect “bakery style” scone is to make sure to make them big enough. They have to be more then just big, they really have to be huge. Small scones are not bakery scones. The original recipe called for you to cut the dough into 8 scones. I made 6 and thought that was just about right! They are huge, and buttery, and tender, andI wouldn’t have it any other way!

Since I was experimenting with the recipe I just through in a couple handful of dried cherries since that is what I had. I also used the food processor instead of by hand as the original recipe (posted below) called for, and it worked great, super quick and easy. I froze the unbaked scones and baked off the next day. They ended up taking 35 minutes from frozen so adjust accordingly.

———————————————————————————————————————————————————————————————

BA’s Best Cream Scones
From Bon Appetit
Ingredients

  • ¼ cup granulated sugar

  • 2 teaspoons baking powder

  • ½ teaspoon baking soda

  • ½ teaspoon kosher salt

  • 3 cups (360 grams) all-purpose flour, plus more for surface

  • ½ cup (1 stick, 4 ounces) chilled unsalted butter, cut into pieces

  • 1 large egg, beaten to blend

  • 1¼ cups (10 ounces) heavy cream, plus more for brushing

  • Demerara or raw sugar (for sprinkling)

Directions
Preheat oven to 375°. Whisk granulated sugar, baking powder, baking soda, salt, and 3 cups flour in a large bowl to combine. Add butter and toss to coat. Using your fingers or a pastry blender, work butter into flour until only pea-size pieces remain. Make a well in the center; add egg and 1¼ cups cream and mix with a fork, incorporating dry ingredients a little at a time, until a shaggy dough forms (it’s okay if it looks a little dry; don’t overwork). Lightly knead dough in bowl until it just comes together.

Turn out onto a lightly floured surface and pat into a 1"-thick round. Cut into 8 wedges and transfer to a parchment-lined baking sheet. Brush dough with cream and sprinkle with demerara sugar. Bake scones until golden brown, 25–30 minutes.

Variations:

  • Lemon-Rosemary: Whisk 2 tsp. finely grated lemon zest and 2 tsp. finely chopped fresh rosemary into flour mixture before adding butter.

  • Cinnamon-Chocolate: Toss 1 cup chopped bittersweet chocolate and 1 tsp. ground cinnamon into flour mixture after working in butter.

  • Double Ginger: Whisk 2 Tbsp. finely chopped candied ginger and 1 Tbsp. finely grated peeled ginger into flour mixture before adding butter.

  • Mixed Berry: Toss 1 cup fresh or frozen berries, cut into pieces if large, into flour mixture after working in butter.

  • Pecan-Oat: Toss ¾ cup old-fashioned oats and ¾ cup chopped toasted pecans into flour mixture before adding butter. Sprinkle ¼ cup oats along with demerara sugar over scones before baking.

Bakery-Style Scones

We go through a lot of half-and-half at home between my sister and I. We each have a minimum of a morning cup of coffee every day during the week, and very often more whenever we can make it work, each with a little dollop of half-and-half because that’s the only way to drink it in my opinion. There are no boundaries on the weekend. In other words, we also go through a lot of coffee too.

Recently, when I walked to the neighborhood grocery store to pick up a pint of half-and-half they were out of my brand, at least in the pint size. But they did have the quart, so why not? Well, we did a good job working our way through that container, but as 3 weeks were quickly approaching I decided something had to be done to use up what was left. After thinking for a bit, I decided on scones because, well, scones. :) If you’re in the same predicament as I was, give this recipe a try, they’re delish!

IMG_3502.jpg

I made this recipe twice. The first time I made a 1.5x batch to get a really nice sized scone. They turned out beautifully, but unfortunately they were too salty. Since they just have a little sugar in them, as scones should, the salt was overpowering. Still completely edible with a nice spoonful of homemade jam, but certainly not top notch. I made them again with half the salt and a smidge more sugar and enjoyed them much more. The original recipe also calls for 2 tablespoons of milk and 4 tablespoons of cream. I just replaced all of the liquid with the half-and-half and it worked great. Perfect way to use up that last little bit of the carton!

 
IMG_3506.jpg
IMG_3503.jpg
 

Bakery-Style Scones
Adapted from Serious Eats
Ingredients

  • 9 ounces all-purpose flour (about 2 cups, spooned; 255g), plus more for dusting

  • 1 tablespoon baking powder

  • 2 teaspoons sugar

  • 1/2 teaspoon kosher salt

  • 2 ounces cold unsalted butter (4 tablespoons; 55g), cut into 1/2-inch cubes

  • 6 ounces roughly chopped milk chocolate (1 cup; 170g)

  • 6-8 ounces half-and-half (or a mix of milk [2 ounces] and heavy cream [4 ounces])

  • ~1 cup mixed nuts and dried fruit (I used almonds, pecans, cranberries and cherries)

Directions
Adjust oven rack to lower-middle position and preheat to 400°F (204°C). Sift flour into a medium bowl, then whisk in baking powder, sugar, and salt. Add butter and use a pastry blender, or two forks, to work the butter into the flour until it resembles a coarse meal. Add nuts and dried fruit and toss to combine, then stir in the 1/2 and 1/2 to form a soft (but not wet) dough.

Turn dough out onto a lightly floured surface and pat into a 7-inch round. Cut into 6 or 8 wedges with a chef’s knife or a bench scraper. Sprinkle generously with coarse sugar, and arrange on a parchment-lined half sheet pan. Bake until puffed and golden, 25-30 minutes. Serve warm with clotted cream, jam, or a spoonful of whipped cream.

Scones are best eaten the day they are made. They do freeze well however if you have leftovers. When ready to eat, thaw to room temperatures. Reheat in a preheated 425 degree oven for 4-6 minutes until heated through and crisp, but before they start to bake through again and dry out.

Lavender Orange Scones

This past week I was feeling the itch to bake something special, but wasn't sure what that should be. I took stock of what I had in the fridge and pantry and found a lonely little orange as well as some dried lavender from last spring. With a quick recipe search I found a recipe for chocolate orange scones. Perfect. At first I was going to go with the classic chocolate orange combination, but then decided that since it's spring and I have some beautiful dried lavender that I would try that combination instead. I figured that the sweet and tart orange would pair well with the floral lavender and I was right. These two flavors compliment each other perfectly and make for a light and fragrant scone, perfect for a leiesurely spring breakfast. 

I've used citrus zest and juice in baked goods plenty of times in the past, but I've never put the actual flesh into a muffin or scone or cake so I wasn't quite sure how it would turn out. I should not have worried, these scones baked up perfectly with little pockets of sweetness due to the orange segments mixed throughout. If you have it, I think some chopped white chocolate would also be a wonderful addition to these lovely spring scones. 


Lavender Orange Scones
Adapted from Vanilla and Bean
Ingredients

  • 1/2 stick (2 ounces) cold butter
  • 1 Orange
  • 2-3 tablespoons whole milk, half and half, or heavy cream
  • 1 tablespoon honey
  • 1/2 teaspoon vanilla Extract
  • 1/2 cup + 1 tablespoon (70 grams) all purpose flour
  • 1/2 cup (60 grams) whole wheat flour
  • 1/4 cup (30 grams) oat flour
  • 1 tablespoon (8 grams) cornstarch
  • 2 tablespoons (25 grams) brown sugar
  • 1/2 teaspoon baking powder
  • 1/2 teaspoon baking soda
  • 1/8 teaspoon salt
  • 1/2-1 teaspoon dried lavender
  • Turbinado sugar, for sprinkling, optional

Directions
Line a sheet pan with parchment paper. Cut the cold butter into 1/4 inch cubes and place in the refrigerator while prepping the other ingredients.

Zest the orange, peel and chop the flesh into small pieces, taking care to reserve the juices. Place the flesh into a small bowl and add about 1 Tbs of all purpose flour. Stir to coat. Set aside. In a measuring cup mix the orange juice and zest, milk, honey, and vanilla extract. Set aside. 

Add the flours, corn starch, brown sugar, baking powder, baking soda, salt and lavender into a large mixing bowl. Add the cold butter to the sifted ingredients and use a pastry cutter (or two forks) to cut in the butter into the pastry. The butter should be about pea size, evenly coated, and distributed in the flour.

Pour the wet ingredients into the dry ingredients. Gently stir the mixture until the flour is just moistened. The dough will be shaggy and seem dry but avoid the temptation to add additional liquid. Add the chopped orange pieces. Fold in to incorporate, eventually using your hands to press and fold the dough together, just a few times. Squeeze a portion of the dough in your fist. It should loosely hold together. 

Dump the contents out of the bowl onto a flour dusted work surface and press the dough together forming a circle. You may need to work it a little bit with your hands to bring it all together. Work gently, but quickly to keep the dough as cold as possible. Use a bench scraper, or a knife, to cut the circle into 4 to 6 triangles. Transfer the cut scone to the prepared baking sheet. 

Place scones on the parchment lined sheet pan and rest in the fridge or freezer for 20 minutes, while the oven is preheating to 425F. 

Before baking, moisten the top of the scones with a little milk and sprinkle the raw sugar evenly over the top of each scone. Bake for 10 minutes at 425 degrees, then turn the oven down to 375 degrees, rotate the baking sheet, and bake for an additional 15 minutes until the scones are golden brown and cooked through. Remove from oven and carefully transfer scones to a cooling rack. 

Yields: 4-6 scones

Classic Pumpkin Scones

So, I know I posted a pumpkin scone recipe just a few weeks ago, but I couldn't resist posting another one. Since it's almost the end of November (which I consider the unofficial pumpkin-baked-good month) I had to share this recipe before the month is over. I've made quite a few different pumpkin scone recipes in the past which have all been good, but when I made this one last week I knew I had the winner! I think this is probably the best one of the bunch. It's a classic scone, buttery and tender, with the addition of a little pumpkin and scented with warming autumn spices. I was planning on adding some chocolate or nuts to the dough, but I realized when they were all cut and on the baking sheet that I had forgotten to add anything at all. But I needn't have feared, they turned out amazingly! Everything I wish for in a scone. Whether you keep theses scones plain, or add your favorite mix-ins, you won't be disappointed, I promise! 

Yum!! So tender and delicious! These scones did not turn out tough like some pumpkin scones do. I think it's key to work the butter evenly into the dough, not leaving the pieces too big so the butter just melts out. And also be very careful not to add too much liquid. I've made this mistake in the past and it leads to a tough finished product. You want just enough of the liquid to pull it all together, and not any more. I usually don't add all the liquid right away at the beginning, instead adding it a little bit at a time until all the dough is moistened and just sticks together. Stop at this point and start shaping. This will help that end product be a real winner! Some chocolate, walnuts, pecans, or cranberries would all be fabulous. Or just keep them plain and simple, and enjoy those warm and buttery spices.


Classic Pumpkin Scones
Adapted from Vanilla and Bean
Ingredients

  • 1/2 stick butter
  • 1 cup (120 grams) all purpose flour
  • 1 tablespoon cornstarch
  • 2 tablespoons brown sugar
  • 1/4 teaspoon cinnamon
  • 1/8 teaspoon cardamom
  • 1/8 teaspoon ginger
  • 1/8 teaspoon allspice
  • 1/2 teaspoon baking powder
  • 1/4 teaspoon baking soda
  • 1/8 teaspoon salt
  • 2-4 tablespoons half-and-half
  • 1/4 cup (60 grams) pumpkin
  • 1 teaspoon vanilla

Directions
Line a sheet pan with parchment paper. Cut the cold butter into 1/4" cubes and place in the freezer while prepping the other ingredients.

Sift the flour, corn starch, brown sugar, spices, baking powder, baking soda, and salt into a large mixing bowl.

Add the cold butter to the sifted ingredients. Use a pastry cutter to cut in the butter into the pastry until evenly incorporated. The butter should be small, about pea sized, evenly coated, and distributed in the flour.

In a separate bowl, mix 2 tablespoons of the half and half, pumpkin puree and vanilla and pour into the flour mixture. Gently stir the mixture until the flour is just moistened. The dough will be shaggy and seem dry. Add more half and half very slowly as needed for the dough to just hold together. Do not add too much liquid or the scones will turn out flat and tough, you want to add just enough so that the dough barely holds together. 

Dump the contents out of the bowl onto a flour dusted work surface and shape into a circle approximately 3/4-1 inch thick, depending on your preference. Cut the circle into 4-6 wedges. Place scones on the parchment lined sheet pan, cover and place in the fridge for 20 minutes. (At this point, the scones can be held in the fridge overnight for a quick bake in the morning. Just make sure they are wrapped tightly).

Preheat oven to 425F while the scones are resting in the fridge.

Before baking, sprinkle the coarse sugar evenly over the top of each scone if desired, using a little water to help it stick if needed. Bake for 18-20 minutes or until golden. Enjoy warm or at room temperature. 

Cherry Walnut Pumpkin Scones

This past week I took my first vacation days of residency. It has been absolutely wonderful. 5 days off (plus both weekends - bonus!) to do absolutely nothing. I really had nothing planned (other than a dentist appointment, woohoo) which is really how I like my days off to be, relaxing and uneventful. It's been kind of a gloomy week. Rainy and cold for several days, not a lot of sun. Early in the week I decided that I needed to had something fun to enjoy for breakfast while on vacation. Since it's October I really didn't have any other choice than to make something pumpkin-y! Something seasonal to leisurely enjoy with my morning cup of coffee. After much deliberation I settle on scones. 

Scones are one of my favorites! I made some delicious pumpkin scone with cranberries and pecans last year, but I had a couple other recipes pinned so I figured I'd try a new one! This recipe is from Joy the Baker, one of my favorite bloggers, and probably the blog I've been following the longest of any food blog. I trust her recipes so I knew this would be a winning recipe. They were the perfect treat for my chilly fall morning breakfasts!

Scones are not difficult. These are pretty basic as scones go, similar to the ones I made last year. These did spread a little while baking, but not too much. They are moist and hearty. Pumpkin scones never have that crispy airiness that traditional scones have, but that's to be expected due to the moist and dense pumpkin. Add a little drizzle of glaze for looks and extra sweetness and then dig in. Don't forget the coffee! 

(Sorry about the dark, not so wonderful pictures of these scones. The batteries in my camera died and I haven't been able to go buy some new batteries yet!)


Cherry Walnut Pumpkin Scones
Adapted from Joy the Baker
Ingredients

  • 1 1/2 cups (180 grams) all-purpose flour
  • 1/4 cup (50 grams) brown sugar
  • 1 1/4 teaspoons baking powder
  • 1/4 teaspoon baking soda
  • 1/4 teaspoon salt
  • 1/2 teaspoon ground cinnamon
  • 1/4 teaspoon fresh grated nutmeg
  • 1/4 teaspoon ground ginger
  • 1/8 teaspoon ground allspice
  • 3/4 stick (6 tablespoons, 3 ounces) unsalted butter, cold and cut into small cubes
  • 1/2 cup (110 grams) buttermilk, cold
  • 1/2 cup (120 grams) pumpkin puree
  • 1 1/2 teaspoons pure vanilla extract
  • 1/4 cup a mix of coarsely chopped walnuts and dried cherries

Directions
Place rack in the upper third of the oven and preheat oven to 400 degrees F.  Line a baking sheet with parchment paper and set aside.

In a medium bowl, whisk together flour, brown sugar, baking powder, baking soda, salt, and all of the spices.  Add the cold butter to the dry ingredients and toss to coat.  Using your fingers or a pastry cutter, break the butter down into the dry ingredients.  Work quickly so that the butter remains cold.  Some of the butter will be the size of oat flakes, others will be the size of small peas.

In a small bowl, whisk together buttermilk, pumpkin puree, and vanilla extract.

Add the wet ingredients, all at once to the dry ingredients.  Stir together until almost thoroughly combined.  Add walnuts and cherries and stir until no dry flour bits remain.  Turn the dough out onto a lightly floured counter. Shape into a small circle, approximately 1 1/2 inches tall. Use a bench scraper or a sharp knife to cut the circle into 6 or 8 wedges. Transfer scones to prepared baking sheet.  Leave about 2-inches of space between each scone.

Bake for 18 to 22 minutes or until browned slightly with dry tops.  You can insert a toothpick into the center of a scone to test for doneness.

Buckwheat Scones

Earlier last month I went on my last trip before residency started. The last hurrah to normal life for a while. Lara and I took a quick trip to Chicago to visit our cousin who lives in Bucktown. We had been talking for a while about us visiting Chicago to see her and her place, and explore her neighborhood. We finally got it done just in the nick of time. We only went for a short weekend, but we had a marvelous time while there. Did a lot of walking, exploring, shopping and of course, eating! I had my first real ramen eating experience which was awesome, visited a great local coffee shop, and perhaps most importantly, grabbed a quick breakfast at a nearby bakery before church on Sunday morning. 

Since Lara and I are earlier risers than most, we got up before anyone else on Sunday and decided to grab some coffee and pastries while everyone else in the house slept. Just a couple miles down the road was Floriole Bakery. I'd been here the last time I visited Chicago and loved it, knew it was a place I would go back to. I was right, it was just as wonderful on this visit. It was very difficult to decide what to get, everything looks amazing, but I ended up ordering a delicious cup of coffee and a buckwheat scone which sounded interesting to me. It was the perfect choice. I absolutely loved the scone. The combination of the buckwheat combined with a little cardamom and some citrus notes was just perfect. A little sandy and course in texture, but not too crumbly. I instantly wanted to recreate this at home. 

When I got back to Michigan I did a little online searching and wouldn't you know it, I found a recipe for buckwheat scones from Floriole Bakery on the Chicago Tribune's website. Perfect!! I quickly ran to the store for some buckwheat and whipped a batch of these beauties together. The verdict? The flavor is spot on, but the texture is slightly different, not as sandy. Their scones almost seemed like they had cornmeal in them, giving them a coarser texture which my scones did not have. When I look on the bakery's website online they describe the buckwheat scones as flourless while this recipe calls for 1/3 cup of flour. So there are definitely some differences, not surprising, but in the end it's not a big deal. This recipe is definitely similar to the original and most certainly a keeper! It is unique, easy to make and delicious. I will definitely make these over and over again!

I made a few changes to the recipe as it was printed online. I replaced the orange zest with lemon zest because I didn't have any oranges. I was bummed about this because I love adding orange to baked goods, but they still turned out great. I  also didn't use cream as stated, but instead used a mix of whole milk and liquid whey (2 ounces whole milk, 1 ounce whey) to make my own "buttermilk" and it worked just fine. I did only needed to use 6 tablespoons of liquid though, as opposed to the 1/2 cup of cream called for. So be careful when added the liquid, start with less than 1/2 cup because you may not need it all. 

Because there is not a lot of gluten in these scones (buckwheat is actually not wheat and is therefore gluten free) they are a little more delicate than traditional scones, but they aren't so delicate as to fall apart with a glance. As with the original scones, this recipe calls for you to make a thumbprint in the scones before baking and fill this with raspberry jam. I didn't have raspberry jam, or any other jam, so I skipped it this time and they were just fine without it. But for a little extra oomph of flavor I would definitely add this in on another go around. So if you're looking for something a little different for breakfast, or have been wanted to play around with some buckwheat flour, give these scones a go, you won't be disappointed!


Buckwheat Scones
Adapted from The Chicago Tribune
Ingredients

  • 3/4 cup (60 grams) old fashioned oats
  • 1/4 cup (50 grams) sugar
  • 3/4 cup (90 grams) buckwheat flour
  • 1/3 cup (40 grams) all purpose flour
  • 1/4 teaspoon lemon zest
  • 1 teaspoon baking powder
  • 1/2 teaspoon baking soda
  • 3/4 teaspoon cinnamon
  • 1/8 teaspoon cardamom
  • 1/4 teaspoon salt
  • 6 tablespoons (85 grams) butter, cut into cubes and chilled
  • 4-6 tablespoons buttermilk

Directions
Measure 6 tablespoons of the oats (30 grams) and the sugar into the food processor. Buzz, reducing oats to flour. Transfer oat/sugar mixture to a large bowl. Add the buckwheat flour, all-purpose flour, lemon zest, baking powder, baking soda, cinnamon, cardamom, and salt. Stir to combine. 

Add the butter. Using a pastry blender, cut in butter, stopping when the largest butter bits are about the size of peas. Mix in remaining 6 tablespoons rolled oats. Drizzle in the buttermilk slowly. The dough will come together in large clumps that stick together readily when pressed. You may not need to add all the liquid. Add only as much buttermilk as needed for the dough to hold together. 

Shape the dough into 10 equal sized balls and set on a baking sheet that has been lined with parchment paper. Sprinkle with a little coarse sugar if desired.

Slide baking sheet into a 350-degree oven and bake until just set, 18-20 minutes. Eat warm, or at room temperature. 


Lilac Blossom Almond Scones

I've been aware for some time now that there are quite a few different edible flowers out there; nasturtium, squash blossoms, chive blossoms, lavender, even marigolds and pansies to name just a few. Up until this point however, other than playing around with some lavender (lavender shortbread cookies!) I really haven't done much with these flowers. I decided to change that this spring when I saw the lilac bushes start bursting with their beautiful flowers, perfuming the air when I take walks. It is one of the best smells imaginable. 

It was a video I saw earlier this spring from Kitchen Vignettes that first peaked my interest in playing around with some lilacs. Then my sister showed me this recipe for lilac blossom scones from Holly and Flora and I knew I had to make them. I did a little urban foraging one morning, coming back home with a bag full of lilac blossoms. Into the scones they went, and I also made a quick lilac blossom simple syrup that I've been using to make vanilla and lilac tea lattes (yum!) all week. So although the lilacs blossoms will soon disappear for another year I will thankfully have the memory of these buttery and delicious scones to hold me through until next spring. 

The flavor of lilac blossoms is quite mild, so don't be afraid that these scones will taste like perfume or potpourri. They lend a quiet floral flavor and aroma to the scones without being overpowering. The almonds add a nice crunch and obvious nuttiness that pairs well with the blossoms. I think the addition of a little bit of white chocolate would be a wonderful third component, but I didn't have any on hand at the time so I wasn't able to try it out. Next time!

Some people might be a little intimidated by scones if they've never made them before, but they really are so easy to make. A few things I like to keep in mind: make sure your butter is very cold before starting, don't over-mix the dough once you add the liquid, and don't add too much liquid or your dough will be too soft and the scones may be a little tough. I usually don't add all the liquid right away, just to make sure I don't add too much. You can always add more as needed. You only want as much liquid as necessary to just hold everything together, and not any more. 

This is a fairly basic buttermilk scone recipe, with the addition of lilac blossoms and almonds. Wonderfully simple and delicious. I made my scones on the smaller side, halving the original recipe and cutting them half as big as what was originally called for, but if you want bigger, more coffee-shop sized scones, make 4 scones out of the recipe below (or double it and make 8 as in the original recipe). 


Lilac Blossom Almond Scones
Adapted from Holly and Flora
Ingredients

  • 1 1/2 cups (6.75 ounces) flour, all-purpose
  • 1 1/2 tablespoons (3/4 ounce) granulated sugar
  • 1 1/4 teaspoons baking powder
  • 1/4 teaspoon baking soda
  • 1/2 teaspoon salt
  • 6 tablespoons (3 ounces) unsalted butter, chilled
  • 1/4 cup (1 ounce) toasted, chopped almonds
  • 3/4-1 cup lilac flowers
  • 1/2 cup buttermilk, shaken well (I actually used a mixture of liquid whey and half-and-half because that's what I had and it work wonderfully)
  • 1/2 teaspoon vanilla extract
  • Turbinado sugar, for sprinkling on top

Directions
Pre-heat the oven to 425 degrees. In a large mixing bowl, combine the flour, sugar, baking powder, baking soda, and salt. Whisk the ingredients together. Cut the chilled butter into small cubes and toss into the dry mixture. Using a pastry blender or your fingers, work the butter into the flour mixture, until pea-sized lumps of butter are present. 

Add the almonds, lilac blossoms, vanilla and buttermilk (a little at a time) and fold together in the bowl with your hands just until the all the flour is moistened and the dough holds together. Make sure to not over-work. Lightly flour the ball of dough and flatten it out on the counter, by hand, into a 1/2 -3/4 inch thick disk. Cut the dough into triangles and place onto a parchment lined baking sheet. Lightly dust with turbinado sugar. (At this point I usually place my scones in the freezer for at least 30-60 minutes to firm up. This step is not absolutely necessary, but I find that scones bake up taller and more beautiful when they chill a little first. You can actually freeze the scones entirely, transfer them to a plastic bag and store them in the freezer. Then bake directly from the freezer when needed, adding a few more minutes to the baking time if needed. This is a great time saver on mornings when you want a fresh batch of scones, but don't want the hassle of making them that morning.) 

Bake 12 to 16 minutes, rotating the baking sheet halfway through, until turning golden brown on the edges. Serve warm, plain, or with a little butter and your favorite jam. 

Yields: 4 large or 8 small scones