Sourdough Banana Bread

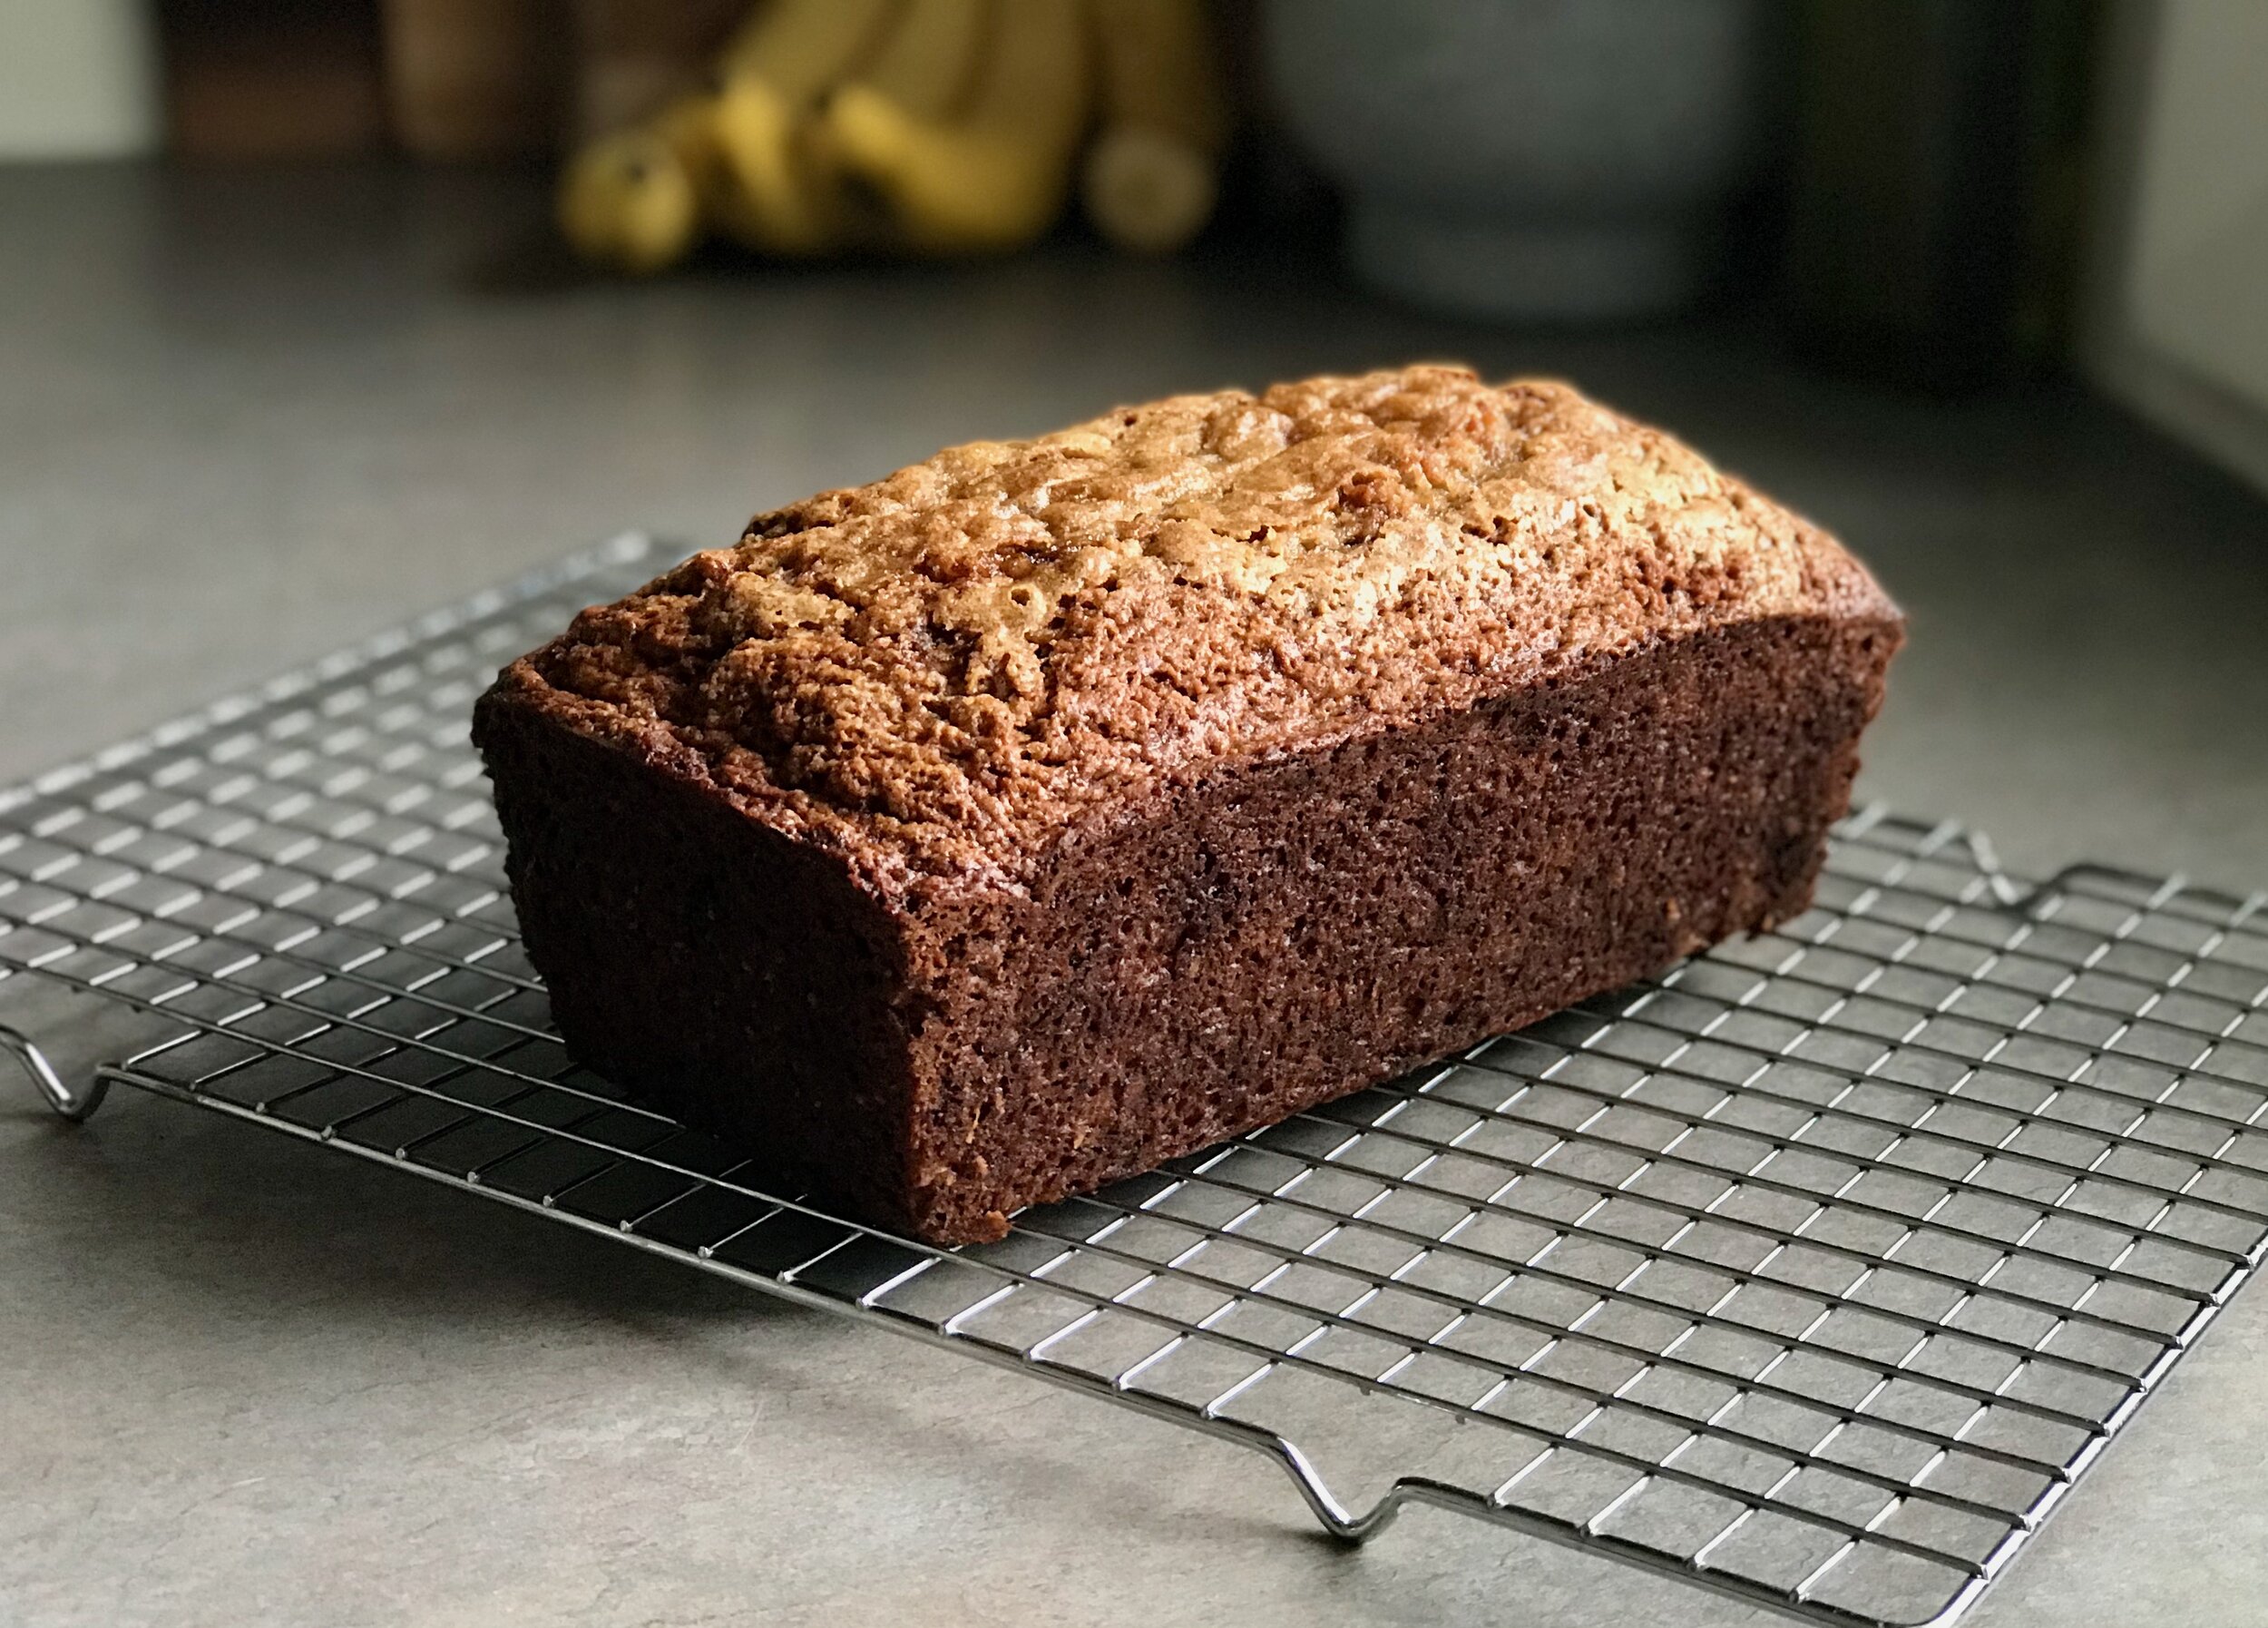
IMG_1126.jpeg
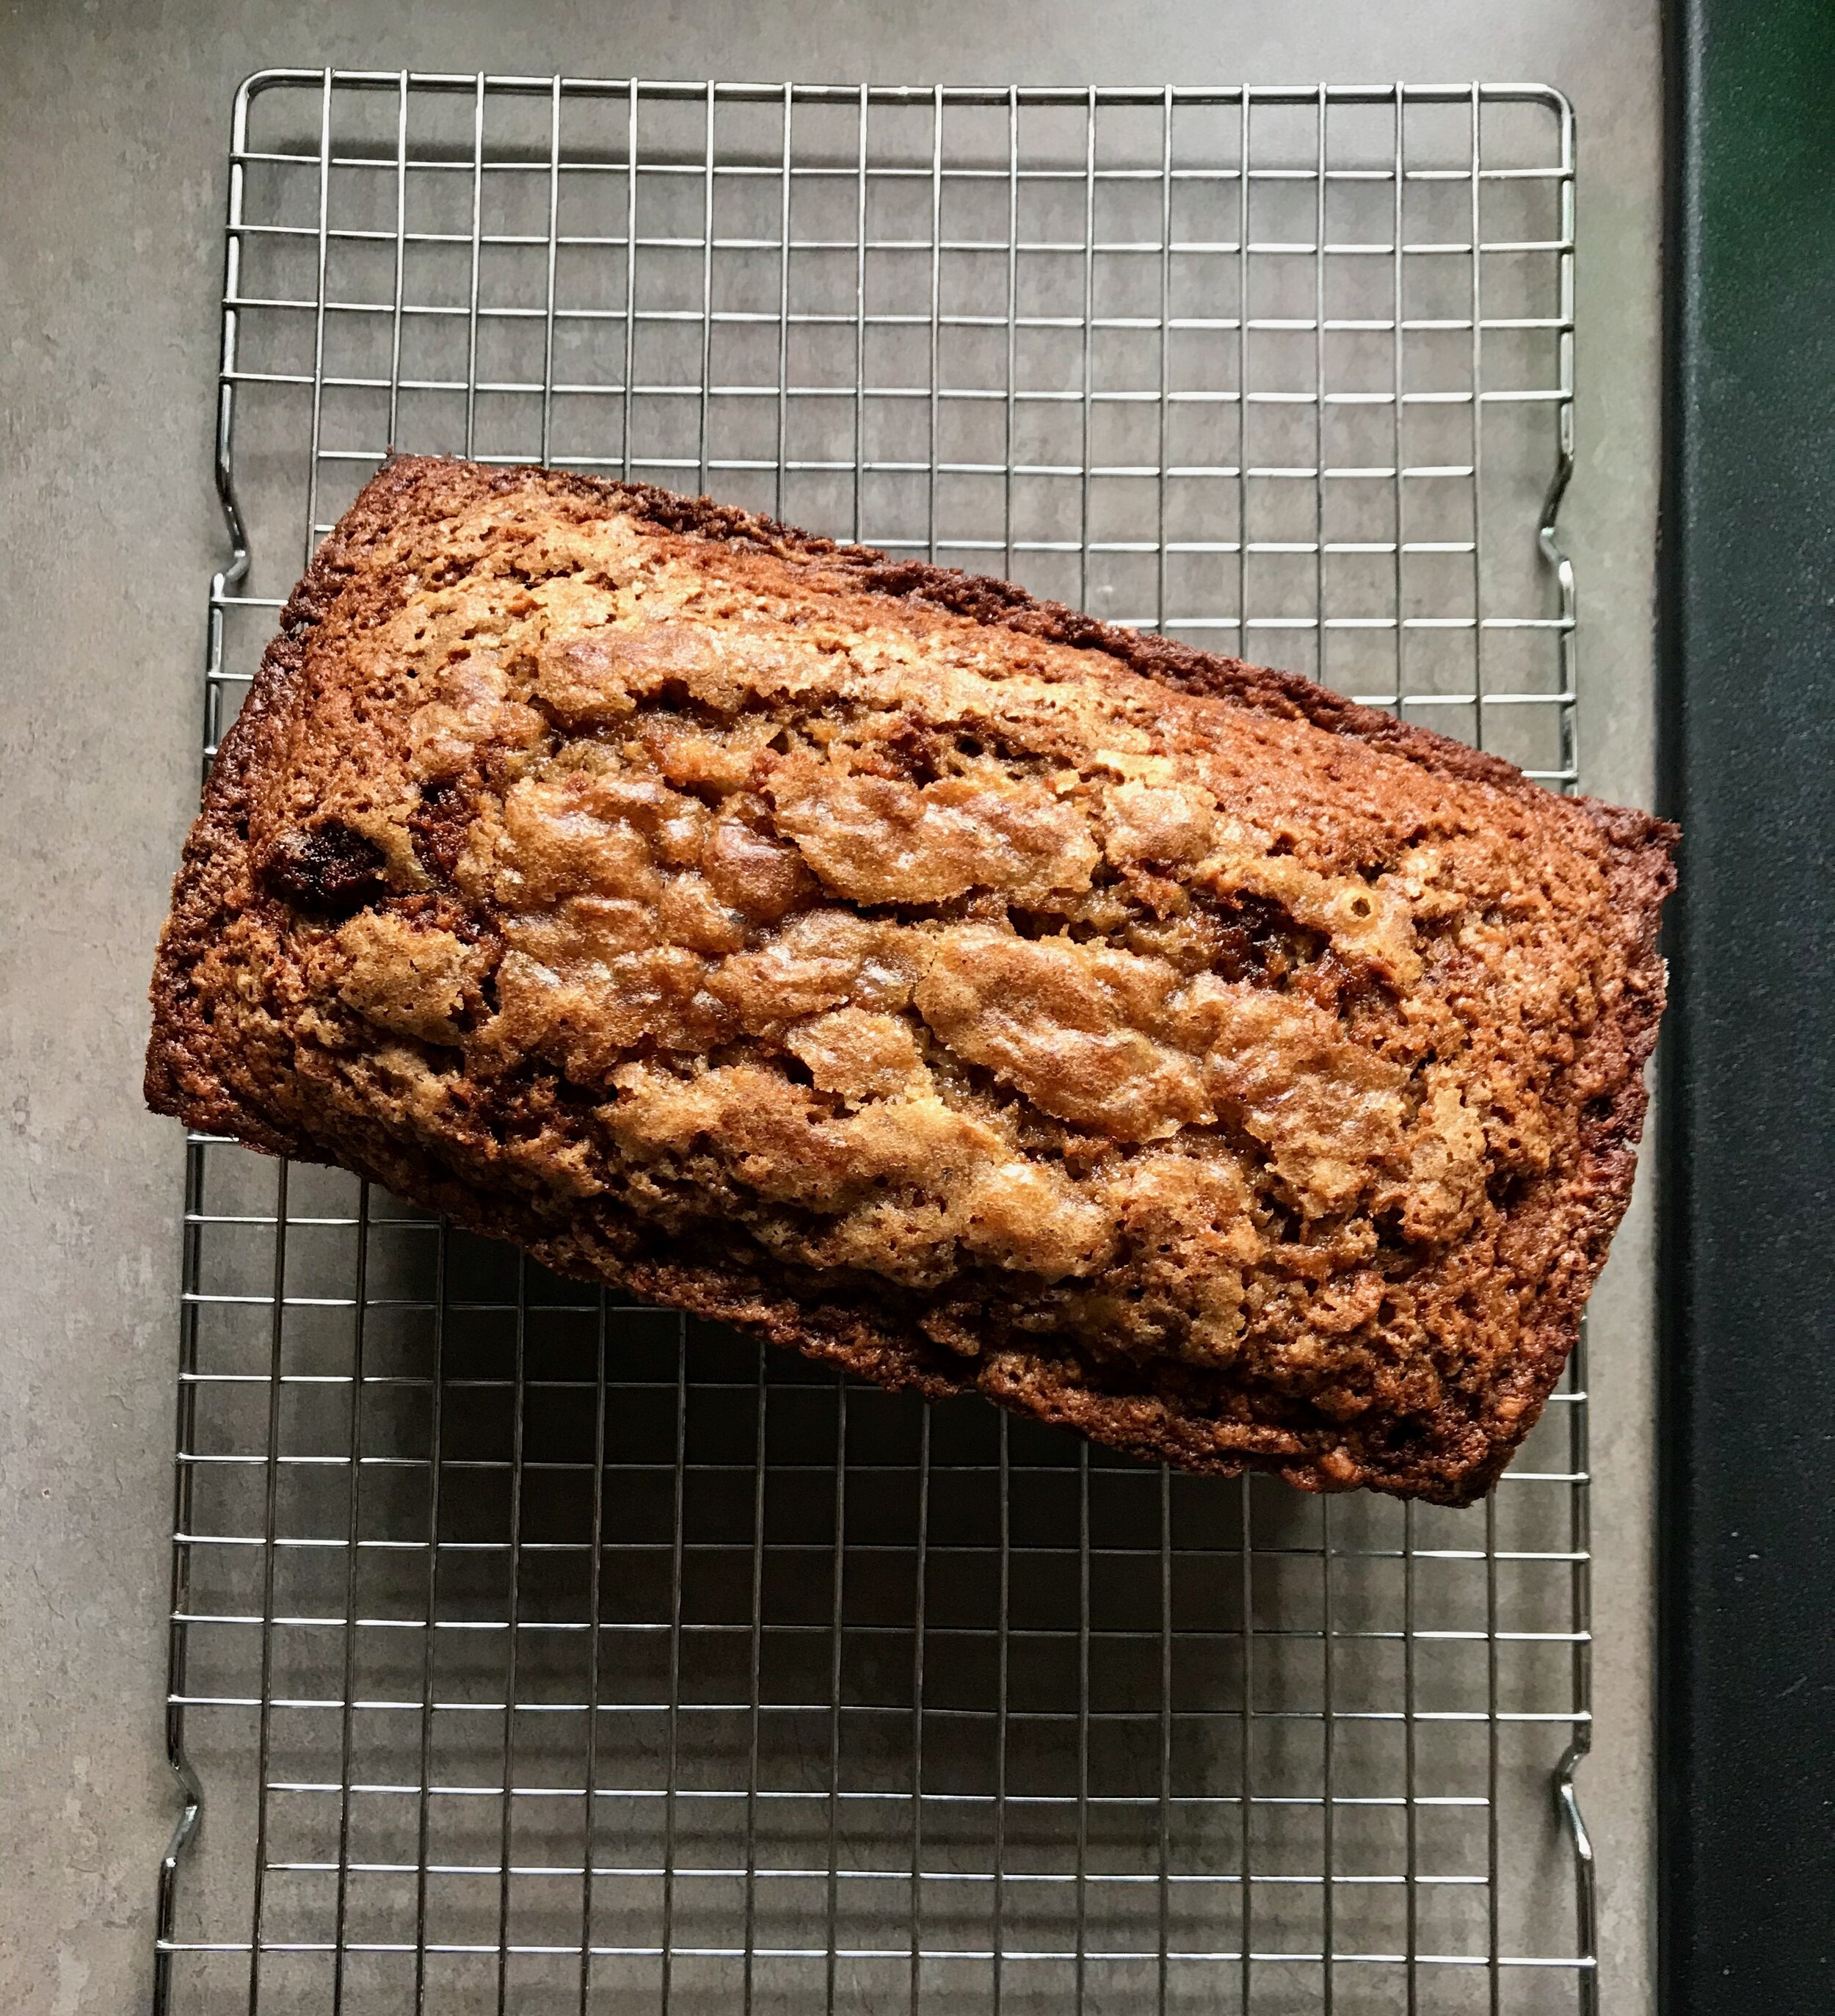
IMG_1125.jpeg

Last week I made my last baked good in my old kitchen. The day I was baking it was the first day of demo for my kitchen reno! That’s right, Lara and I are renovating our kitchen/dining room! We started thinking about this in June of last year. It was something we thought about doing “someday”, but then in June we decided to just go for it. Not sure exactly why the light switch flipped, but definitely think COVID had a lot to do with it, being stuck at home all the time. It also helped so much that the federal government changed the interest rate on all federal student loans to 0%. Yes, 0%. No interest has been collecting on my loans for months and months now. That has been so nice to see.

Anyway, I knew I had only a few days left in my kitchen so I did some baking and cooking. I had quite a bit of leftover sourdough starter in the fridge that I wanted to use up. I wanted a recipe that used a lot of it, but wasn’t difficult or didn’t take too long.

I wasn’t really even searching for a recipe that morning, but this sourdough banana bread recipe just popped up on my Instagram feed. I knew it was meant to be. I was able to get it whipped together and baked before the demolition crew showed up. Used up almost all of my leftover starter which was great.

It smelled amazing, as banana bread does, while baking. I heard the demo crew immediately comment that it smelled really good! Later in the day as they were heading out, the final loaf was still sitting on the counter and they commented again, “it’s the banana bread!”. :) When I cut it later that night I just had to set aside a few pieces for the guys the next day. I heard later that they really appreciated it!

Other than having the sourdough starter, this was a pretty basic banana bread. It was quick and easy to put together and it baked up beautifully. The baking time was actually pretty accurate, it rose well, and developed a lovely rounded and crackly crust. I am a big fan. It also taste delicious. I would probably up the cinnamon and other spices next time just because I like more of them in my banana bread, as written the spices are quite subtle.

A few specifics on what I did; I used 1/2 cup (100 grams) brown sugar instead of 2/3 cup as stated in the recipe. Since there is also 1/4 cup honey I thought this would be fine, and it was. I didn’t notice any missing sugar/sweetness. I also added a few additional spices, just a pinch of allspice and cloves. But as stated above I would probably add more spices next time, if nothing else I would increase the cinnamon. I used about 3 + 1/3 medium/average sized bananas to get to 397 grams required in the recipe. I also added a little whole wheat flour, using a little under a cup of home ground white winter wheat that I ground before the kitchen was gone and am storing in the freezer. I also added in walnuts, about half of what the recipe recommends, I threw in about 45-50 grams. It was a nice addition. I could definitely add more next time.

All in all this one is a keeper. I will be using this to use up sourdough starter in the future I have no doubt!


Sourdough Banana Bread
From King Arthur Baking Company
Ingredients

  • 8 tablespoons (113g) unsalted butter, at cool room temperature

  • 2/3 cup (142g) brown sugar, packed

  • 1 teaspoon vanilla extract

  • 1 teaspoon cinnamon

  • 1/4 teaspoon nutmeg

  • 1 teaspoon baking soda

  • 1 teaspoon baking powder

  • 1 teaspoon salt

  • 1 3/4 cups (397g) mashed ripe banana (from about 1 3/4 pounds unpeeled bananas) - I was too lazy to actually mash up the bananas, so I just chopped them up and through them in in chunks. They never really smoothed out in the batter, they stayed chunky, but once it was baked up it didn’t seem to matter. No chunks or weird spots in the final bread - Yay for lazy success!

  • 1/4 cup (85g) honey

  • 2 large eggs

  • 1/2 cup (113g) sourdough starter, unfed/discard

  • 2 cups (240g) Unbleached All-Purpose Flour - I used some whole wheat, a little under a cup

  • 3/4 cup (85g) chopped nuts, optional

Directions
Preheat the oven to 325°F. Lightly grease a 9" x 5" loaf pan, set aside.

In a large bowl, combine the butter, sugar, vanilla, cinnamon, nutmeg, baking soda, baking powder, and salt, beating until smooth. Add the mashed bananas, honey, eggs, and sourdough starter, again beating until smooth. Add the flour then the nuts, stirring just until smooth.

Transfer the batter to the prepared loaf pan, smoothing the top. Let it rest at room temperature for 10 minutes.

Bake the bread for 45 minutes, then gently lay a piece of aluminum foil across the top to prevent over-browning.

Bake for an additional 20-25 minutes. Remove the bread from the oven; a long toothpick or thin paring knife inserted into the center should come out clean, with a few wet crumbs clinging to it.

Allow the bread to cool for 10 minutes in the pan. Remove it from the pan and cool completely on a rack.
Bakery-Style Scones

We go through a lot of half-and-half at home between my sister and I. We each have a minimum of a morning cup of coffee every day during the week, and very often more whenever we can make it work, each with a little dollop of half-and-half because that’s the only way to drink it in my opinion. There are no boundaries on the weekend. In other words, we also go through a lot of coffee too.

Recently, when I walked to the neighborhood grocery store to pick up a pint of half-and-half they were out of my brand, at least in the pint size. But they did have the quart, so why not? Well, we did a good job working our way through that container, but as 3 weeks were quickly approaching I decided something had to be done to use up what was left. After thinking for a bit, I decided on scones because, well, scones. :) If you’re in the same predicament as I was, give this recipe a try, they’re delish!

IMG_3502.jpg

I made this recipe twice. The first time I made a 1.5x batch to get a really nice sized scone. They turned out beautifully, but unfortunately they were too salty. Since they just have a little sugar in them, as scones should, the salt was overpowering. Still completely edible with a nice spoonful of homemade jam, but certainly not top notch. I made them again with half the salt and a smidge more sugar and enjoyed them much more. The original recipe also calls for 2 tablespoons of milk and 4 tablespoons of cream. I just replaced all of the liquid with the half-and-half and it worked great. Perfect way to use up that last little bit of the carton!

 
IMG_3506.jpg
IMG_3503.jpg
 

Bakery-Style Scones
Adapted from Serious Eats
Ingredients

  • 9 ounces all-purpose flour (about 2 cups, spooned; 255g), plus more for dusting

  • 1 tablespoon baking powder

  • 2 teaspoons sugar

  • 1/2 teaspoon kosher salt

  • 2 ounces cold unsalted butter (4 tablespoons; 55g), cut into 1/2-inch cubes

  • 6 ounces roughly chopped milk chocolate (1 cup; 170g)

  • 6-8 ounces half-and-half (or a mix of milk [2 ounces] and heavy cream [4 ounces])

  • ~1 cup mixed nuts and dried fruit (I used almonds, pecans, cranberries and cherries)

Directions
Adjust oven rack to lower-middle position and preheat to 400°F (204°C). Sift flour into a medium bowl, then whisk in baking powder, sugar, and salt. Add butter and use a pastry blender, or two forks, to work the butter into the flour until it resembles a coarse meal. Add nuts and dried fruit and toss to combine, then stir in the 1/2 and 1/2 to form a soft (but not wet) dough.

Turn dough out onto a lightly floured surface and pat into a 7-inch round. Cut into 6 or 8 wedges with a chef’s knife or a bench scraper. Sprinkle generously with coarse sugar, and arrange on a parchment-lined half sheet pan. Bake until puffed and golden, 25-30 minutes. Serve warm with clotted cream, jam, or a spoonful of whipped cream.

Scones are best eaten the day they are made. They do freeze well however if you have leftovers. When ready to eat, thaw to room temperatures. Reheat in a preheated 425 degree oven for 4-6 minutes until heated through and crisp, but before they start to bake through again and dry out.

Chocolate Greek Yogurt Banana Bread

My sister served me this bread last week for breakfast and I enjoyed it quite a bit, so this weekend I decided to make myself a loaf. It's a wholesome chocolate banana bread made with whole wheat flour and Greek yogurt. When eating a breakfast bread, I like like having a nice thick slice; something I can really sink my teeth into. This bread is perfect for that. And topped with a little peanut butter for a little extra protein umph is my favorite way to finish it off! 

IMG_0682.jpg

I streamlined the original recipe here, just so I didn't have to use as many bowls! Mix the wet ingredients in one bowl, the wet in another and mix them together. Done. I also did what I seem to always do and cut back on the sugar from 1/2 c honey, to 2 tbs honey + 2 tbs brown sugar (so 1/4 cup total). Feel free to double this for a sweeter and more indulgent bread. 

 
IMG_0675.jpg
IMG_0677.jpg
 

Chocolate Greek Yogurt Banana Bread
Adapted from The Baker Mama 
Ingredients

  • 1 1/2 cups (180 grams) whole wheat flour
  • 1/2 cup (40 grams) unsweetened cocoa powder
  • 1 1/2 teaspoons baking powder
  • 1/2 teaspoon kosher salt
  • 1/2 cup plain Greek yogurt
  • 2 tablespoons (42 grams) honey
  • 2 tablespoons (25 grams) brown sugar
  • 1 large egg
  • 1 teaspoon vanilla
  • 1/2 cup (110 grams) milk
  • 1 cup (225 grams) mashed ripe banana; about 2 large bananas
  • 1/2 - 1 cup dark chocolate chips or chunks (optional)

Directions
Preheat oven to 350°F. Lightly grease and flour a 9x5-inch loaf pan and set aside. In a medium bowl, whisk together the flour, cocoa powder, baking powder and salt, set aside.

In a large bowl, beat together the remaining ingredients until well combined. Add the dry mixture to the wet mixture and mix with a spatula until mostly combined. Add in the chocolate chips or chocolate chunks if using, and continue to mix until completely combined with no more streaks of dry flour in the batter. Batter will be thick.

Spread batter evenly into prepared loaf pan. Press more chocolate chips into the top of the batter before baking, if desired. Bake on the middle rack of the oven for about 50 minutes, turning halfway through, or until a toothpick inserted in the center of the loaf comes out with a few moist crumbs. Let the bread cool in the pan for about 20 minutes before removing to a wire rack to cool completely and serve.

Yields: 8-10 slices

Oat Flour Banana Carrot Muffins

I recently stumbled over this recipe for a simple and nutritions blender muffin. I had a carrot in the fridge, and bananas turning brown on the counter so it was almost like it was meant to be! I went to work putting it all together and am glad I did. These muffins turned out delicious; light and moist, full of whole grains, healthy fats, fresh fruit and fresh veggies. How great is that? They are also made with no wheat flour, and no dairy, so if you are avoiding either of those this is another plus. They are not vegan due to the 2 eggs, but you could always try a vegan egg replacement if this is something you care about. 

I followed the original recipe other than decreasing the honey just a bit from 1/4 c to 2 tablespoons and didn't miss it at all. The bananas themselves are nice and sweet. I also had a little freezer jam hanging out that I decided to add to the center of the muffin for a little sweet surprise! You can't see it in the picture, but it's there, I promise! It's a fun addition if you have some extra jam lying around. If you use peanut butter as your nut butter it'll turn these muffins into a "PB&J muffin"! Yum!

IMG_0670.jpg

Oat Flour Banana Carrot Muffins
Adapted from Running with Spoons
Ingredients

  • 1 1/2 cups (120 grams) oats
  • 2 tablespoon (14 grams) flaxseed
  • 1 teaspoon ground cinnamon
  • 1/4 teaspoon ground nutmeg
  • 2 teaspoons baking powder
  • 1/2 teaspoons baking soda
  • 1/4 teaspoon salt
  • 2 large eggs
  • 6 tbsp (96 grams) almond or peanut butter
  • 2 tablespoons (40 grams) honey
  • 2 teaspoons vanilla extract
  • 2 medium bananas (200 grams or 1 cup)
  • 1 cup (115 grams) shredded carrot, about 1 medium carrot

Directions
Preheat your oven to 350 degrees and prepare a muffin pan by lining the cavities with parchment paper liners or greasing them well with oil. Set aside.

Add all the dry ingredients (oats through salt) to a high-speed blender, and process on high until the oats have broken down into the consistency of a fine flour.

Add all of the remaining ingredients except for the carrots, and process on high until the batter becomes smooth and creamy, about 30 seconds. Periodically stop and scrape down the sides of your blender, if necessary. Transfer the batter to a medium-size mixing bowl and fold in the carrots by hand.

Spoon the batter into the prepared muffin cups, filling each one about 3/4 of the way full.
Bake for 16 - 18 minutes, until the tops of your muffins begin to turn golden brown and a toothpick inserted into the center comes out clean. Allow the muffins to cool in the pan for 10 minutes before transferring them to a wire rack to cool completely. 

Yields: 10 muffins
Approximate calorie count: 165 calories

Brownie Batter Chocolate Oat Muffins

When it comes to breakfast, I love a good egg sandwich, avocado toast, or a delicious scramble full of peppers, mushrooms, sausage and cheese. However, where my heart truly lies, and what I really want every morning, is with a sweet breakfast. I just have a big old sweet tooth when it comes to breakfast (and really any time), and I will almost always choose a sweet breakfast over a savory one despite how good those savory breakfasts may be. (I usually just end up have a savory "breakfast" for dinner, problem solved!)

I especially love chocolate for breakfast. I don't think I really need to explain it any more than that. Chocolate. Breakfast. Enough said. But even though I love sweets for breakfast, I don't always feel good about eating them. These brownie batter muffins solve that problem. They are sweet and chocolatey, yet have some nutrition in them, and are not just empty calories. Yes, you can have the best of both worlds! 

IMG_0657.jpg

These yummy little brownie batter muffins are easy to make. Really just need one bowl and some simple ingredients. I cut down on the maple syrup from the original recipe from 1/2 to 1/4 cup to make them a little healthier and I thought they were just fine. So naturally sweetened with the maple syrup if that's your kind of thing. I'm sure honey would be fine as well, or just regular white or brown sugar if that's all you have, although I have not actually tried this I bet it would be fine. There is some protein and healthy fat from the almond butter (yes peanut butter would work just fine too). And you can go ahead and add in anything else that floats your boat; chocolate chips or chunks, cocoa nibs, any nut you like, even some fresh or frozen berries, or dried fruit. Customize away, and enjoy!

 
IMG_0654.jpg
 

Brownie Batter Chocolate Oat Muffins
Adapted from Running with Spoons
Ingredients

  • 1 large egg
  • 3/4 cup (6 ounces) milk
  • 1/4 cup (75 grams) maple syrup
  • 1/4 cup (64 grams) almond butter
  • 2 tsp vanilla extract
  • 2 cups (160 grams) old fashioned oats
  • 1/2 cup (60 grams) whole wheat flour or whole wheat rye flour
  • 1/4 cup (20 grams) unsweetened cocoa powder
  • 1 1/2 tsp baking powder
  • Cocoa nibs (optional)
  • Chopped chocolate (optional)

Directions
Preheat your oven to 350 degrees and prepare a muffin pan by spraying the cavities with cooking spray or lining them with parchment paper liners. Set aside.

In a large mixing bowl, lightly beat the egg. Whisk in the milk, maple syrup, almond butter, and vanilla, mixing until smooth. Add the oats, flour, cocoa powder, and baking powder, and mix until well combined. Add the cocoa nibs and chocolate and give one more good stir to combine. 

Spoon the batter into the prepared muffin cups, filling each until about 3/4 full. 

Bake for 15-20 minutes, or until a toothpick inserted into the centre comes out clean. Allow the muffins to cool in the pan for about 5 minutes before transferring them to a wire rack to cool completely. 

Yields: 10 muffins
Approximate Calorie Count: 190 calories each
 

Pflaumenkuchen

Every year there seem to be "new" discoveries to make at the farmers market. Some fruit or vegetable that I just never really noticed before seems to jump out at me and I start seeing it everywhere, and see recipes all over the internet that I probably would have just skipped over before. This year I "discovered" Italian Prune Plums. They are a small, egg shaped, dark purple/almost black plum that is nice enough raw, really shines when baked. Hence this recipe. I bought a small basket a few weeks ago and ate them raw in yogurt with granola. Nice, but certainly not something to write home about. But then I saw the recipe for this yeasted breakfast cake. The description of the plums baking up into a "sweet-tart, floral, rich, and grapey" when cooked left my mouth watering. I was hooked. 

IMG_1312.jpg

This cake was a simple yeasted dough that was mildly sweet with just a little richness from butter and an egg. The perfect compliment to the juicey and tart plums that really did bake up into a deliciously jammy topping. Covered in a good handful of cinnamon sugar it really was the perfect late summer breakfast treat. Paired with a steaming cup of coffee you will not go wrong. 

 
IMG_1307.jpg
IMG_1320.jpg
IMG_1327.jpg
IMG_1315.jpg
IMG_1331.jpg
 

Pflaumenkuchen (Yeasted Plum Cake) 
Adapted from Sweet Amandine, originally from My Berlin Kitchen, by Luisa Weiss
Ingredients
For the dough:

  • 1 1/2 cups plus 2 tablespoons (195 grams) all-purpose flour
  • 2 tablespoons (25 grams) sugar
  • 1 1/2 teaspoons instant yeast
  • Grated zest of half a lemon (optional, I didn't have one but I know it would be great)
  • 1 teaspoon vanilla extract
  • 1/4 teaspoon salt
  • 6-8 tablespoons (3-4 ounces) whole milk
  • 3 tablespoons (1 1/2 ounces) unsalted butter
  • 1 egg 

For the fruit and topping:

  • 1¼ pounds Italian prune plums
  • 3 tablespoons sugar
  • 2 teaspoons cinnamon
  • 2 tablespoons unsalted butter, melted and cooled

Directions
Butter the bottom and sides of a 9-inch springform pan or cake pan.   

Make the dough:  
Put the milk and the 3 tablespoons butter into a small saucepan and heat over the lowest possible flame, swirling occasionally, until the butter has just melted.  Add the vanilla extract. Set aside to cool until lukewarm.  Meanwhile, blend the dry ingredients - the flour, 2 tablespoons sugar, yeast, lemon zest, and salt - in the bowl of a stand mixer fitted with the dough hook. 

In a medium bowl, whisk together the egg with the lukewarm milk and butter.  Pour the mixture into the dry ingredients, and stir with a wooden spoon until you have a loose dough.  Knead on medium speed for about 4 minutes, or until a smooth dough forms.  If your dough is sticky, add a tablespoon or two of flour, only as much as you need to keep it manageable.  Form the dough into a ball, place it in the buttered pan, cover with a towel, and let it rise until it's doubled in bulk, anywhere from one to two and a half hours, depending on the temperature of your kitchen.

Prepare the fruit and topping:
While the dough rises, heat the oven to 350 degrees, and pit and quarter the prune plums.  Stir together the remaining 3 tablespoons of sugar and the cinnamon in a small bowl and set aside.  Melt the remaining 2 tablespoons of butter and leave to cool.         

When the dough is ready, deflate it with your fingertips.  Push it down evenly along the bottom of the pan and about 1-inch up the sides.  Gently press the quartered plums into the dough at a 45-degree angle, making concentric circles.  (Start at the edge and work your way toward the middle.)  If you have extra plums on your cutting board once you've arranged your circles, squeeze them in somewhere.  The more plums, the better.  Sprinkle with the cinnamon-sugar mixture, spoon the melted butter over top, and set aside, uncovered, for 20 minutes.

Bake for 40-45 minutes (the original recipe called for 30-40 minutes, but mine was definitely not done at 30 minutes, and was questionable at 40; I'd start checking at 30 just in case your oven runs a little hotter than mine, but it may take 45 + minutes so use your best judgement), until the crust is brown and the plums are bubbling.  Cool until the fruit is no longer hot.  

Buckwheat Applesauce Breakfast Cake

Cake for breakfast? Always a good idea in my book. While this recipe is not a cake in the traditional sense, light, airy and super rich, it kind of has an indulgent feel when topped with a yummy yogurt almond frosting. It's not a very sweet cake - dense and hearty in texture, yet still super moist thanks to the applesauce. The buckwheat flour really adds a unique dimension in both flavor and texture. There is a lovely bitterness to this cake from this flour which I love, but might take a little getting used to. And because buckwheat is not "wheat", it behaves differently in baking. It results in a cake that is almost a little sandy in texture, and more dense than a traditional baked good. 

I adapted the recipe (because I just can't help myself!). The original used almond flour in addition to the buckwheat, and coconut oil. I replace these with whole wheat flour and butter instead. This likely altered the texture somewhat but in the end I loved the results, so it doesn't really matter! I also used some liquid whey (leftover from homemade yogurt) instead of almond milk, but I'm sure buttermilk would also work Finally, I adjusted the spices somewhat based on my preferences, and the time of year and replaced the molasses with maple syrup along the same vein. Overall, this dense, somewhat bitter but very interesting "cake", topped with a healthy yogurt and almond butter frosting ticks all the right buttons for me. The most important thing being that it's delicious. In the end that's all that really matters!

Buckwheat Applesauce Breakfast Cake
Adapted from Edible Perspective
Ingredients

  • 1 1/4 c buckwheat flour (150 grams)
  • 1/2 cup (60 grams) whole wheat flour
  • 2 tablespoons (25 grams) brown sugar
  • 1/2 teaspoon cinnamon
  • 1/4 teaspoon cardamom
  • 1 teaspoon baking powder
  • 1/2 teaspoon salt
  • 2 eggs
  • 1 cup buttermilk or liquid whey
  • 2/3 cup (170 grams) unsweetened applesauce, I used homemade (alternatively, can use several cups of grated apple, somewhere around 250 grams, the recipe is very forgiving)
  • 2 teaspoons vanilla
  • 3 tablespoons (42 grams) butter, melted
  • 3 tablespoons (60 grams) maple syrup (or honey)

Directions
Preheat your oven to 350* F and line a 9x9 pan with parchment, or grease thoroughly.  Stir the buckwheat flour, whole wheat flour, sugar, cinnamon, cardamom, baking powder, and salt in a large bowl until well mixed.  In another bowl whisk the eggs together.  Then whisk in the milk, applesauce, vanilla, butter and maple syrup until fully combined.  Pour the wet ingredients into the dry ingredients and stir until just combined.

Pour the batter into your pan and spread evenly.  Bake for 38-40 minutes, testing with a toothpick for doneness.  You want the toothpick to be slightly sticky, not gooey or dry.  Allow to cool for 10-15 minutes before slicing. Serve with a dusting of powdered sugar, or with almond butter frosting (recipe below). 

Almond Butter Frosting
From Delectably Mine
Ingredients

  • 1 tablespoon almond butter
  • 2 tablespoons Greek yogurt
  • 1/2 teaspoon maple syrup (optional)
  • couple shakes of cinnamon
  • Pinch of salt (optional)

Directions
Mix together the almond butter and Greek yogurt until well combined and smooth. Add in the maple syrup, cinnamon and salt and stir to combine. Taste and adjust flavorings if desired, adding a little more almond butter if it is too tangy, a little more yogurt if it is too thick, or a little extra maple syrup if you want it a little sweeter. Spoon frosting onto each slice of cake, or spread in an even layer over the top of each piece. 

Lavender Orange Scones

This past week I was feeling the itch to bake something special, but wasn't sure what that should be. I took stock of what I had in the fridge and pantry and found a lonely little orange as well as some dried lavender from last spring. With a quick recipe search I found a recipe for chocolate orange scones. Perfect. At first I was going to go with the classic chocolate orange combination, but then decided that since it's spring and I have some beautiful dried lavender that I would try that combination instead. I figured that the sweet and tart orange would pair well with the floral lavender and I was right. These two flavors compliment each other perfectly and make for a light and fragrant scone, perfect for a leiesurely spring breakfast. 

I've used citrus zest and juice in baked goods plenty of times in the past, but I've never put the actual flesh into a muffin or scone or cake so I wasn't quite sure how it would turn out. I should not have worried, these scones baked up perfectly with little pockets of sweetness due to the orange segments mixed throughout. If you have it, I think some chopped white chocolate would also be a wonderful addition to these lovely spring scones. 


Lavender Orange Scones
Adapted from Vanilla and Bean
Ingredients

  • 1/2 stick (2 ounces) cold butter
  • 1 Orange
  • 2-3 tablespoons whole milk, half and half, or heavy cream
  • 1 tablespoon honey
  • 1/2 teaspoon vanilla Extract
  • 1/2 cup + 1 tablespoon (70 grams) all purpose flour
  • 1/2 cup (60 grams) whole wheat flour
  • 1/4 cup (30 grams) oat flour
  • 1 tablespoon (8 grams) cornstarch
  • 2 tablespoons (25 grams) brown sugar
  • 1/2 teaspoon baking powder
  • 1/2 teaspoon baking soda
  • 1/8 teaspoon salt
  • 1/2-1 teaspoon dried lavender
  • Turbinado sugar, for sprinkling, optional

Directions
Line a sheet pan with parchment paper. Cut the cold butter into 1/4 inch cubes and place in the refrigerator while prepping the other ingredients.

Zest the orange, peel and chop the flesh into small pieces, taking care to reserve the juices. Place the flesh into a small bowl and add about 1 Tbs of all purpose flour. Stir to coat. Set aside. In a measuring cup mix the orange juice and zest, milk, honey, and vanilla extract. Set aside. 

Add the flours, corn starch, brown sugar, baking powder, baking soda, salt and lavender into a large mixing bowl. Add the cold butter to the sifted ingredients and use a pastry cutter (or two forks) to cut in the butter into the pastry. The butter should be about pea size, evenly coated, and distributed in the flour.

Pour the wet ingredients into the dry ingredients. Gently stir the mixture until the flour is just moistened. The dough will be shaggy and seem dry but avoid the temptation to add additional liquid. Add the chopped orange pieces. Fold in to incorporate, eventually using your hands to press and fold the dough together, just a few times. Squeeze a portion of the dough in your fist. It should loosely hold together. 

Dump the contents out of the bowl onto a flour dusted work surface and press the dough together forming a circle. You may need to work it a little bit with your hands to bring it all together. Work gently, but quickly to keep the dough as cold as possible. Use a bench scraper, or a knife, to cut the circle into 4 to 6 triangles. Transfer the cut scone to the prepared baking sheet. 

Place scones on the parchment lined sheet pan and rest in the fridge or freezer for 20 minutes, while the oven is preheating to 425F. 

Before baking, moisten the top of the scones with a little milk and sprinkle the raw sugar evenly over the top of each scone. Bake for 10 minutes at 425 degrees, then turn the oven down to 375 degrees, rotate the baking sheet, and bake for an additional 15 minutes until the scones are golden brown and cooked through. Remove from oven and carefully transfer scones to a cooling rack. 

Yields: 4-6 scones