Stuffed Pork Loin with Chimichurri

IMG_0783.jpeg

Last Saturday Lara and I hosted a small Christmas gathering with our friend Lindsay and her husband Andrew. They both enjoy good food and trying new things so we were excited to try a new recipe, something fun we’ve never done before.

We thought that a stuffed pork loin sounded festive, fun, and celebratory. Something we won’t typically cook for ourselves, and sadly something our family just won’t enjoy that much so not something to make for them. I’m very thankful for friends who are excited about trying new things, because my family (however much I love them) isn’t.

We did some recipe hunting and settled on this recipe for an Argentinian style pork roast stuffed with olives, roasted red peppers, Chimicurri and other tasty things - a combination of things I would never think about putting together which is why I was excited to try it.

IMG_0792.jpeg

This was good to get me out of my typical routine (which for the last few months has been FULL of fresh lemon, parmesan, and garlic… so good!).

IMG_0800.jpeg
IMG_0758.jpeg

This recipe definitely had a lot of steps, but wasn’t difficult. Getting your mise en place done ahead of time is extremely helpful so I recommend prepping everything before starting to put the roast together. Make your chimichurri (or buy a good store bought version if that’s more your style, no shame in that if that’s what works for you). Get your spice mixture together, and then lay everything else out so it’s at hand and ready to go; your olives, peppers, capicola, breadcrumbs, and eggs (if using).

I made the chimichuri in the recipe below with a slight variation. I didn’t have any fresh oregano but could get fresh cilantro and parsley from the farmers market so I used that combination. I also made 2/3 of the recipe as printed and there was still plenty of it.

IMG_0723.jpeg

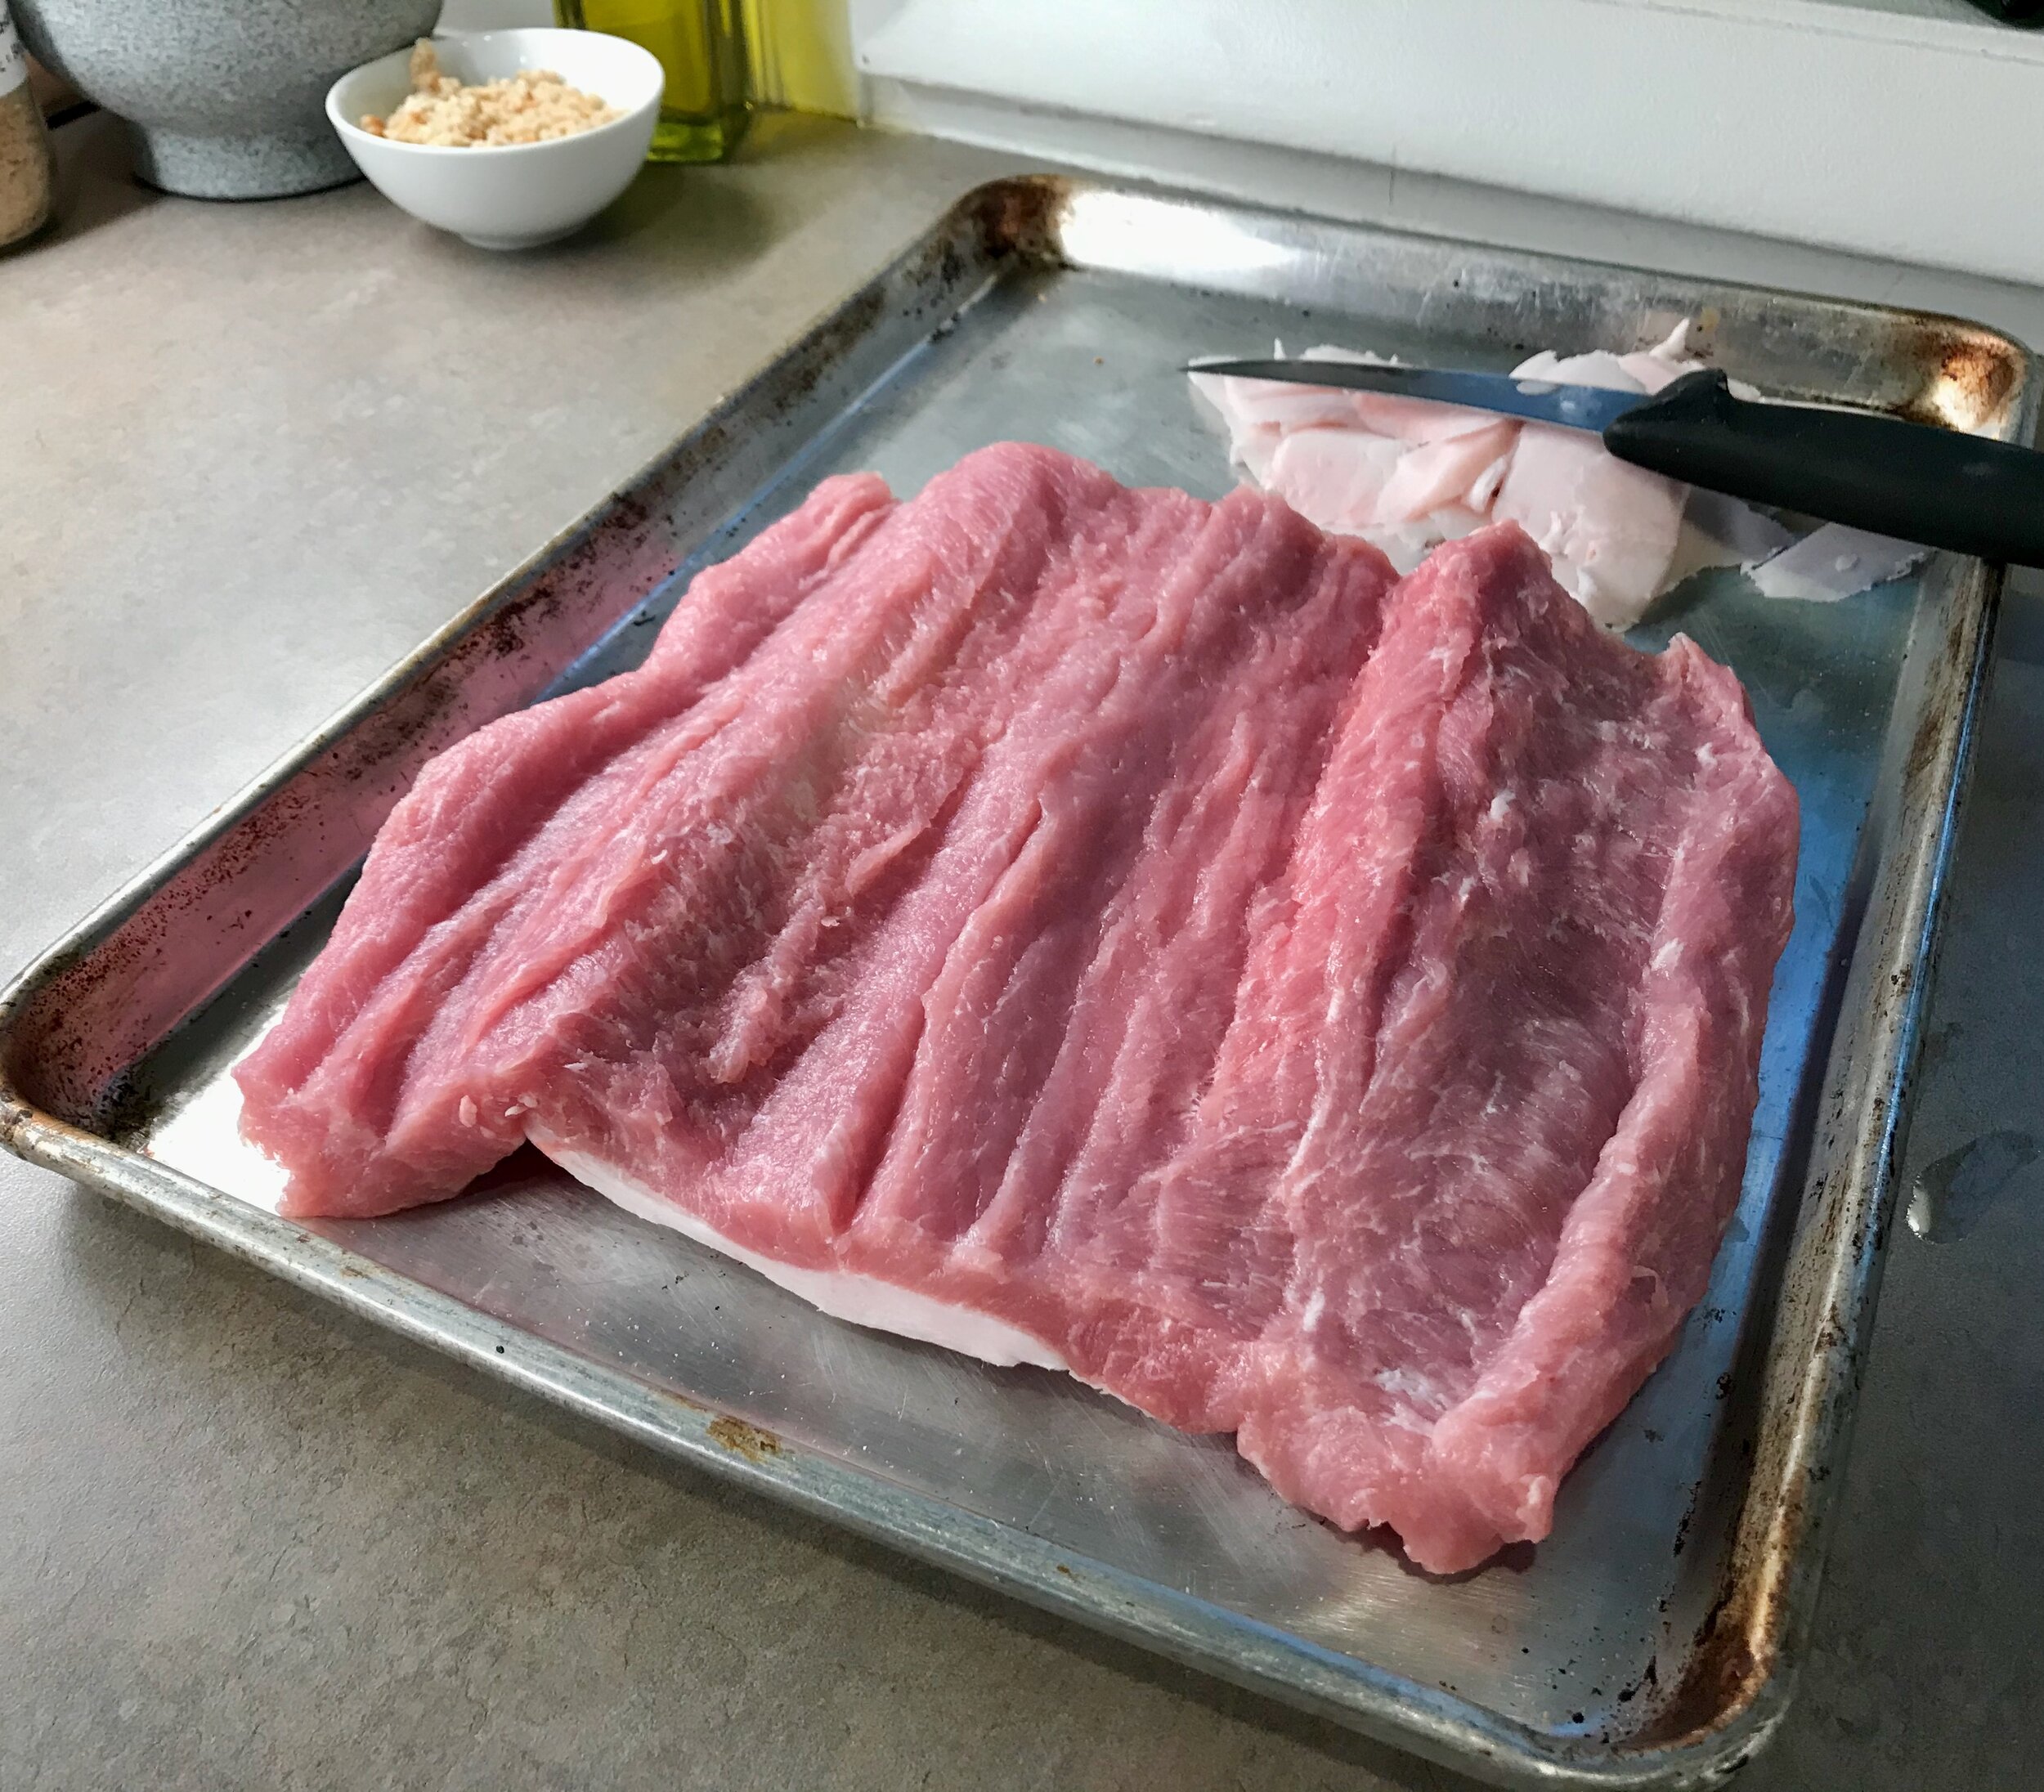
I do think a really good cut of pork is critical to the best final product. I bought a gorgeous 3.3 lb (I went slightly smaller than the recipe called for without any issues) center cut pork loin from my favorite butcher (Louise Earl Butcher for those in Grand Rapids, Matt is the best!). This roast was gorgeous! It had a beautifully thick cap of fat which roasted up so tasty. The recipe says to not trim this fat cap, but I did end up trimming a little from mine because it was so thick to start. It did not detract from the finished roast, there was still an ample amount of fat.

The most challenging/technical part of the recipe was cutting the roast open so that I could stuff it. I watched a video which helped. It’s important to have a good sharp knife, and to go slow. This was the first time I had done this and it turned out fine.

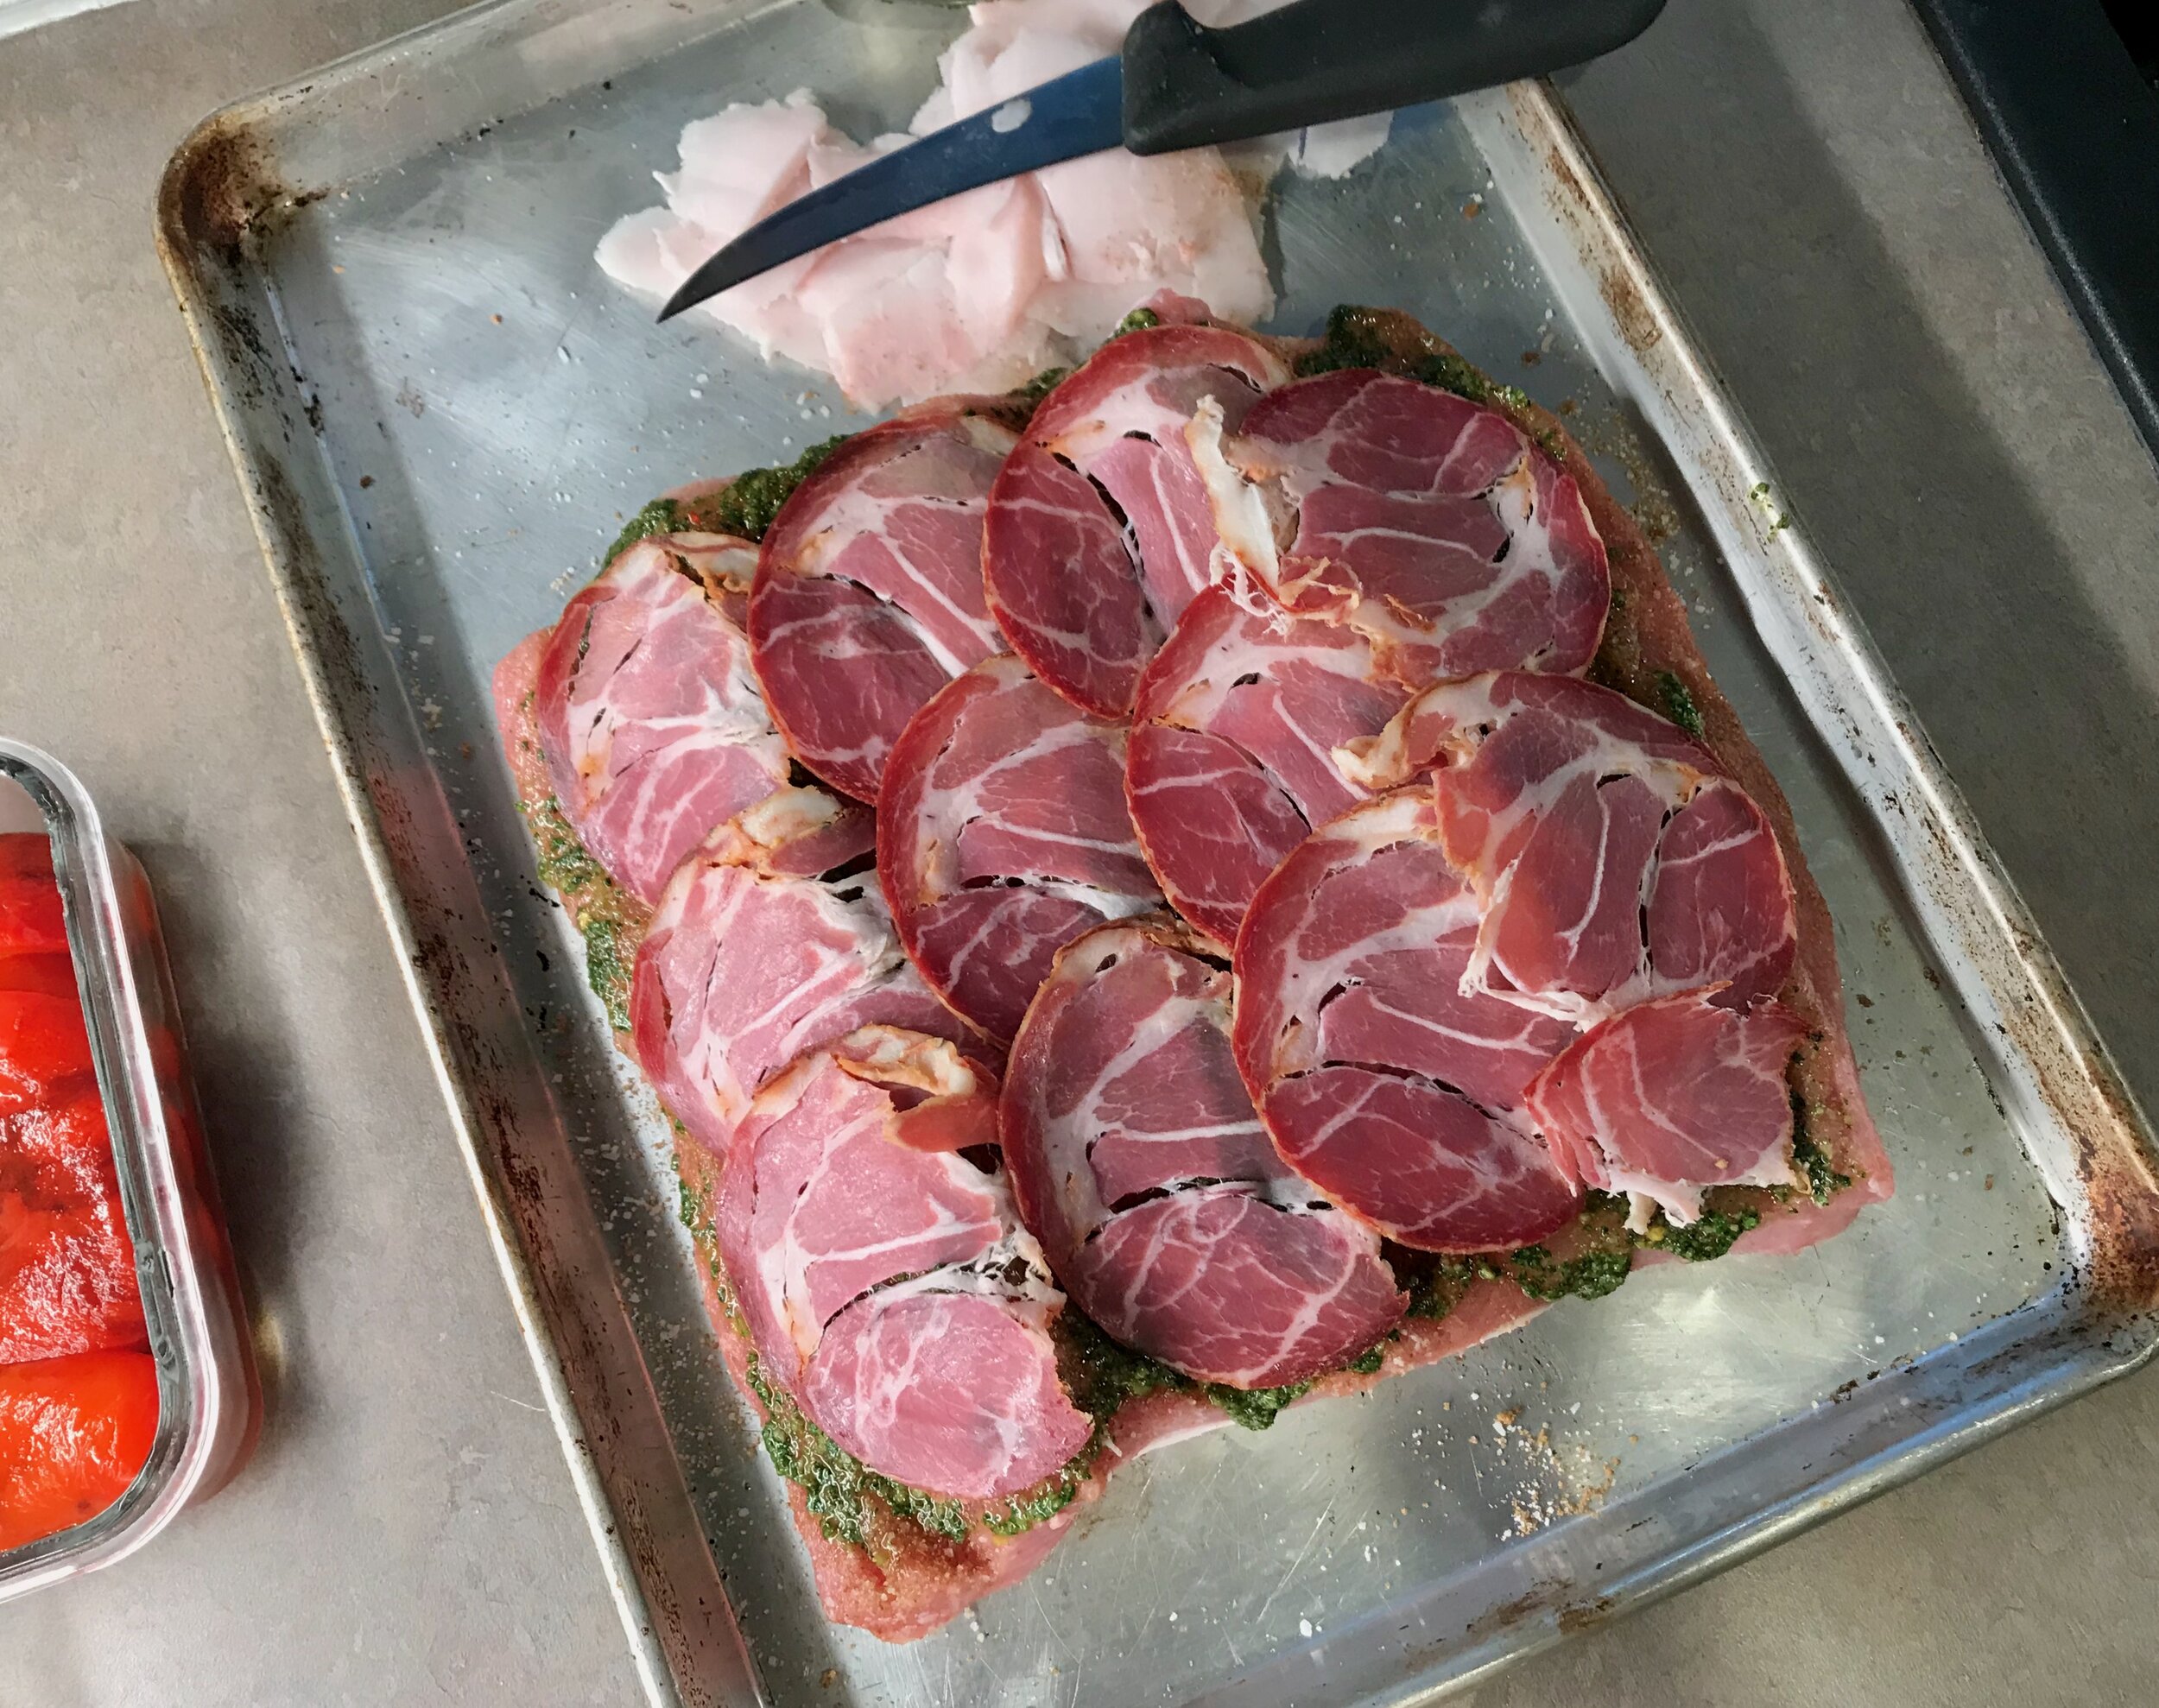
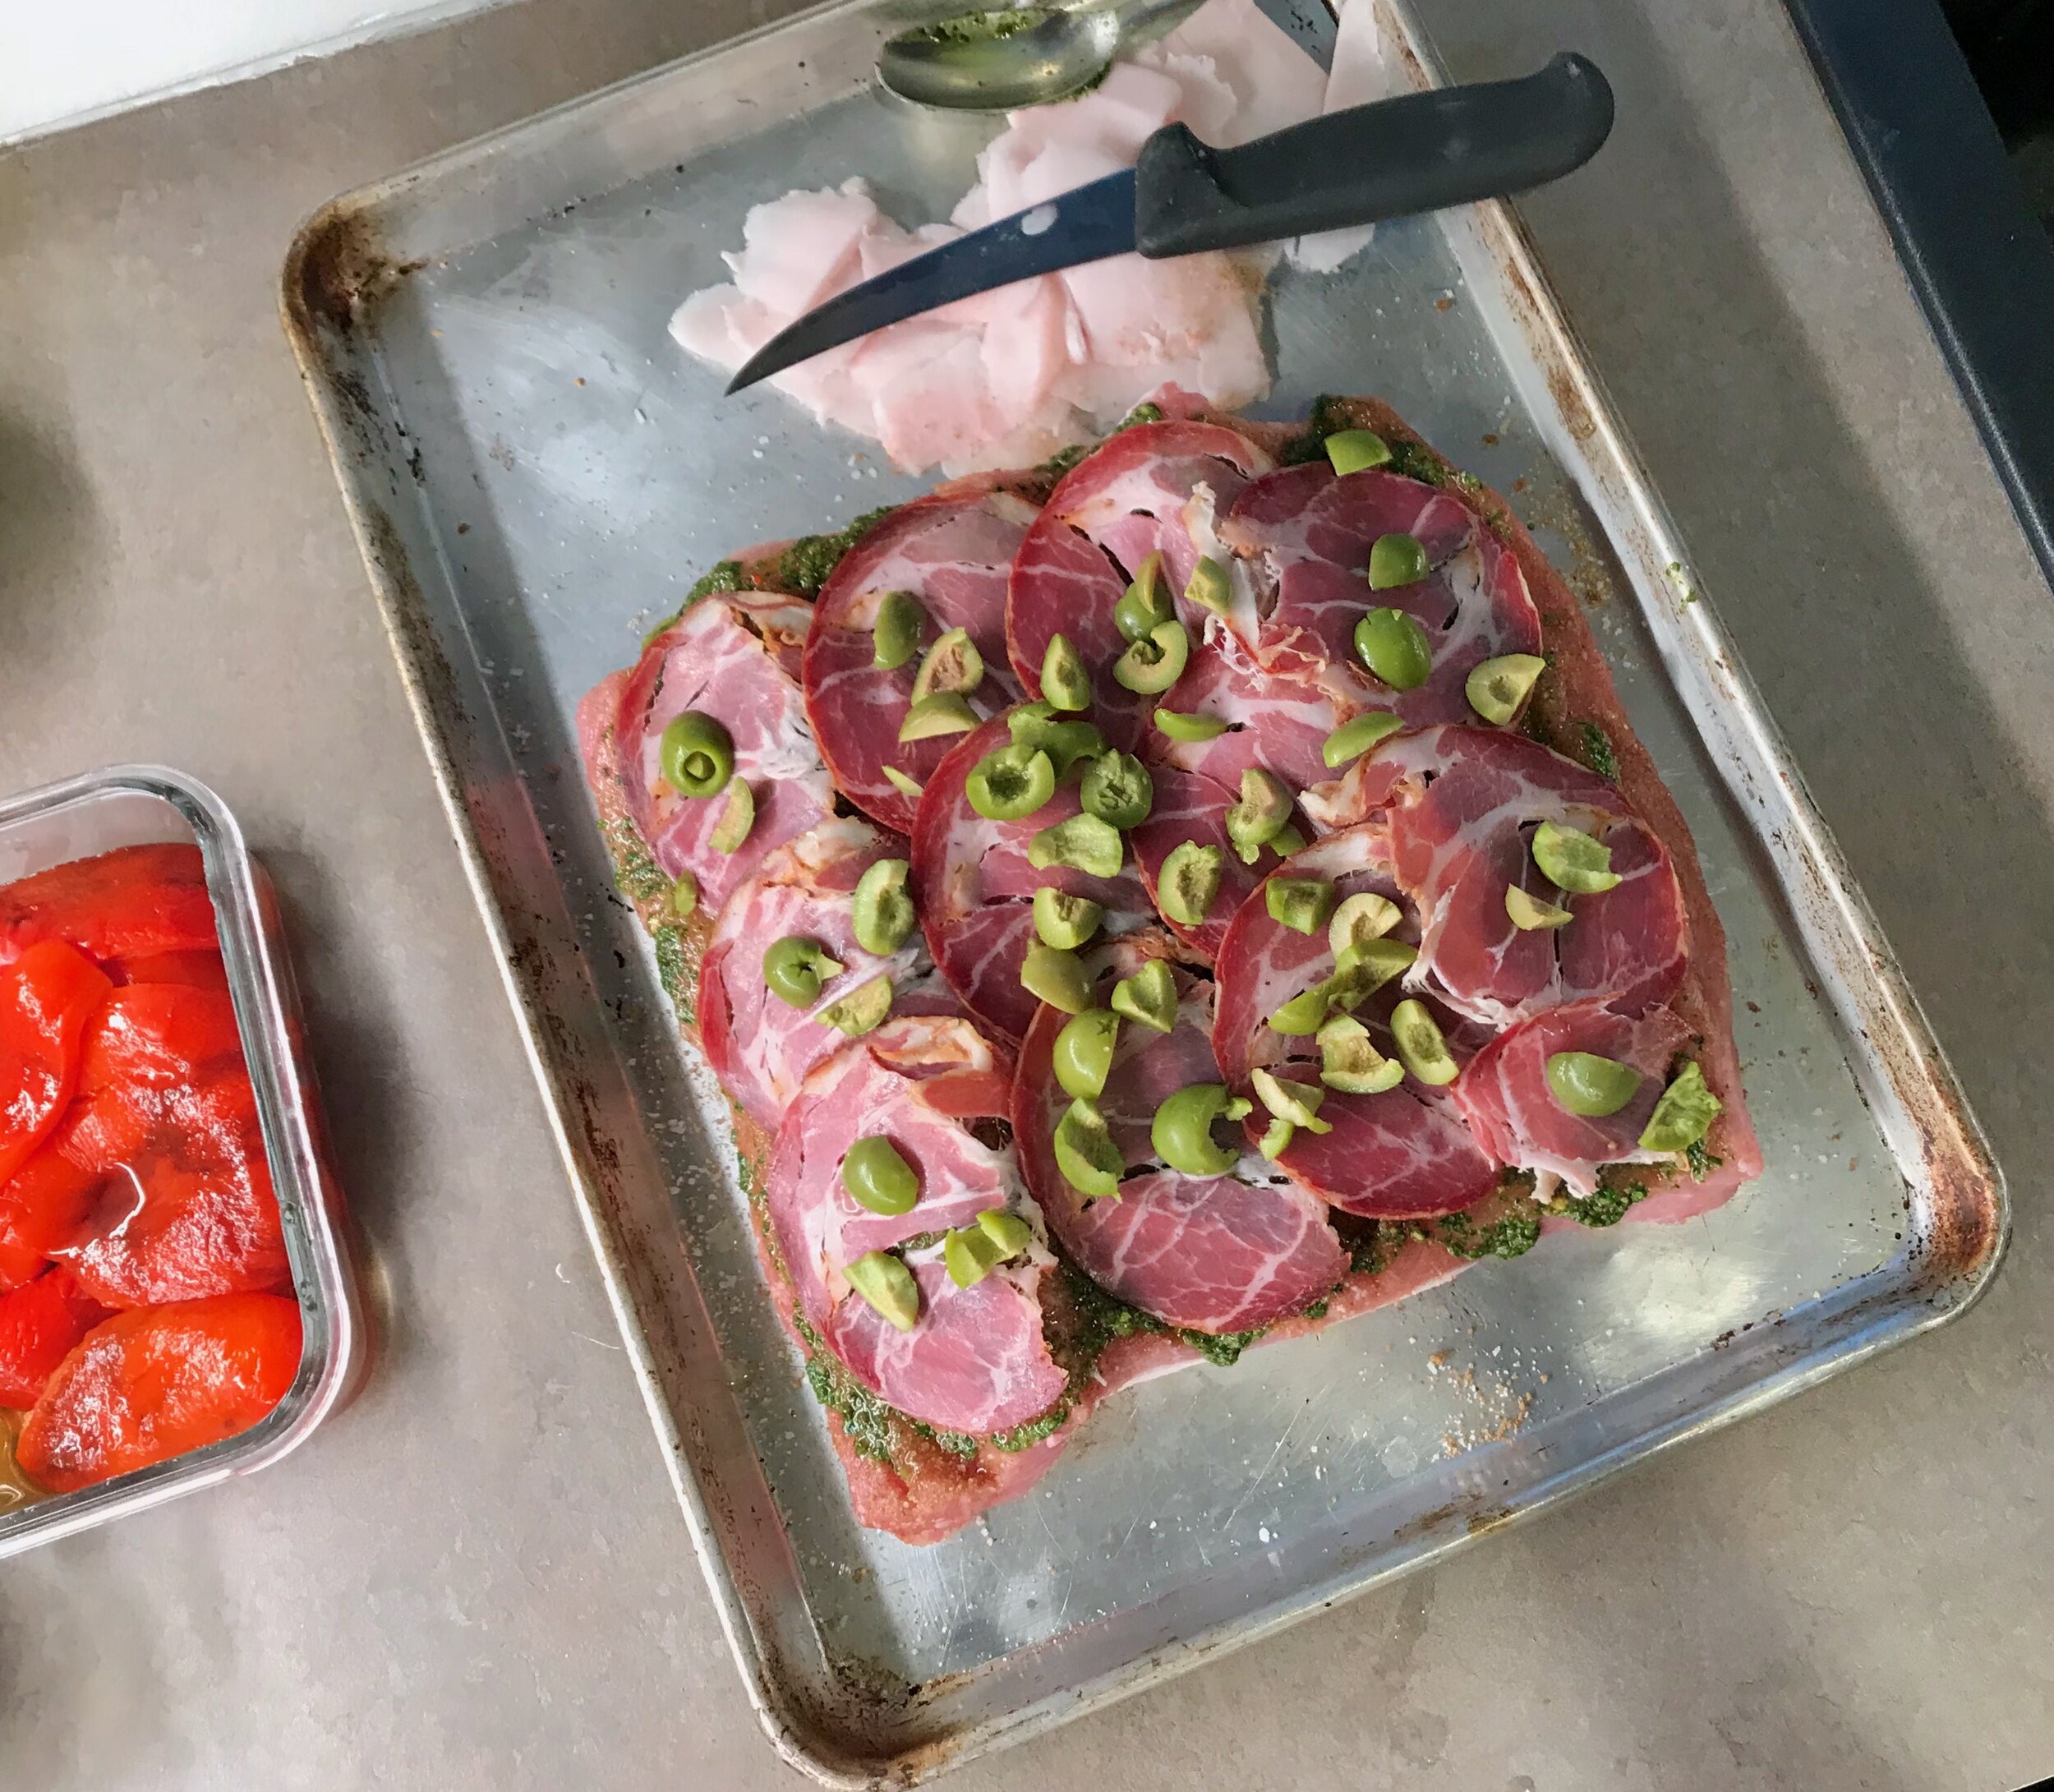
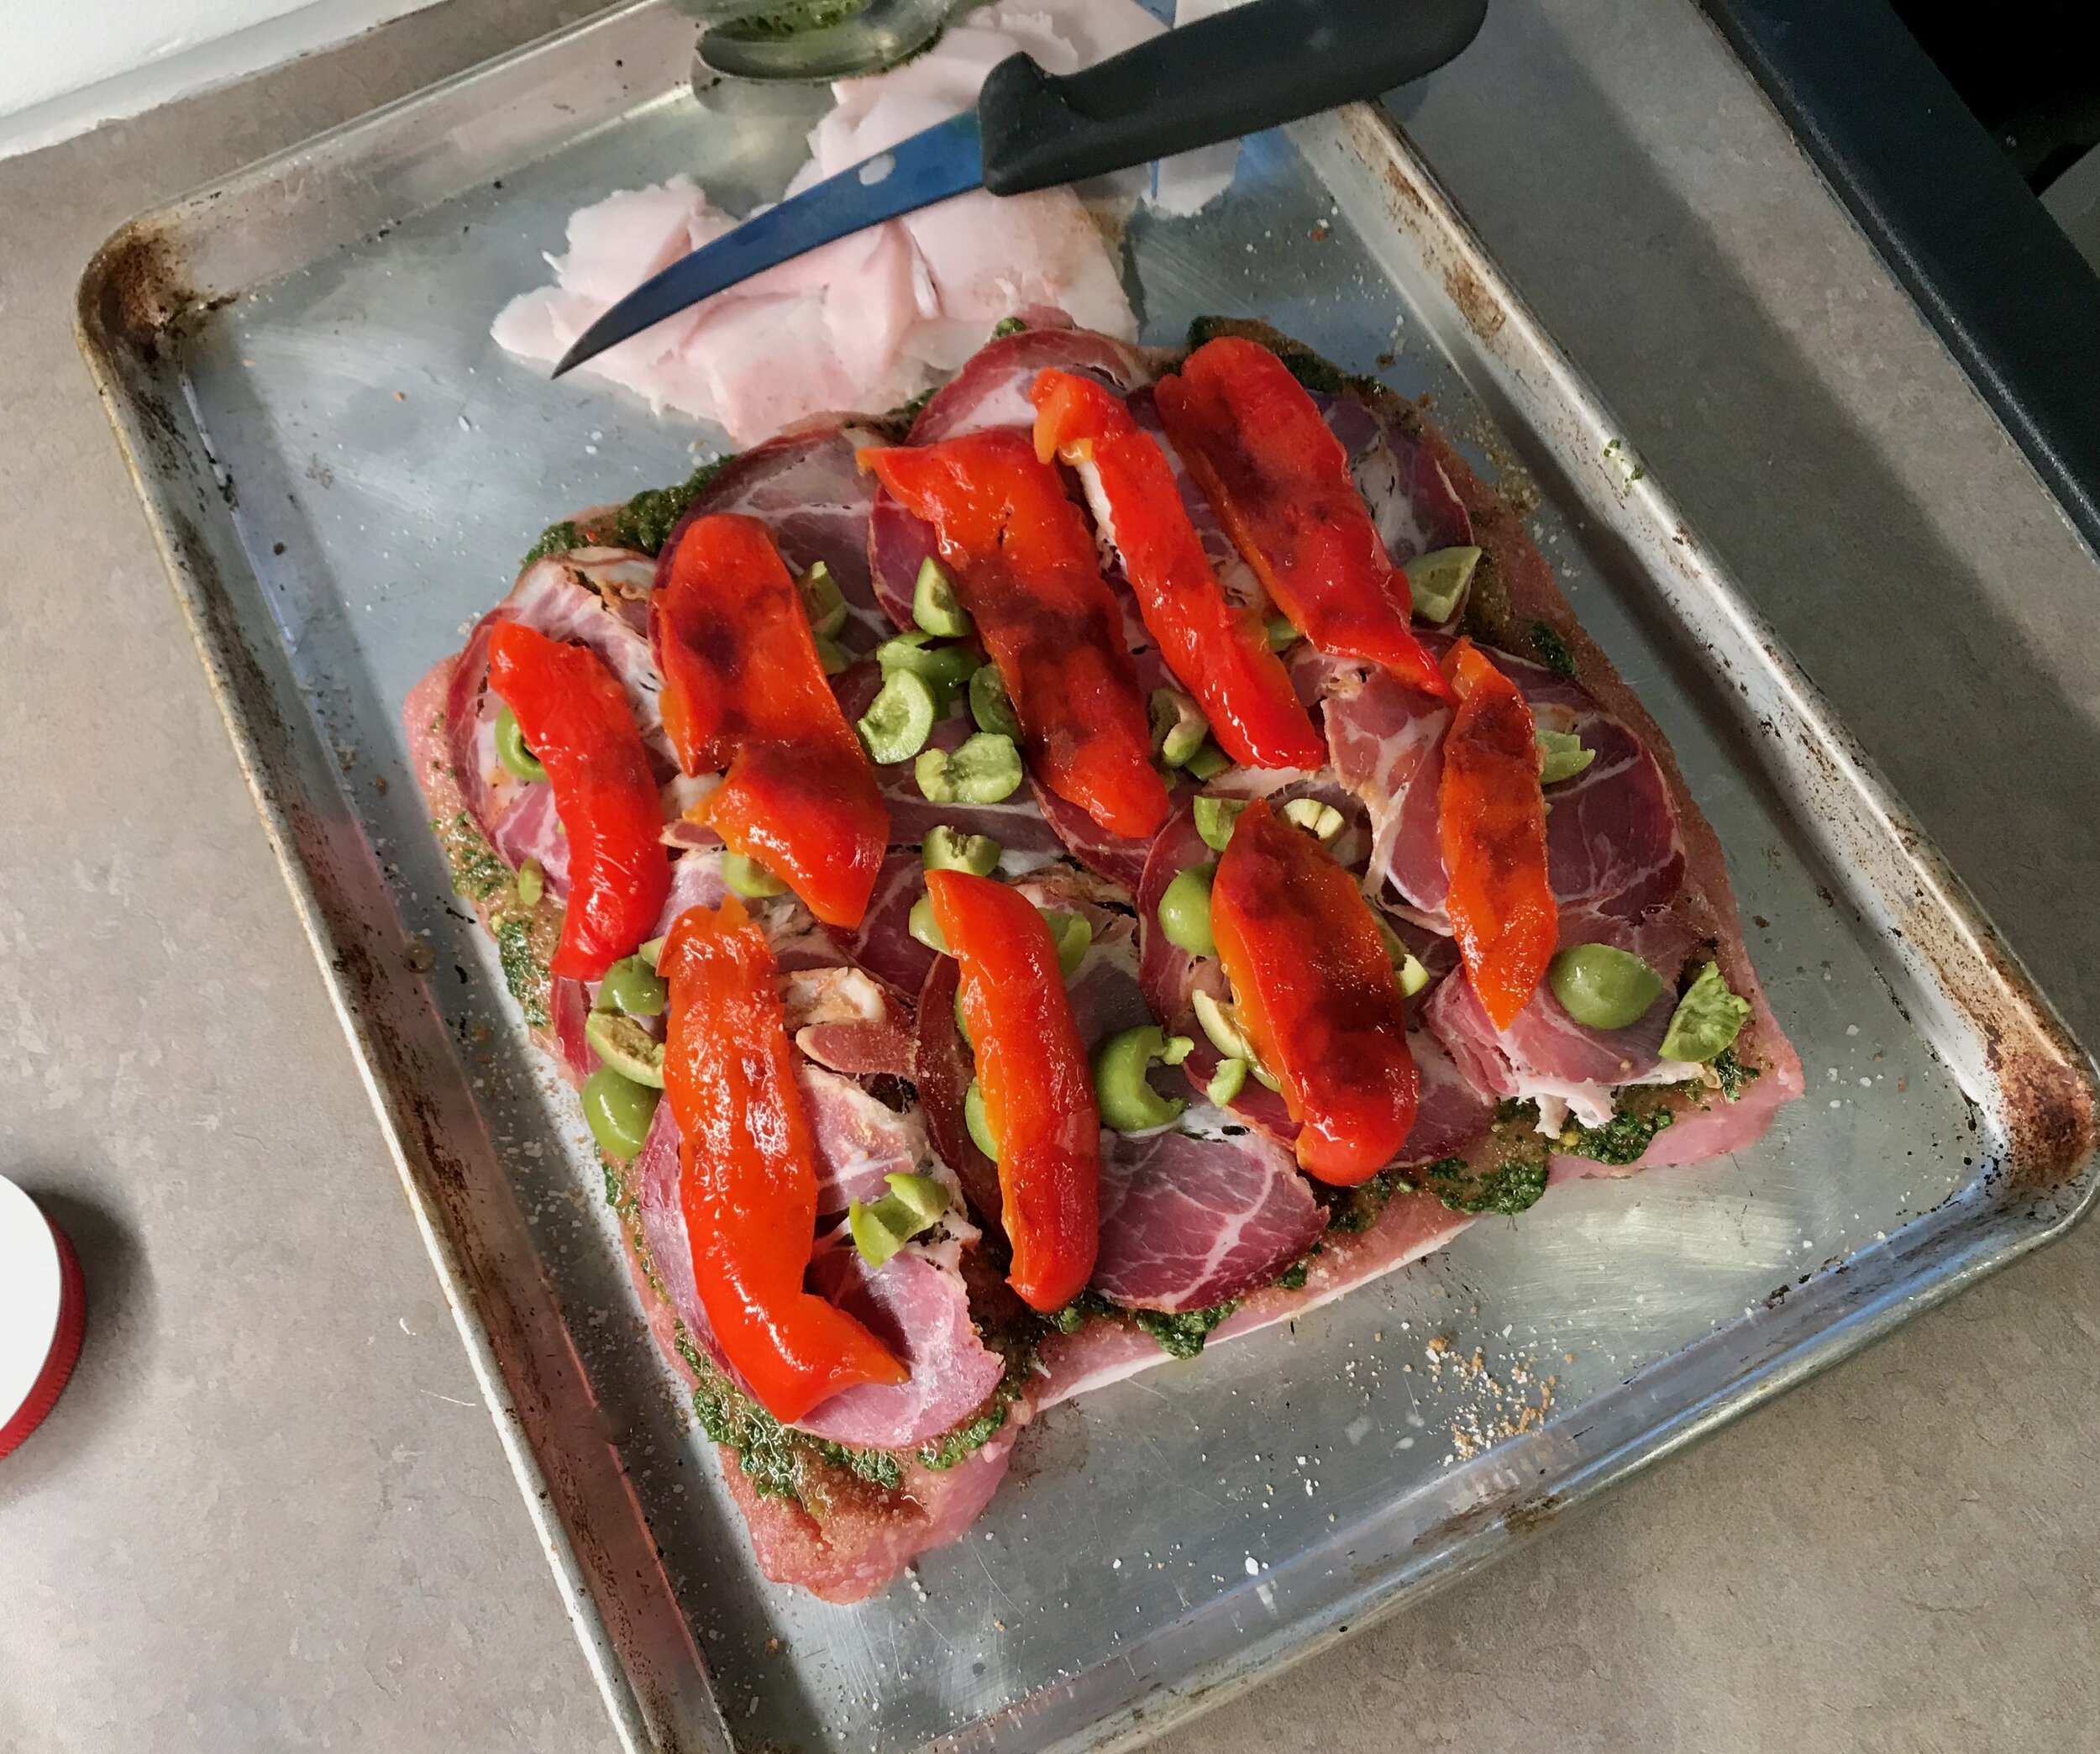
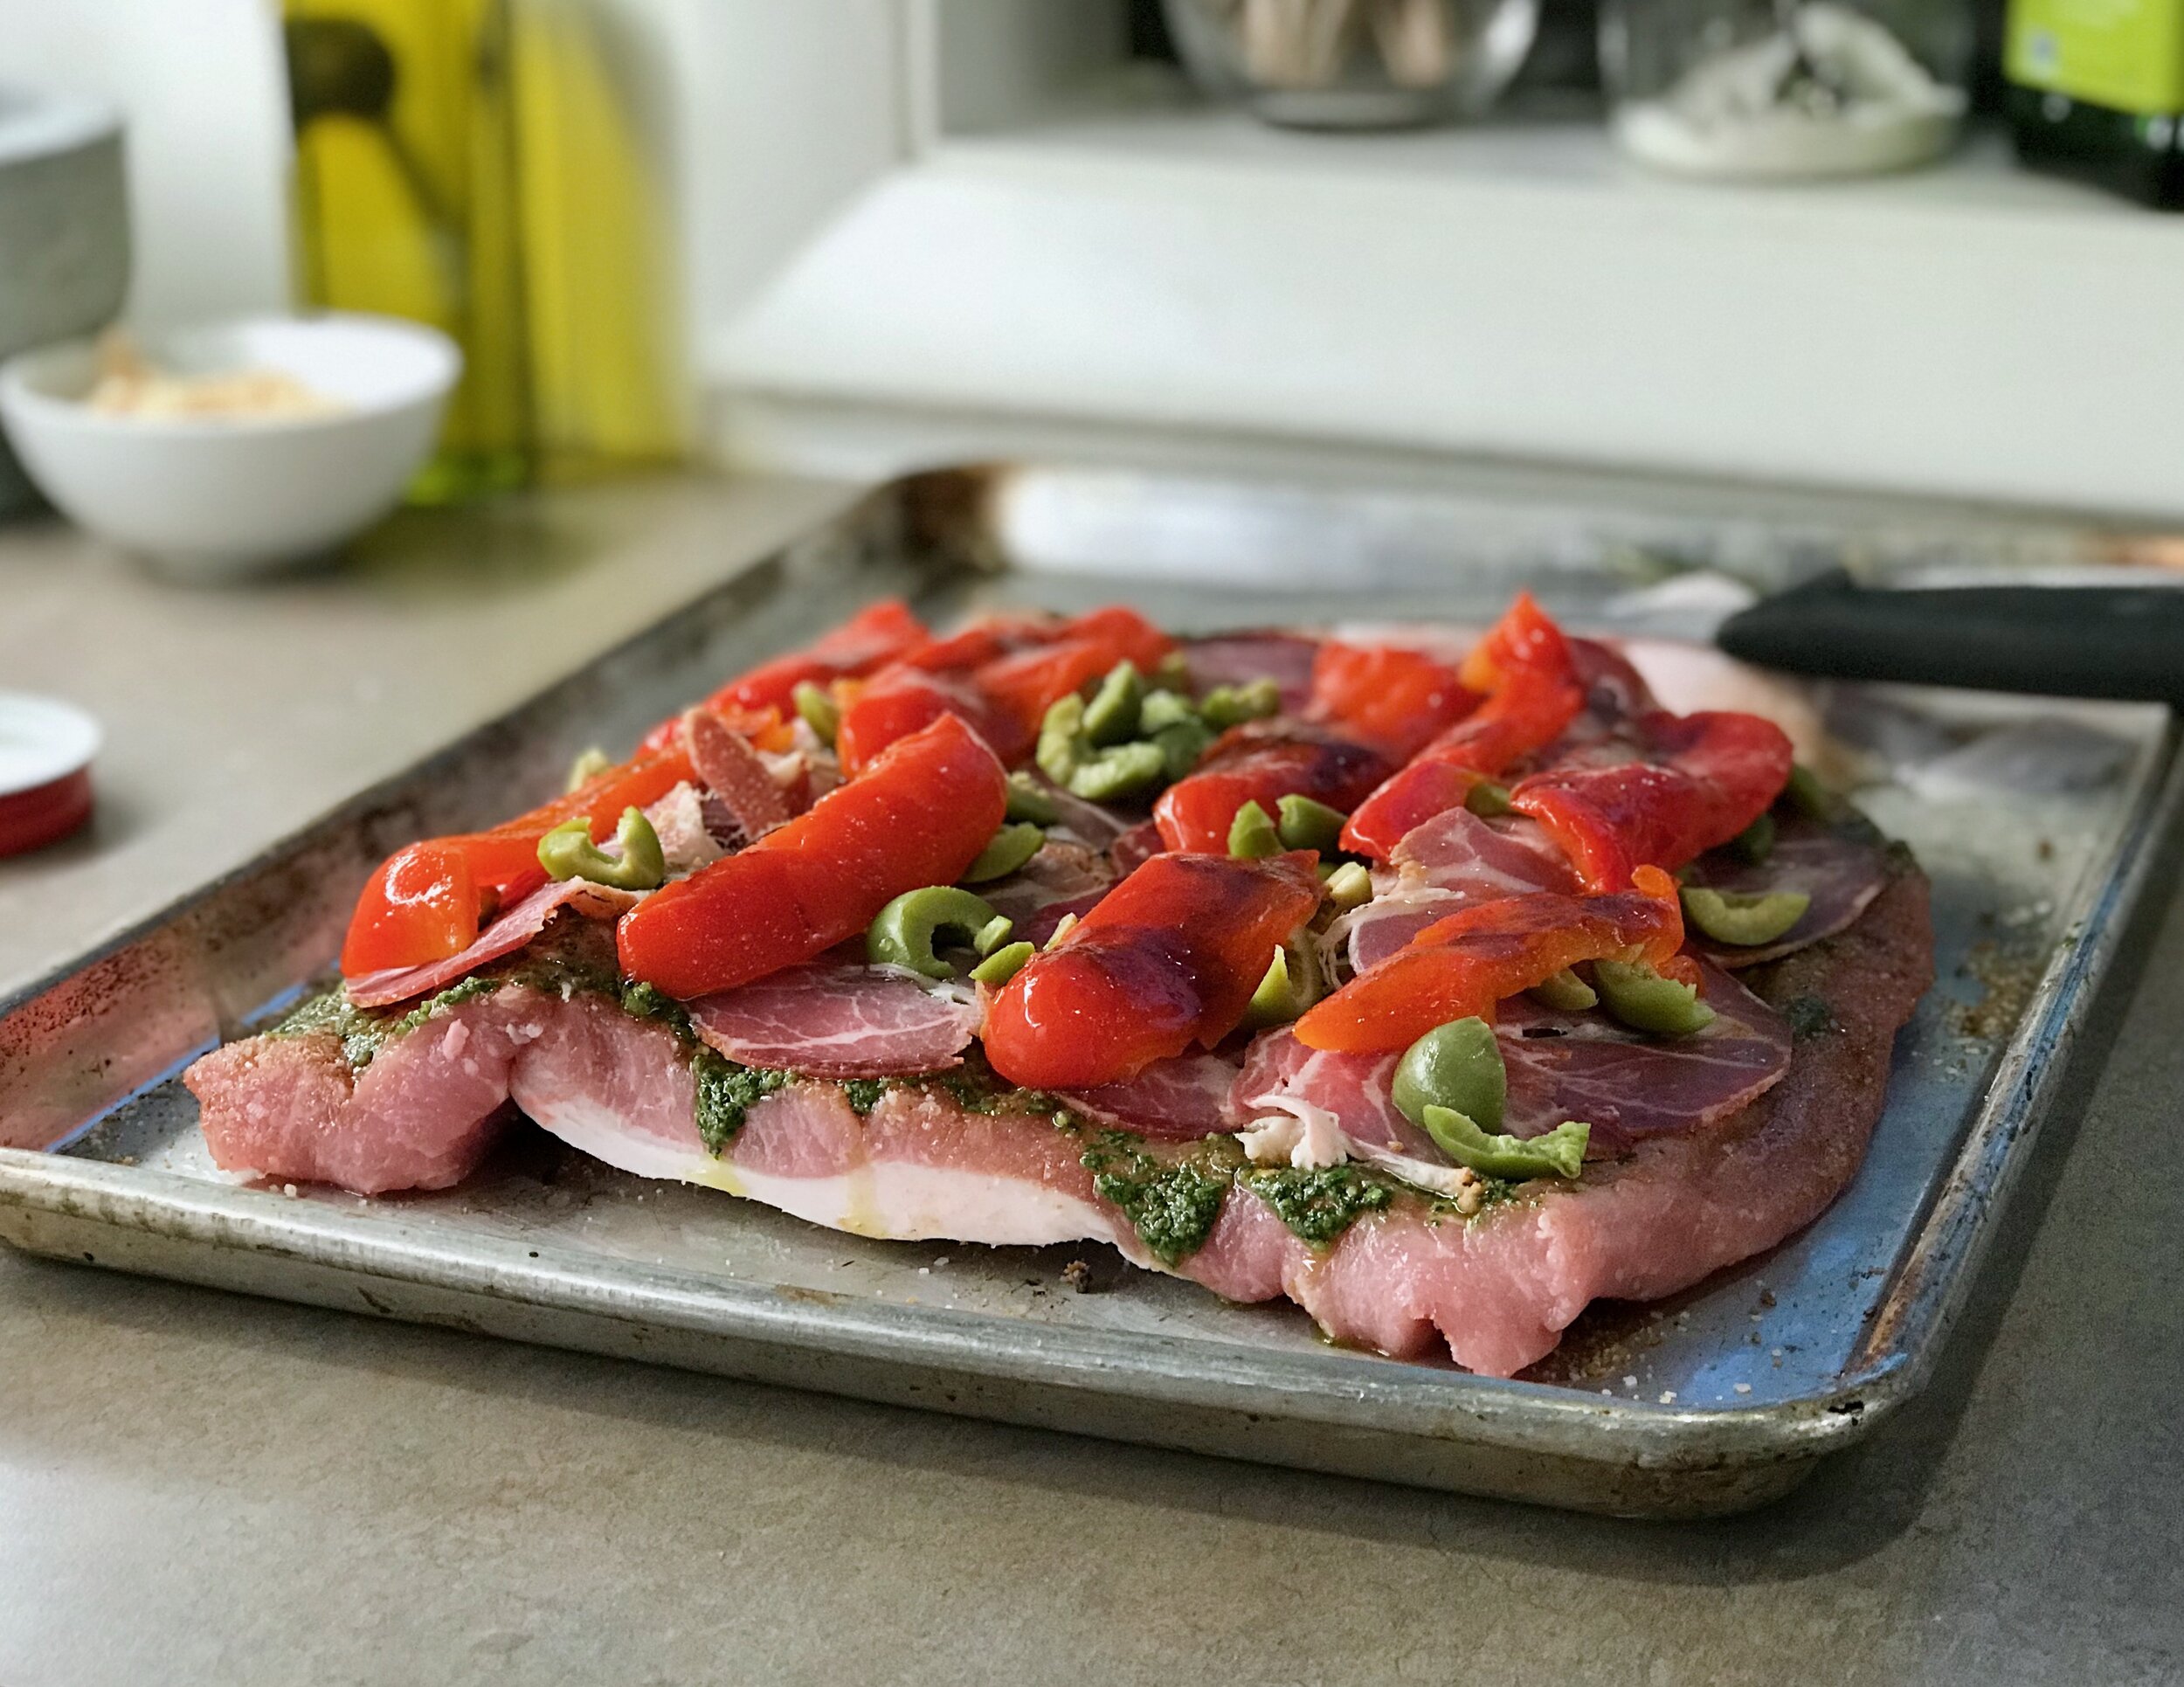
Once that step was done the rest was pretty easy. Just start layering everything, starting with the spice mixture and chimichuri, then the capicaola that you cover with the festive combination of green olives (I used castelvetrano olives) and roasted red peppers (I roasted my own, but jarred are easy and delicious. I ended up roasting two large red bell peppers and probably used just a little over half of this in the roast).

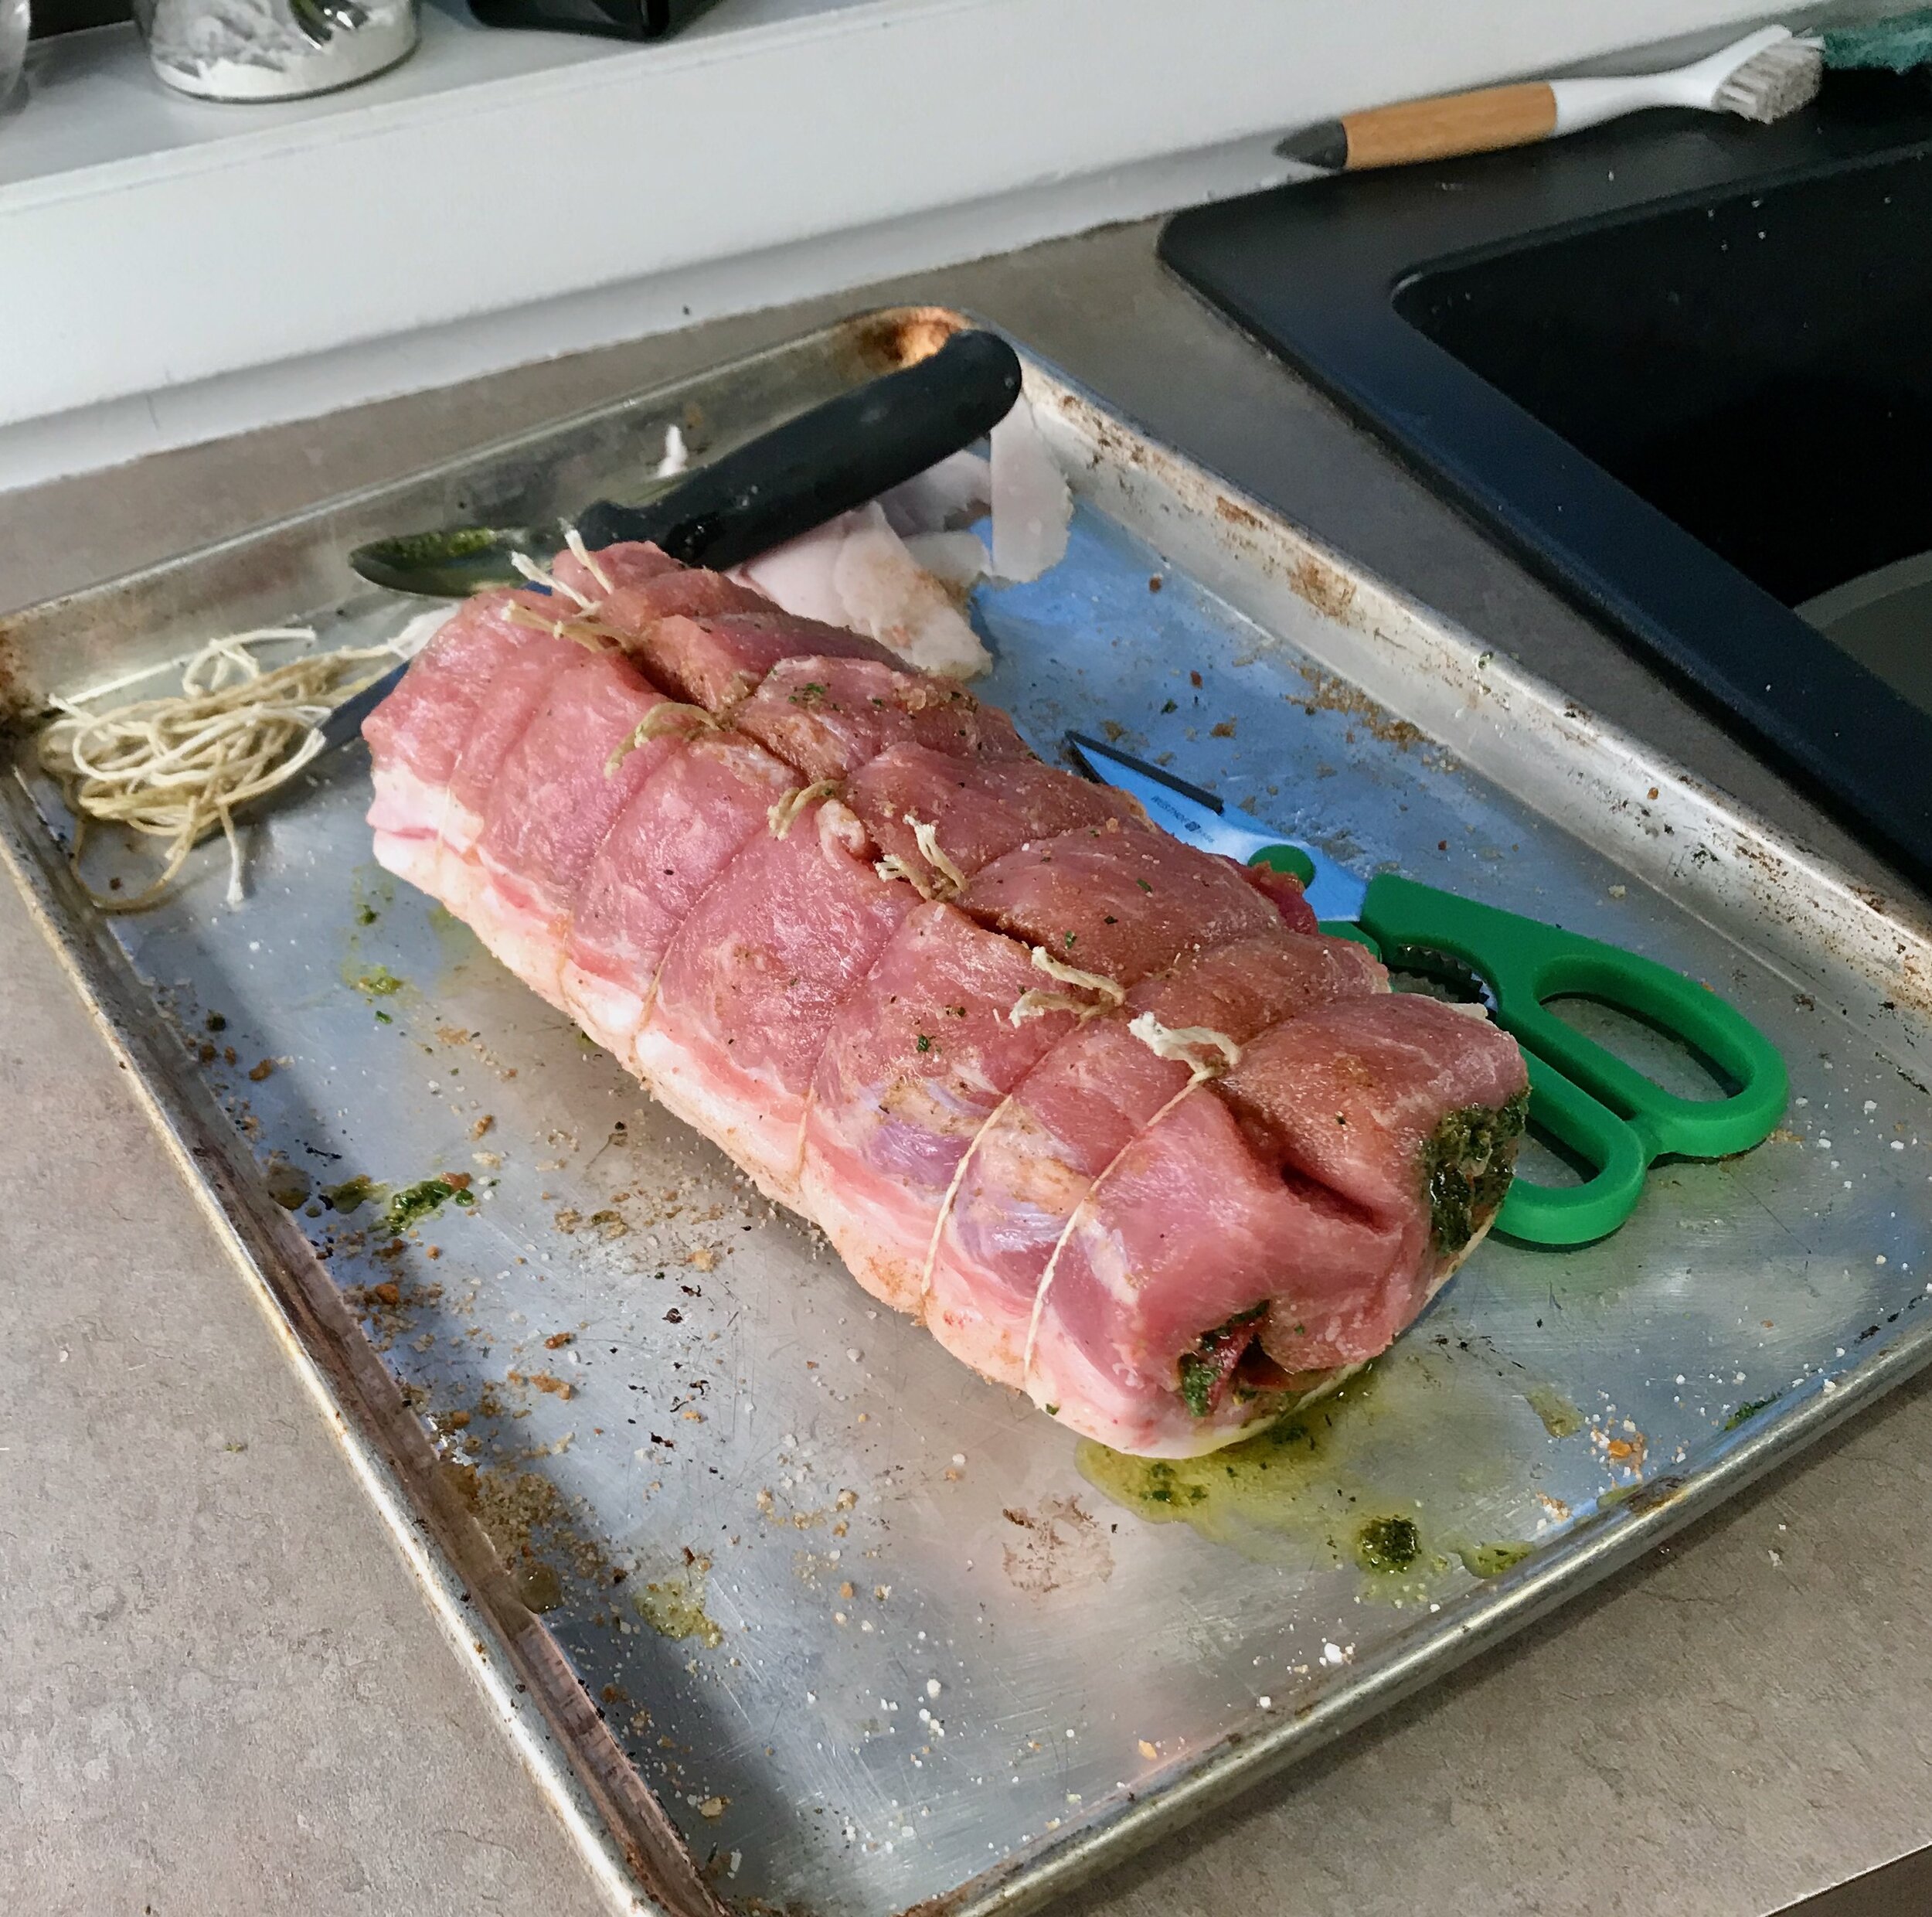
Roll it up and tie it tightly with butchers twine to keep everything in place. Place the finished product on a wire rack over a baking sheet and into the oven. I think this could all easily be done in advance, the day prior if desired. I don’t see why it would be a problem to refrigerate at this point if you want to make it easy on yourself the day you’ll be serving this.

IMG_0784.jpeg

I ended up baking the roast for a total of 1 hour and 28 minutes (not the 1.5-2 hours as stated in the recipe, but I did have a slightly smaller roast) - it came in at just over 135 degrees, a little over 140 degrees in a few spots, so probably could have come out a minute or two earlier, but I don’t think it was a big deal, it was not overcooked or dry at all. I let it rest about 15-20 minutes before slicing and it was perfect. The nice thing about something like this is that the timing isn’t so so crucial. It can sit and rest anywhere from 15 minutes to an hour, so you have a lot of flexibility.

IMG_9855 2.jpeg

I served the roast with a Celery Root salad with Brown Butter, Oranges, Dates, and Almonds from Joshua McFadden’s Six Seasons (one of my all time favorite cookbooks!), as well as some fresh sourdough bread that I baked earlier that morning. It was a perfect combination.

Final verdict? This was amazing. I couldn’t have picked a better recipe for our party. It was beautiful, smelled amazing while roasting, and was one of the best tasting things I have made all year. I will definitely be making it again. The fat cap was crispy and fatty and basted the entire roast. The filling was perfect, an amazing combination of flavors as well as some texture differences.

Highly recommended for your next party!


Stuffed Pork Loin with Chimichurri
From 177 Milk Street
Ingredients

For the Chimichurri:

  • 3 cups lightly packed fresh flat-leaf parsley

  • 1/3 to 1/2 cup lightly packed fresh oregano

  • 7 medium garlic cloves, smashed and peeled

  • 1 1/2 teaspoons ground cumin

  • 1 1/2 teaspoons ground coriander

  • 3/4 teaspoon red pepper flakes

  • Kosher salt and ground black pepper

  • 1/4 cup red wine vinegar

  • 3/4 cup (6 ounces) extra-virgin olive oil

For the Roast:

  • 1 tablespoon ground cumin

  • 1 tablespoon ground coriander

  • 2 teaspoons packed light brown sugar

  • Kosher salt and ground black pepper

  • 4 -pound boneless center-cut pork loin

  • 6 ounces thinly sliced capicola or mortadella

  • 1/2 cup pitted green olives, roughly chopped

  • 1 1/2 cups drained roasted red peppers, patted dry and torn into large pieces

  • 1/3 cup panko breadcrumbs

  • 3 hard-cooked large eggs, peeled and halved crosswise (optional in my opinion, I did without and it was just fine)

  • 1 1/2 tablespoons extra-virgin olive oil

  • Flaky sea salt, to serve (optional)

Directions
To prepare the Chimichurri: in a food processor, combine the parsley, oregano, garlic, cumin, coriander, pepper flakes, 1 teaspoon salt and ½ teaspoon black pepper. Process until finely chopped, 30 to 45 seconds. Scrape the bowl, add the vinegar and oil, then process until as smooth as possible, 45 to 60 seconds. Measure ¼ cup of the chimichurri into a small bowl and set aside; transfer the remainder to a serving bowl; cover and refrigerate until ready to serve.

Heat the oven to 350°F with a rack in the lower-middle position. Line a rimmed baking sheet with extra-wide foil and a fit with a wire rack.

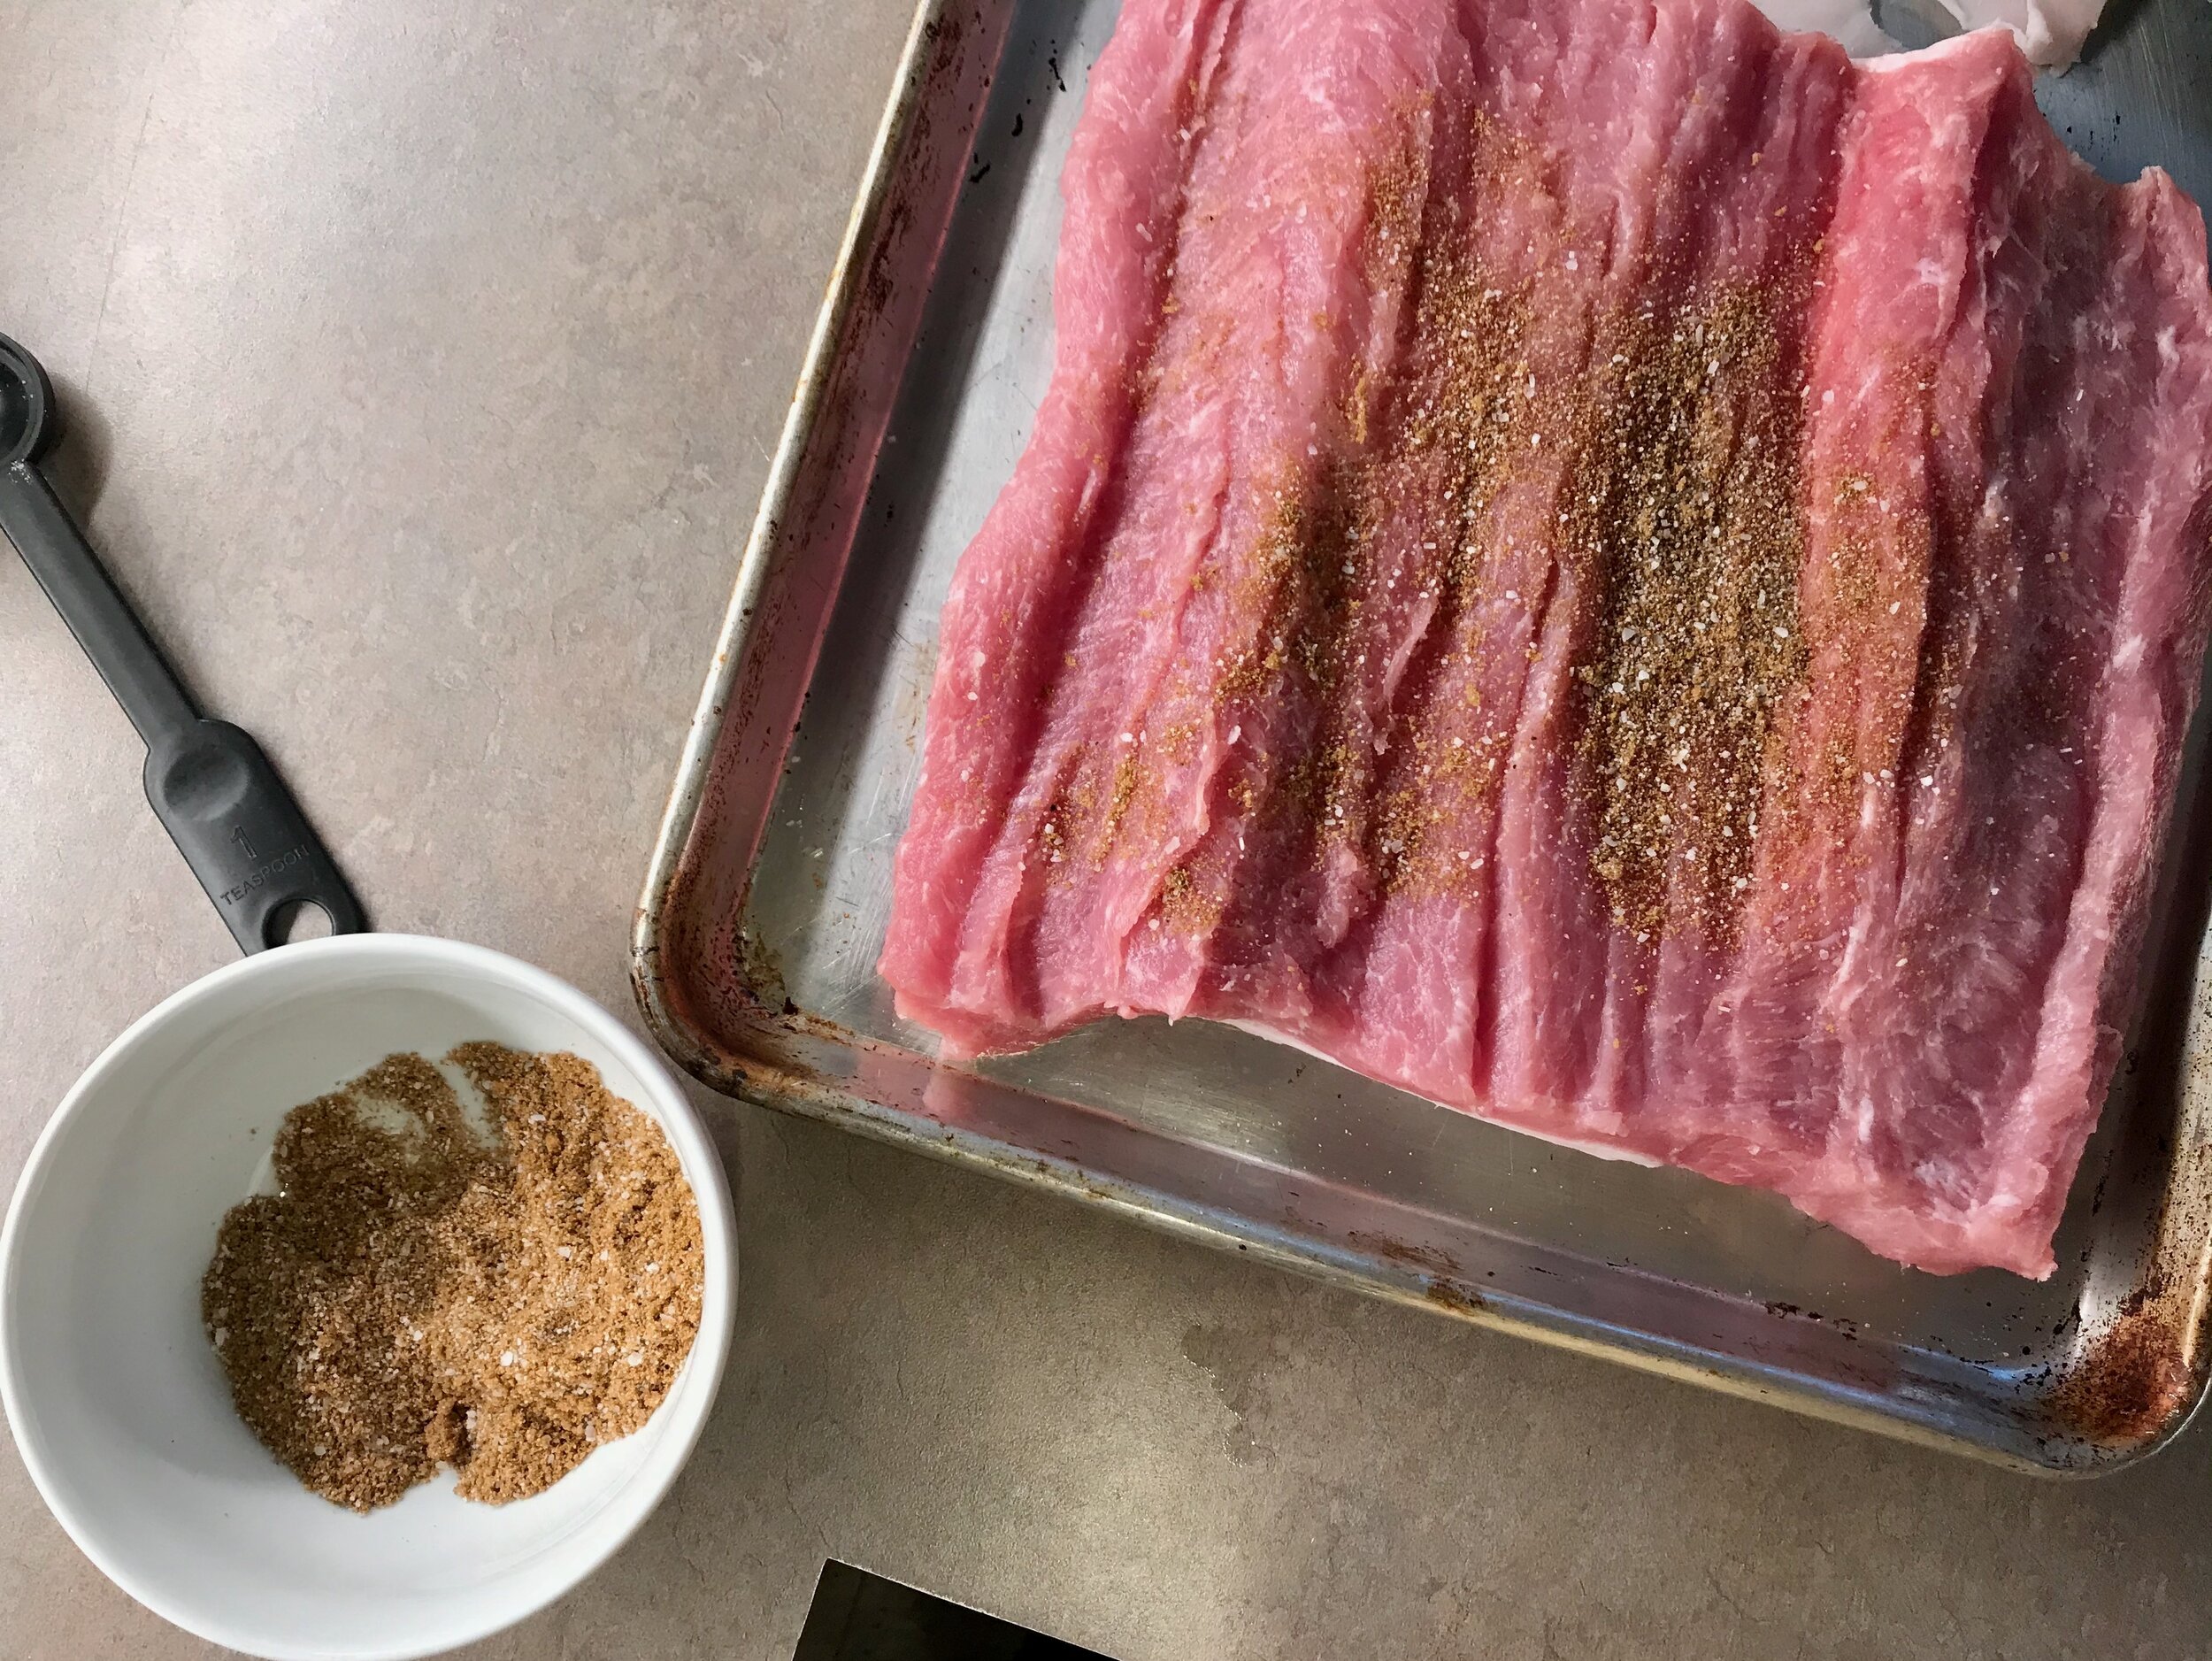
To prepare the roast: in a small bowl, stir together the cumin, coriander, brown sugar, 3½ teaspoons salt and 1½ teaspoons pepper. Set aside. Heat the oven to 350°F with a rack in the lower-middle position. Line a rimmed baking sheet with extra-wide foil and a fit with a wire rack. To prepare the roast, in a small bowl, stir together the cumin, coriander, brown sugar, 3½ teaspoons salt and 1½ teaspoons pepper. Set aside.

Cut eight 24-inch lengths of kitchen twine. Place the roast fat side down on a cutting board, perpendicular to the counter's edge. With a sharp boning or carving knife, cut along the length of the roast, down its center, stopping about ½ inch from the bottom. Starting at the base of the cut and with the knife blade held as parallel as possible to the cutting board, slice along the length of the roast, unrolling the meat with your free hand as you go. Continue cutting and unrolling the meat until the half is a flat, fairly even surface ½ to ¾ inch thick. Rotate the roast 180° and repeat with the second side. If there are areas that are slightly too thick, use a meat mallet to pound those areas to the same thickness.

Season the pork on both sides with the spice mixture. Place the meat fat side down and with a short side nearest you. Spread the reserved ¼ cup chimichurri evenly on the meat. Shingle on the capicola slices, covering the entire surface, then sprinkle evenly with the olives. Lay the red peppers on top, tearing as needed to cover the entire surface. Sprinkle evenly with the panko. Place the egg halves cut sides down in a row about 3 inches from the bottom edge. Lift the bottom edge over the eggs and continue rolling the meat into a tight cylinder. Position the cylinder seam side down and tie at even intervals with the twine, then snip off excess twine. If any bits of filling fall out, simply tuck them back in. Brush the roast on all sides with the oil.

Transfer the roast fat side up to the prepared baking sheet. Bake until the top is nicely browned and center of the roast reaches 135°F, 1½ to 2 hours. Let rest on the wire rack for 30 to 60 minutes. Remove the chimichurri from the refrigerator about 30 minutes before serving. Cut the roast into ½-inch-thick slices, removing the twine as you go. Arrange the slices on a platter, sprinkle with flaky salt (if using) and serve with chimichurri.

Tip: Don't trim the fat off the pork loin. The fat cap lends richness to an otherwise lean cut and gives the roast an appealing burnished-brown appearance. Don't rush when butterflying the pork loin. Short, small cuts allow for the best control so you can maintain an even slice and adjust as you go. Don't worry if the surface of the butterflied meat is not perfectly flat or even; it won't matter in the finished dish.

Peppermint Cheesecake

I can't believe that I have been blogging for so long and have not yet posted one cheesecake!! I do have a red velvet cheesecake cake, but no true cheesecake. Well considered this problem officially fixed today! Here is my first official cheesecake post, and it is a great one. My work had a work Christmas party a few weeks ago which included ugly sweaters, white elephant gifts, all that fun stuff. Obviously my first question is - what's to eat? It was potluck time, it was requested that everyone bring an appetizer or a dessert. This year it was time; Cheesecake time. 

I had stumbled across a cheesecake a few weeks earlier that for whatever reason had just caught my eye. On a whim I decided to just go for it. I went to the store and picked up cream cheese, ricotta, Oreos and candy canes and I am so glad I did. This cheesecake was so simple and turned out delicious. Creamy and light and silky smooth. A winner all around. 

IMG_1847 (1).jpg

The original recipe included a graham cracker crust and was topped with fresh strawberries. Since it's December that wasn't quite right. I wasn't sure what I was going to do, but as I was walking through the aisles at the grocery store my eyes caught on a package of peppermint Oreos and I knew what I was going to create - an Oreo peppermint cheesecake. I swapped out the graham crackers for peppermint Oreos, and added a hint of peppermint extract to the filling and voila! The perfect Christmas cheesecake was born! 

 
IMG_1844.jpg
IMG_1852 (1).jpg
 

Peppermint Cheesecake
Cheesecake Adapted from Lil cookie
Crust adapted from Crazy for Crust
Ingredients
For the crust:

  • 25 mint creme Oreos
  • 5 tablespoons (2 1/2 ounces) butter, melted

For the filling:

  • 2 8-ounce packages (450 grams) cream cheese
  • 1 16-ounce (450 grams) whole milk ricotta cheese
  • 1 cup (200 grams) sugar
  • 3/4 teaspoon peppermint extract
  • 1 tsp. vanilla extract
  • 3/4 teaspoon kosher salt
  • 1/4 cup (35 grams) all-purpose flour
  • 5 large eggs

For coating:

  • 1 8-ounce container sour cream
  • 1 tablespoon sugar
  • 1/2 tsp. vanilla extract

Directions
For the crust: preheat oven to 350 degrees. Line a 9 inch springform pan with aluminum foil (alternatively, you can use a 9 inch, tall sided cake pan with removable bottom). 
In a food processor with a steel blade, process the Oreos until crushed into small bits. Add melted butter and process until combined and the mixture is damp and cohesive. 

Press the moist crumbs to the bottom and the sides of the pan and bake for about 10 minutes. (I found it easiest to do this with a metal measuring cup.) Cool for a few minutes at room temperature. Turn the oven temperature down to 325 degrees. 

Meanwhile, make the cheese filling: Wipe the bowl of the food processor clean. Add the cream cheese, ricotta, sugar, peppermint extract, vanilla and salt and process until well combined. Add the eggs one by one, processing between additions until well incorporated. Add the flour and pulse a few times until the flour is incorporated into the filling.

Pour the cheese filling into the baked crust. Place cheesecake in the now 325 degree oven and bake for 60-70 minutes or until the cake is golden, a bit swollen and slightly vibrating in the center. Remove from the oven, turn the oven off, and let the cheesecake cool for about 10 minutes at room temperature.

While the cheesecake is baking prepare the coating: in a small bowl, mix sour cream, sugar and vanilla to a uniform mixture. Once the cheesecake has cooled about 10 minutes, pour the sour cream coating on top of the cake and return to the still-hot (but turned off) oven for 5-6 minutes.
Remove from oven and cool completely at room temperature before refrigerating it for at least 7-8 hours (preferably overnight).

Pretty in Pink Chocolate Birthday Cake

It was my birthday yesterday!! Unfortunately, Lara had to work so we couldn't spend the entire day celebrating our birthday like we wanted to. :) This did mean however, that I had plenty of time to spend on my favorite project, birthday cake!! I baked the cake on Friday and froze the layers overnight. Yesterday morning I whipped up a batch of Swiss meringue buttercream to frost the cake with and then decorated it with macarons from my local (and totally amazing) macaron shop that is right down the street (I know, how lucky is that?), and flowers from the flower shop just a few more buildings over. The combination of gorgeous pink dahlias and the corresponding macarons is stunning. I was so pleased with how it all turned out, certainly my favorite cake that I've made to date!

I looked at what felt like a gazillion chocolate cake recipes before settling on one. I went with Rose Levy Beranbaum's All American Chocolate Butter Cake. From the start, this was the recipe I was leaning to, she did literally write the Bible on cake after all, but I had to research for a while before finally deciding. Although I have a chocolate cake recipe that I've made several other times before that I just love, that recipe uses oil as the fat and for this cake I really wanted to go with butter instead. There is just something about butter in a chocolate cake that makes me happy, and it tastes so good. I'm so glad I went this route.

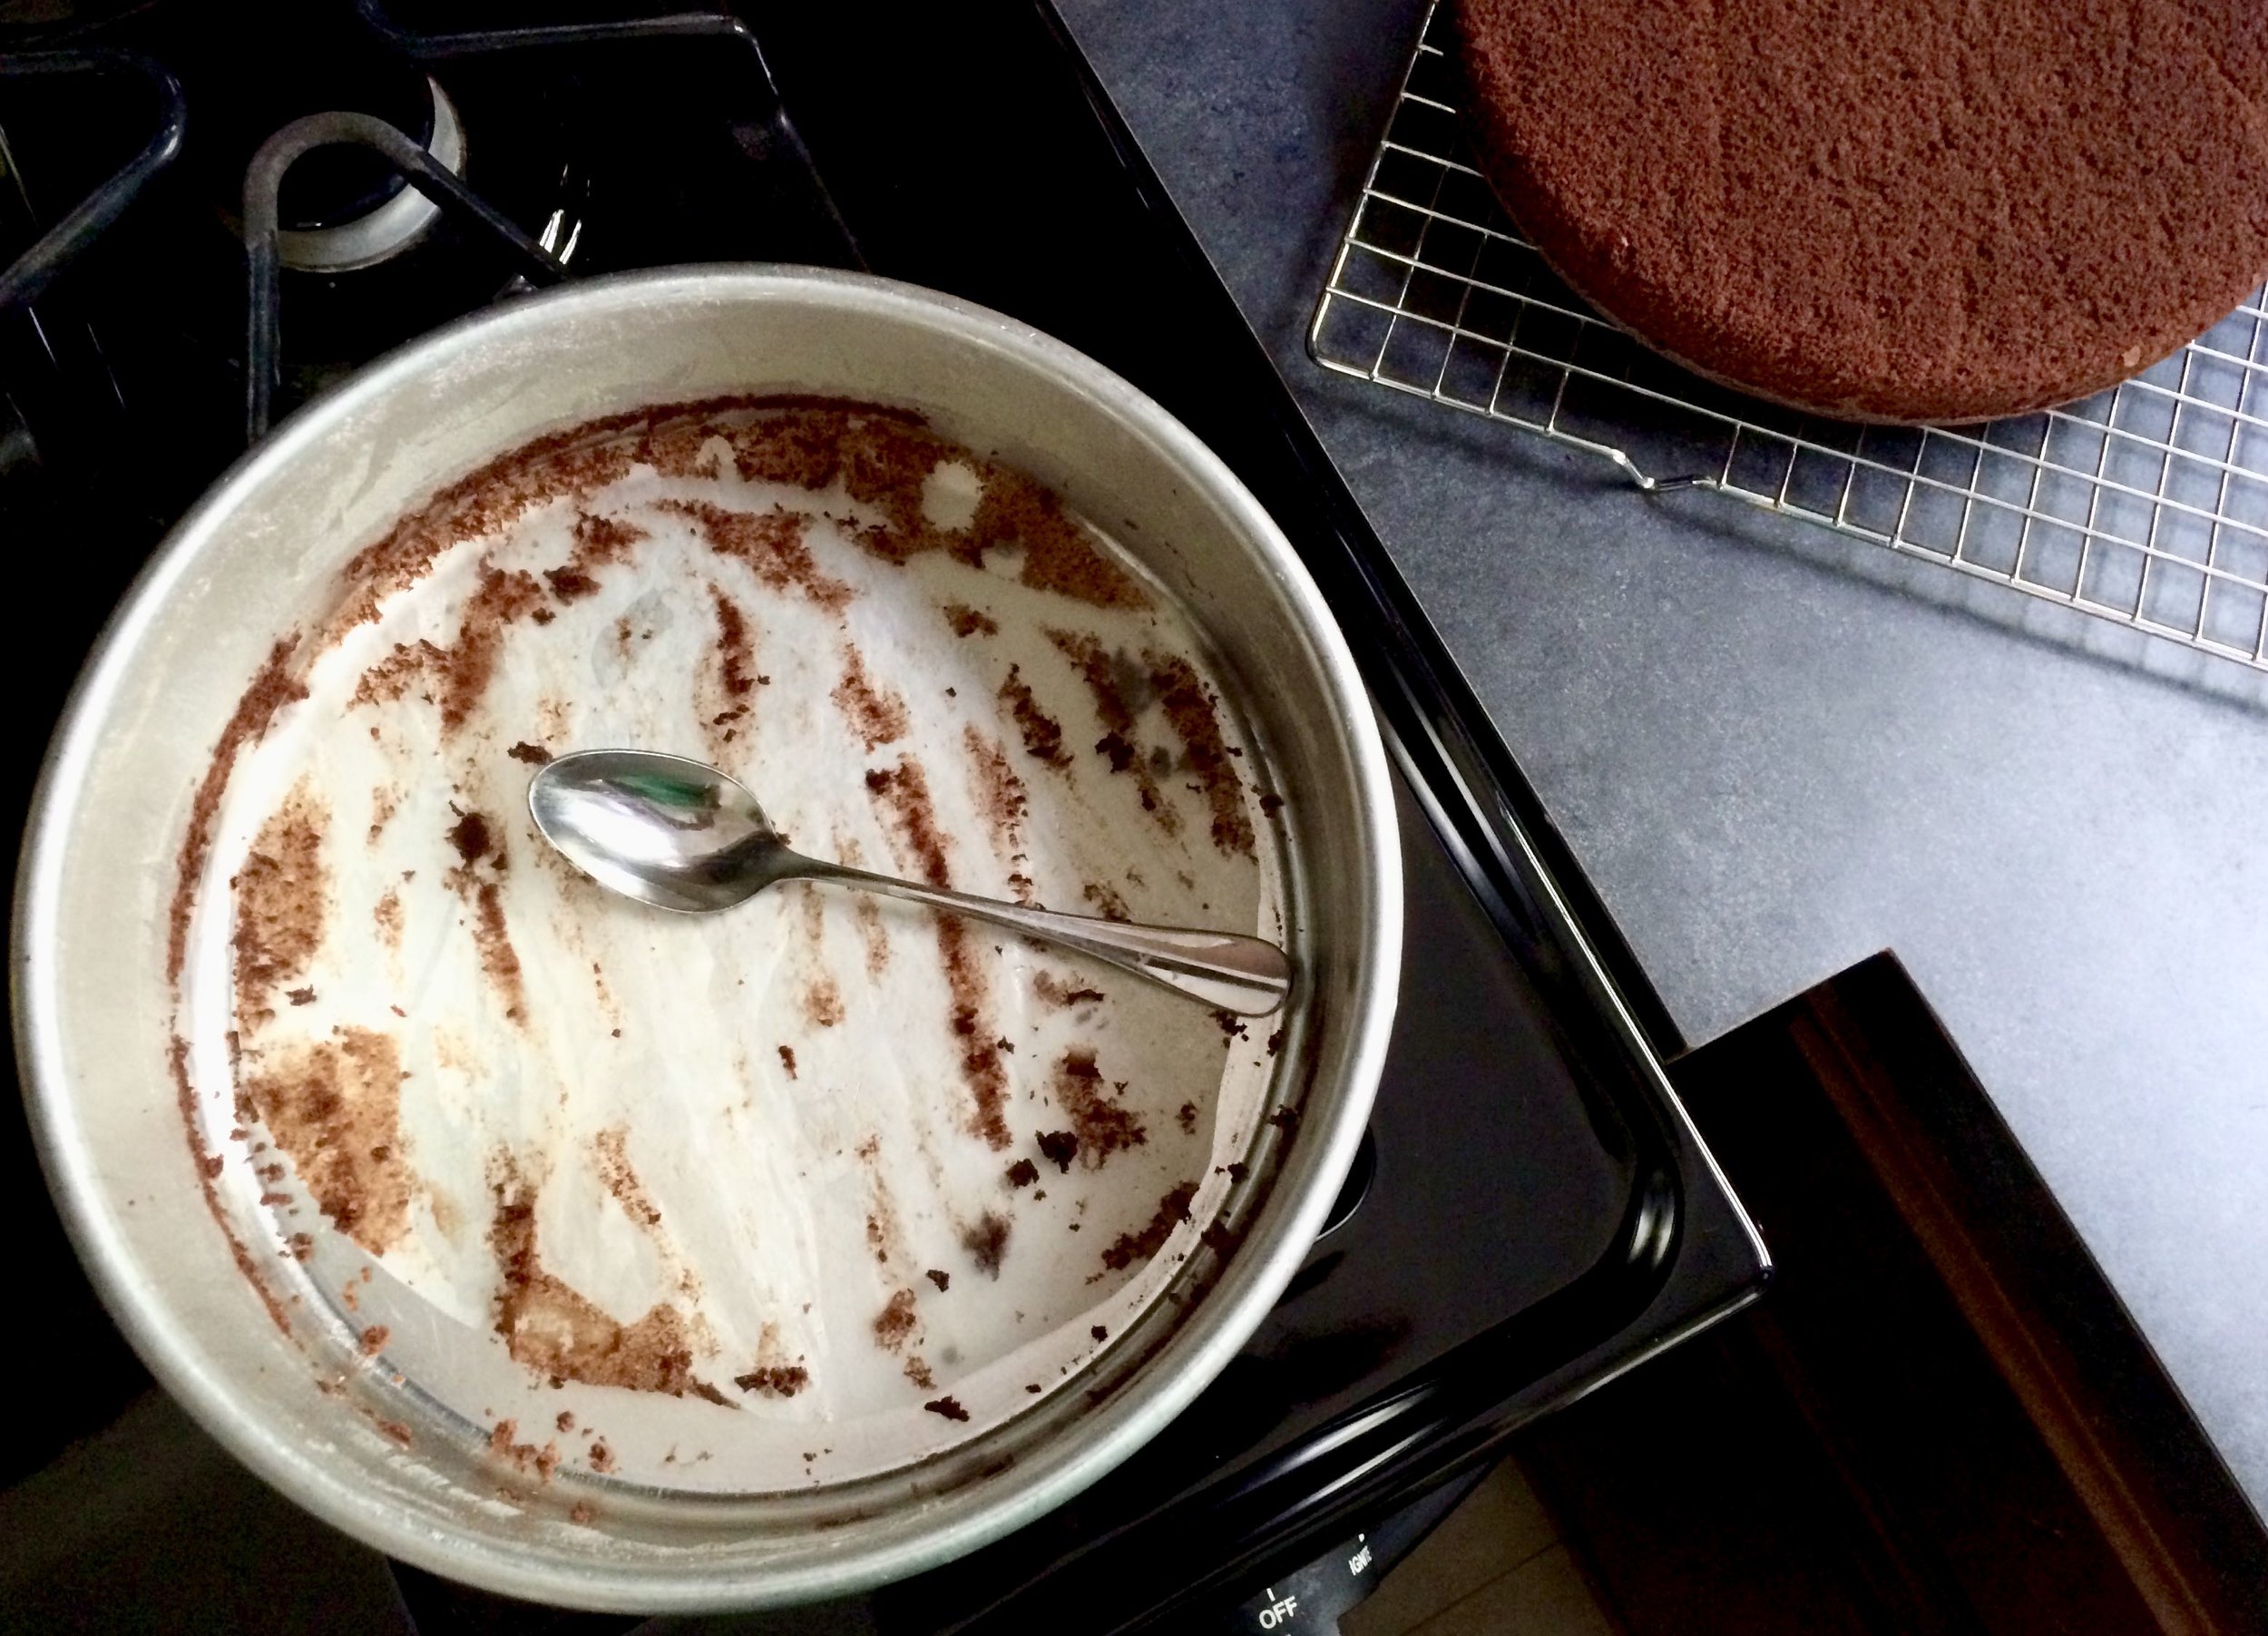
The cake turned out absolutely delicious. It was not a super high-riser as cakes go, but it baked up very nicely without too much of a domed top making it easier for me to frost. I just made 2 layers, but I think adding a third layer next time would be amazing. It is a delicate and tender cake, dense yet moist, and did I mention, it's nice and buttery! So, so, so delicious. I will be making this one again!

For the frosting I went with a basic Swiss meringue buttercream because you can't really go wrong with that! Because I decided to decorate it with real flowers and macarons I left the frosting simple. I smoothed it out evenly all over the cake and left it at that. I wanted to decorations to really shine. 


After looking at a lot of different cakes I knew I wanted to decorate with real flowers. I think it is the best and most beautiful way to decorate a cake. Nothing I can ever do with frosting is going to come close to competing with God's beautiful creation, so why try and compete with that? I walked down the street to my local flower shop and just picked out what spoke to me. I couldn't pass up the gorgeous local dahlias, they were just stunning.

I then headed a few doors down to grab a few macarons to finish out the decorations. (FYI I love my local macaron shop, Le Bon Macaron, they have the absolute BEST macarons, and their shop is absolutely adorable. I highly recommend them to anyone!) I knew they would add a different element and more interest (plus more deliciousness) to the cake. I picked out three different flavors totally based on their colors, just wanted them to go with the flowers I had picked. In the end it all came together beautifully in the finished cake. So much fun to put together! I would really love another excuse to make cake again, soon...! 

Happy Birthday Lara!! I wouldn't choose anyone else to share a birthday with! Even though you had to work, I'm glad we still had plenty of time to celebrate (and eat cake!)!! 


All-American Chocolate Butter Cake
Adapted from The Cake Bible by Rose Levy Beranbaum
Ingredients

  • 1/2 cup + 3 tablespoons (2.25 ounces) natural unsweetened cocoa powder
  • 1 cup (8.25 ounces) boiling water
  • 3 whole eggs (5.25 ounces)
  • 2 1/4 teaspoons vanilla extract
  • 2 1/4 cups + 2 tablespoons (8.25 ounces) all purpose flour
  • 1 1/2 cups (10.5 ounces) sugar
  • 1 tablespoon baking powder
  • 3/4 teaspoon salt
  • 1 cup (8 ounces) unsalted butter, room temperature

Directions
Whisk together the boiling water and cocoa powder until smooth, and cool to room temperature. In another bowl, combine the eggs, ¼ of the cocoa mixture, and vanilla.

In the bowl of your stand mixer, combine the remaining dry ingredients and mix on low speed with the paddle attachment to blend. Add the butter and the remaining cocoa mixture and mix on low speed until the ingredients are moistened. Increase to medium to medium-high speed and beat for 1 ½ minutes to aerate. Scrape down the sides and gradually add the egg mixture.

Pour into two prepared 9” cake pans (lined with parchment paper, buttered and floured) and bake at 350 degrees F for 25-35 minutes or until a toothpick or knife inserted into the center of the cake comes out clean.

Cool on wire racks in the pans for 10 minutes then release onto wire racks. Store tightly wrapped with plastic wrap at room temperature for 2 days, 5 days refrigerated, or 2 months frozen.


Swiss Meringue Buttercream
From Style Sweet California
Ingredients

  • 1/2 cup (125 grams) egg whites (from about 3 to 4 large eggs)
  • 1 cup (200 g) granulated sugar
  • 1 1/2 cups (3 sticks – 340 g) unsalted butter, at room temperature, cubed
  • 1 ½ teaspoons pure vanilla extract
  • ½ vanilla bean, seeds scraped out (optional)

Directions
Whisk together the sugar and egg whites:  In the bowl of an electric stand mixer, add the egg whites and granulated sugar.  Whisk them together briefly by hand, just until they are combined so that the egg whites don’t begin cooking by themselves.

Create a double-boiler:  Fill a sauce pan with a few inches of water and bring to a simmer.  Place the mixer bowl with the egg white mixture on top to create a double-boiler. The water should be kept at a simmer but should not touch the bottom of the bowl.  The double-boiler acts as indirect heat for the egg white mixture. 

Heat the egg white mixture:  Occasionally stirring, heat the egg white mixture until it reaches 155 to 160 degrees F on a candy thermometer.  The mixture should be very hot to the touch and the sugar should have dissolved. 

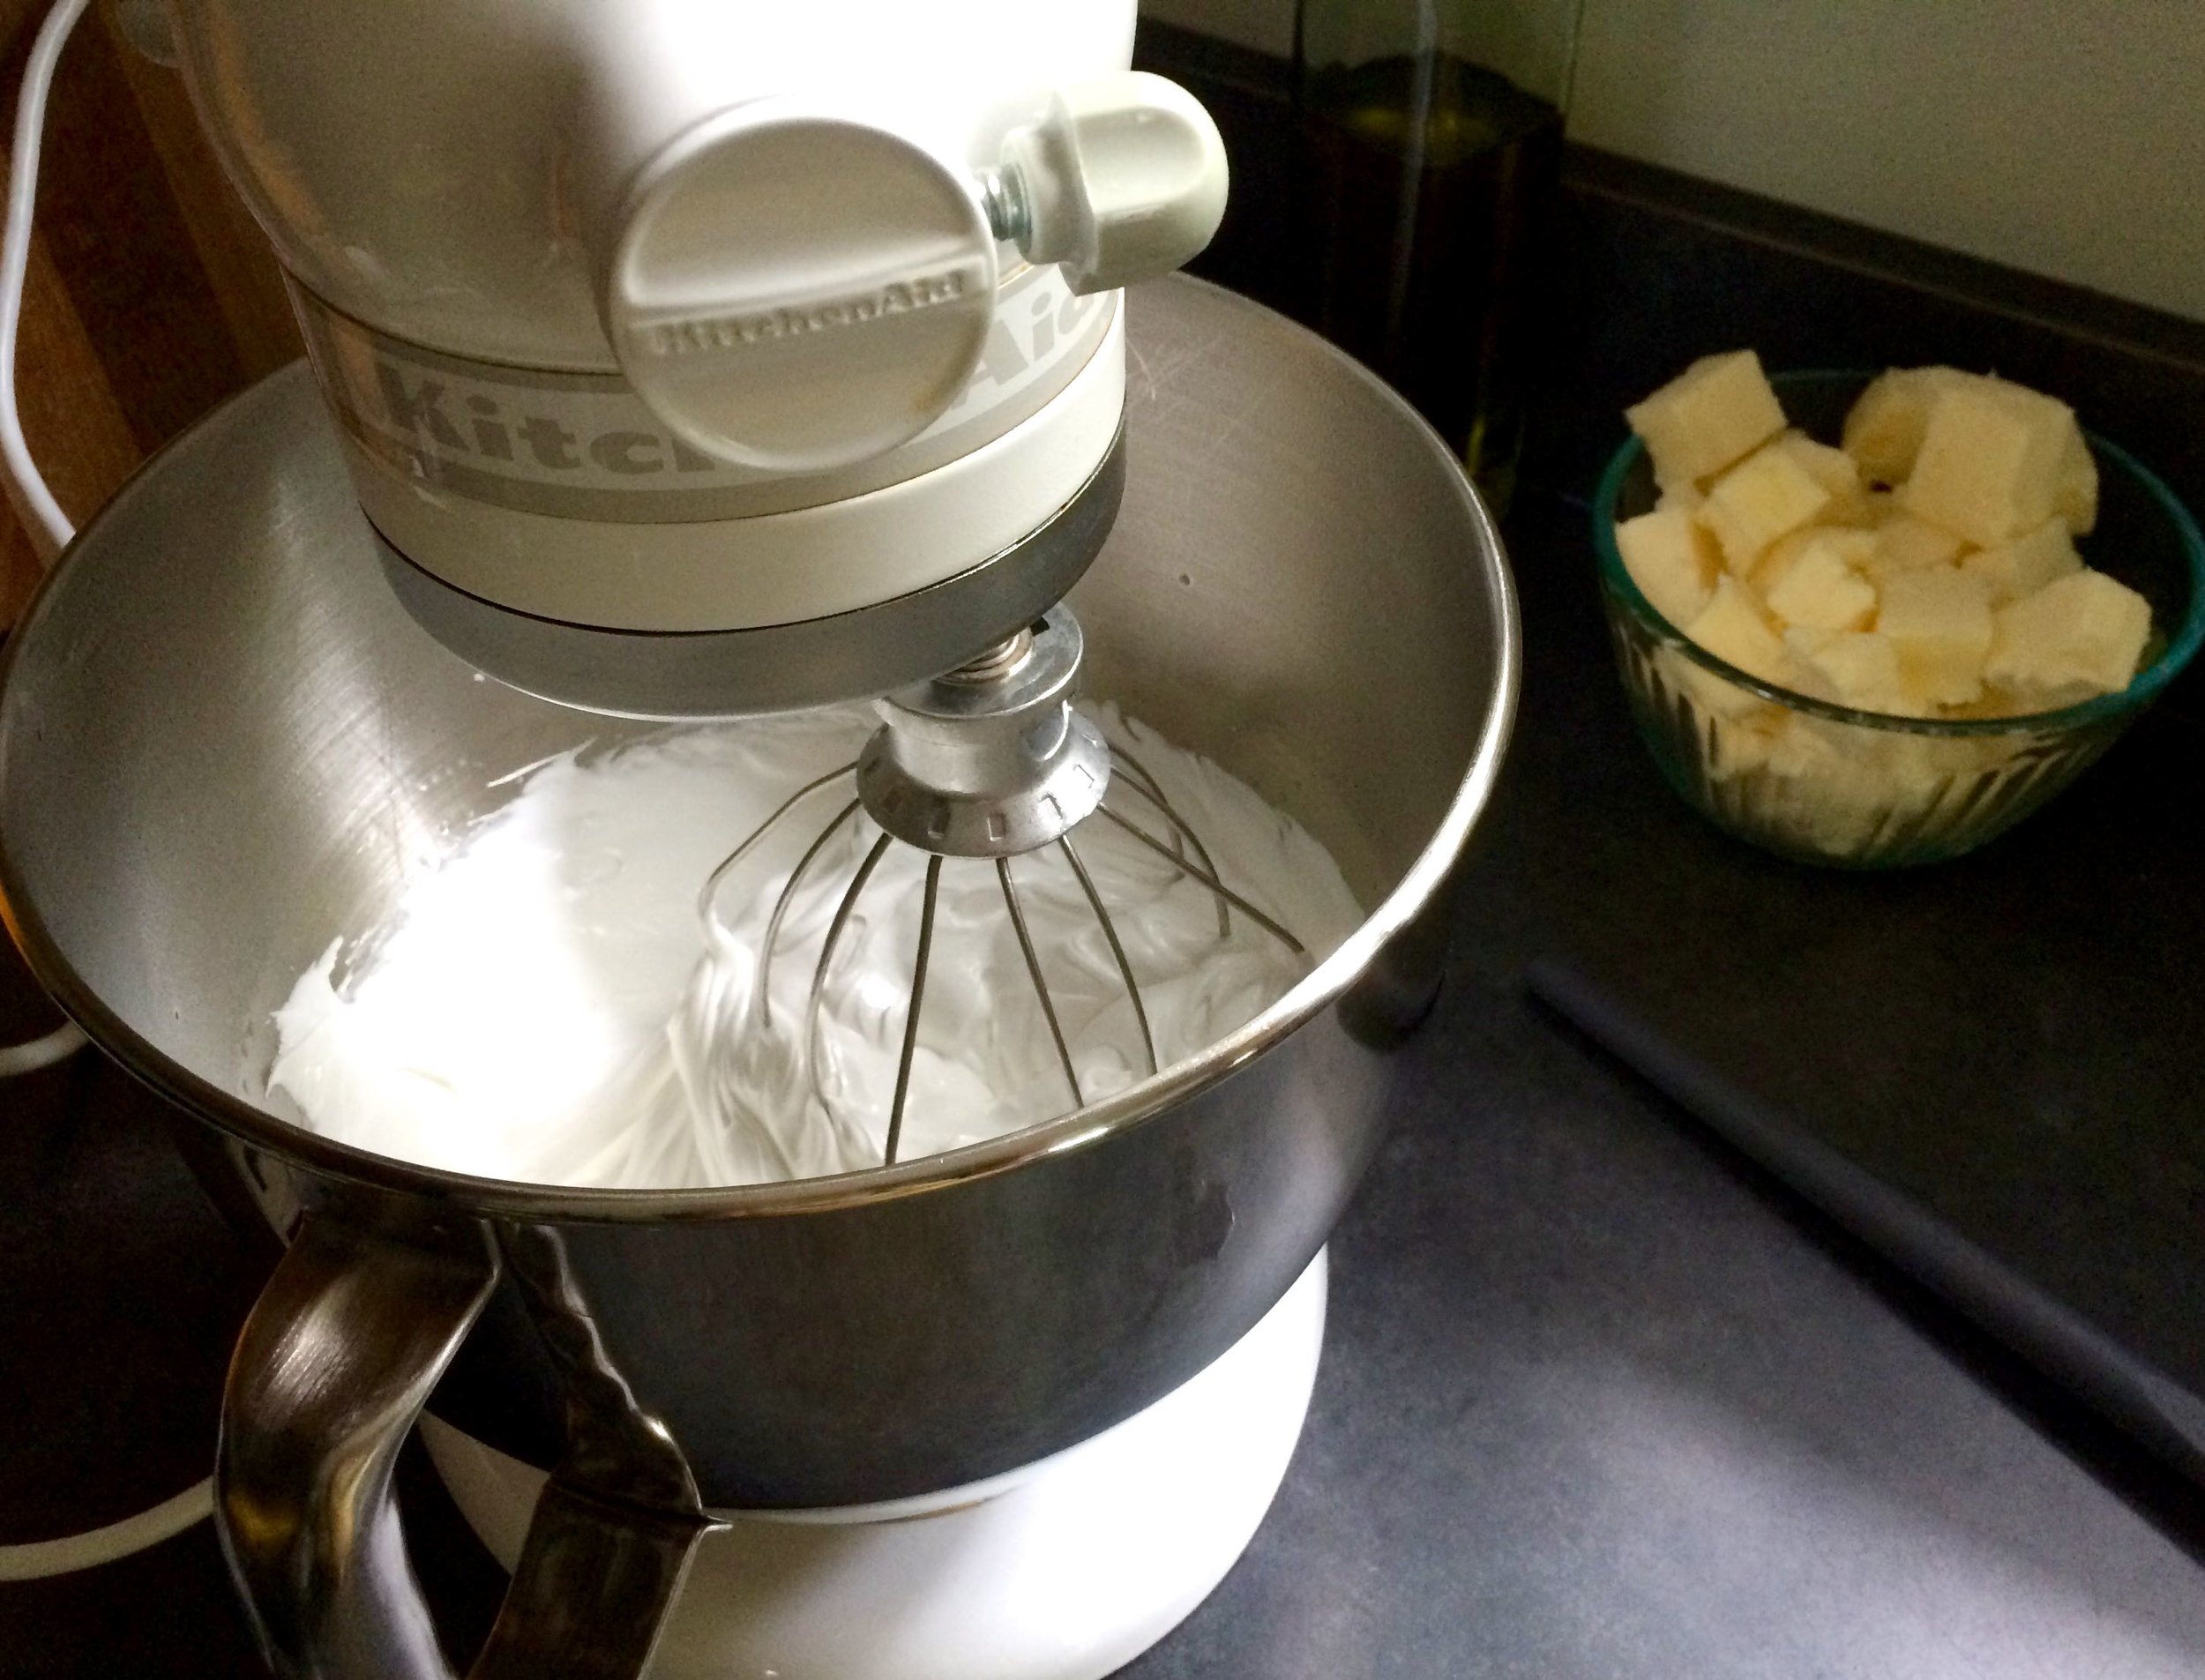
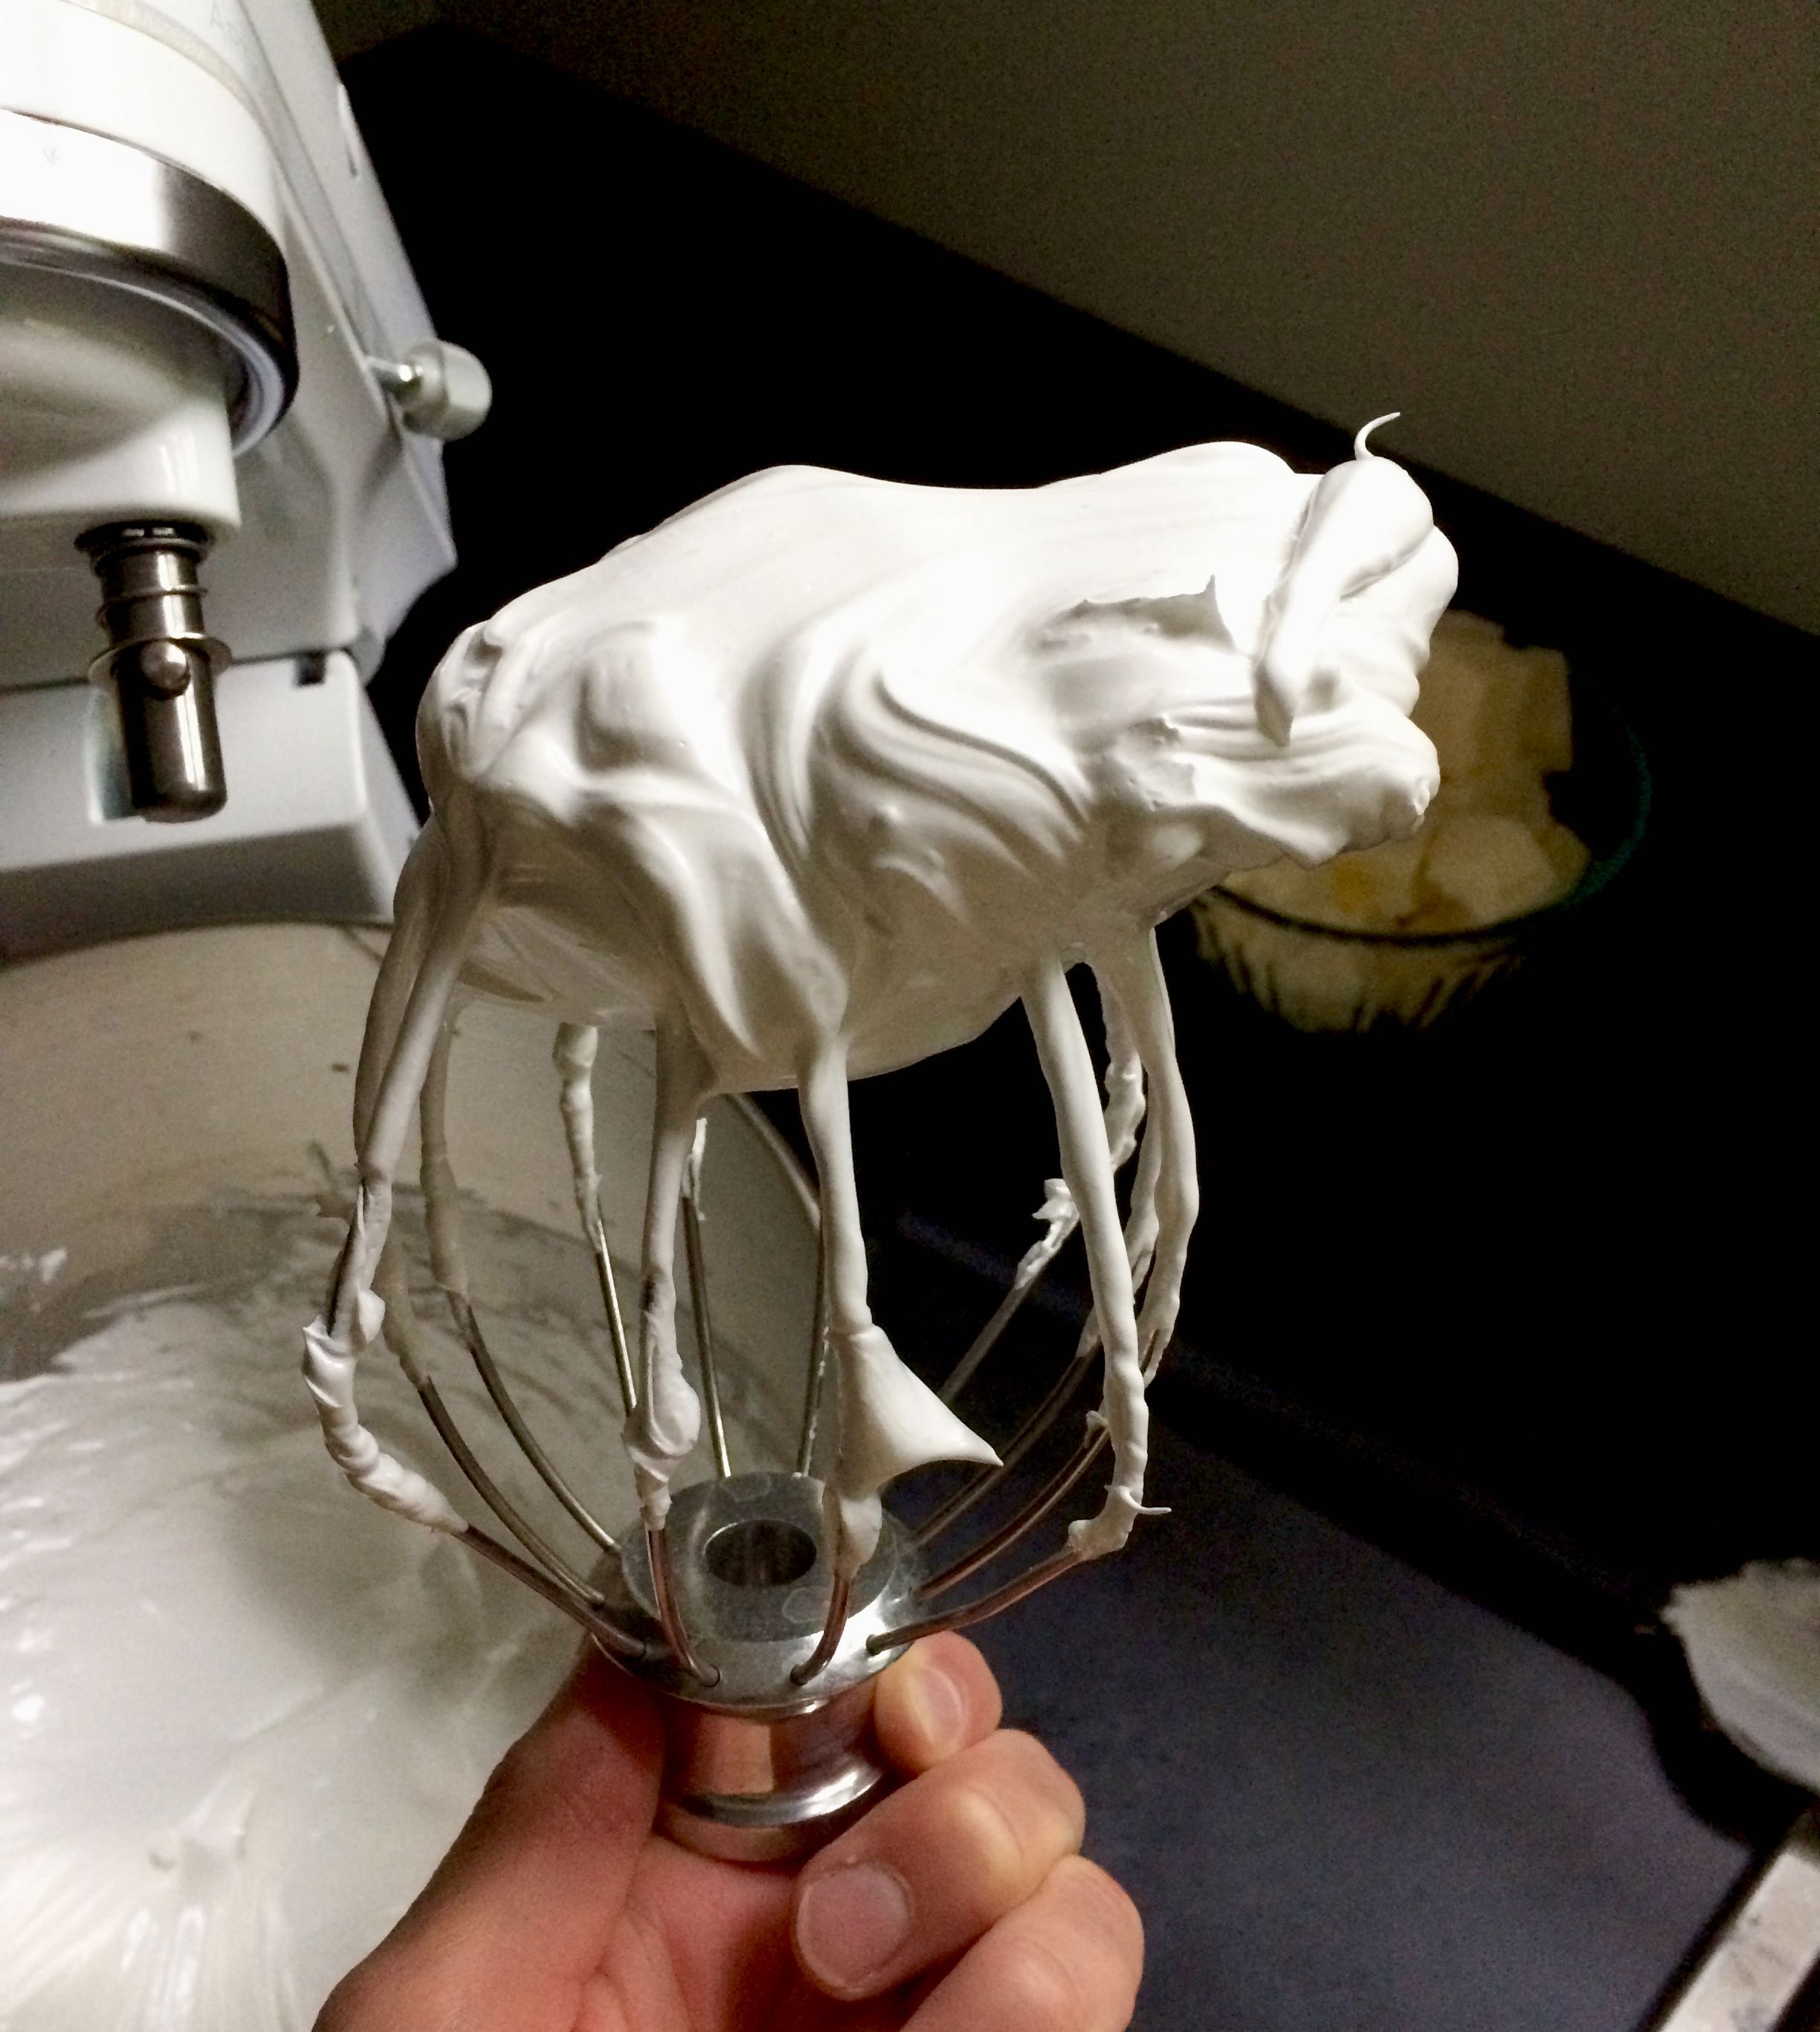
Make the meringue:  Once the egg white mixture is hot, carefully return the bowl to the stand mixer.  Fitted with the whisk attachment, beat the mixture on high speed for about 8 minutes.  When done, the meringue should hold shiny, medium-stiff peaks and be cooled to room temperature.  Stop the mixer and swap out the whisk for the paddle attachment.

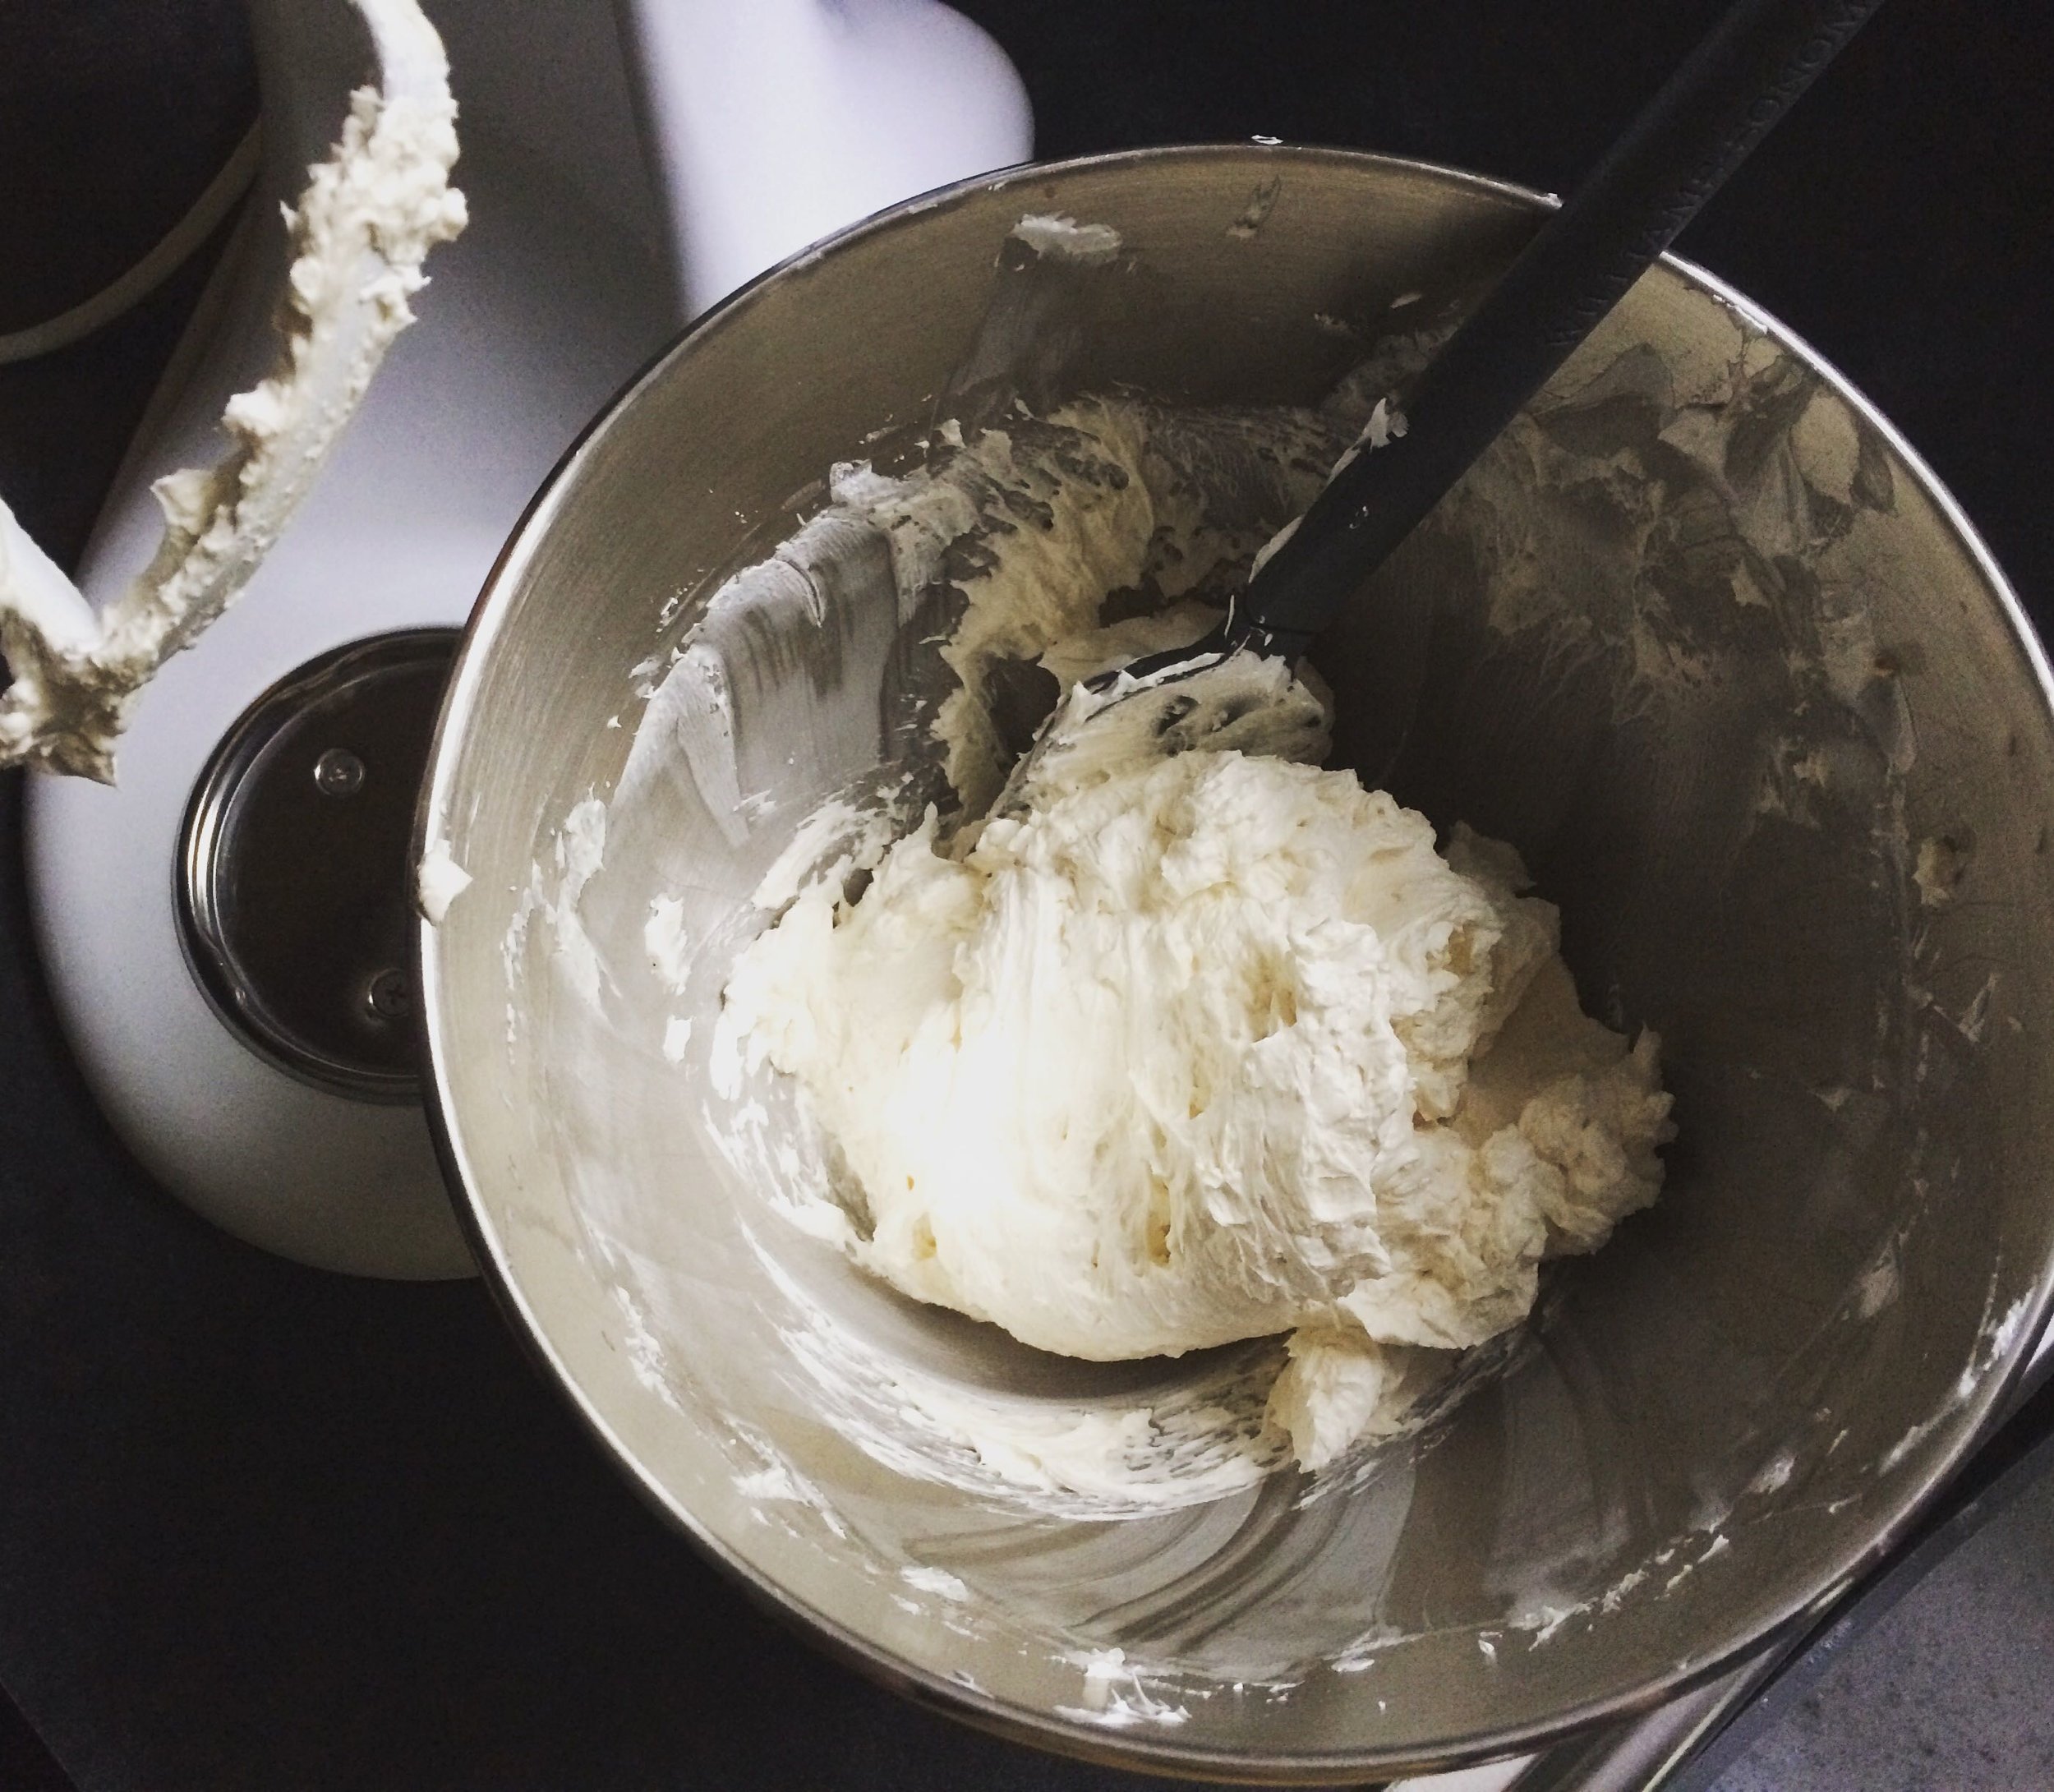
Add the butter:  With the mixer on low, begin adding in the butter a couple tablespoons at a time.  Use the paddle attachment to mix it in.  The butter must be room temperature in order to incorporate properly with the meringue.

Add the vanilla:  Once the butter has been mixed in, add the vanilla bean seeds (if using) and the vanilla extract.

Mix until smooth:  Turn the mixer up to medium speed and mix until silky smooth.  This may take a few minutes, but centime to mix until light, creamy, and free from most air bubbles.

Note: Yields approximately 3 1/2 cups - enough to nicely frost an 8-inch double layer cake, but without any leftover for decorating with. 

Tomato and Asiago Pizza

August is almost gone, can you believe it? I sure can't. This summer just FLEW by! One of my favorite parts about August is how amazing the farmers market is this time of year. Tomatoes, peaches, melon, corn, squash, peppers and the first of the apples, wow is it glorious. I have been eating good! 

There's almost nothing better than a simple, homemade pizza to showcase some of that summer bounty. This pizza only needed a couple ingredients to help it shine. Start with a good crust, add some garlicky oil, top with a couple handfuls of whole milk mozzarella mixed with a bit of asiago, top with a couple slices of one of those juicy, sweet and tender August tomatoes and sprinkled with thyme. A quick trip to the oven and you're ready to go. Serve with a bit of fresh parley and Parmesan cheese and you are set for dinner.

You could kind of consider this a spin on the traditional Margarita pizza, just switching up the cheese a bit and using a different herb, so not really a Margarita pizza at all! But in the same spirit in my opinion! Whatever you all it, it's delicious!


Tomato and Asiago Pizza

  • 1/4 of the perfect pizza dough recipe
  • 1/4 cup olive oil
  • 2 garlic cloves, thinly sliced
  • 1/2 tomato, sliced thin
  • Asiago cheese, shredded
  • Parmesan cheese, grated
  • Fresh Thyme
  • Fresh parsley, for garnish

Directions
Heat a small frying pan over medium to low heat. Add the oil and allow it to heat up for 30 seconds, then add the sliced garlic. Fry the garlic in the oil until it is just starting to turn golden, watching it closely to ensure that it does not burn. Remove pan from heat and set aside to cool. 

Prepare pizza dough. Brush shaped dough liberally with the garlic oil, you may not need it all, save the leftover oil to use later on. Sprinkle the oiled dough with a few tablespoons of parmesan cheese. Then top with asiago cheese, spreading almost to the very edge. Lay tomato slices on top of the cheeses. Sprinkle the whole thing with minced fresh thyme and some salt and pepper. Slide pizza off peel and onto your heated stone or baking sheet. Bake until the crust is golden and and cheese is bubbling and just beginning to brown, 6-10 minutes depending on your oven. 

Lavender Cupcakes with Blueberry Jam and Lemon Buttercream

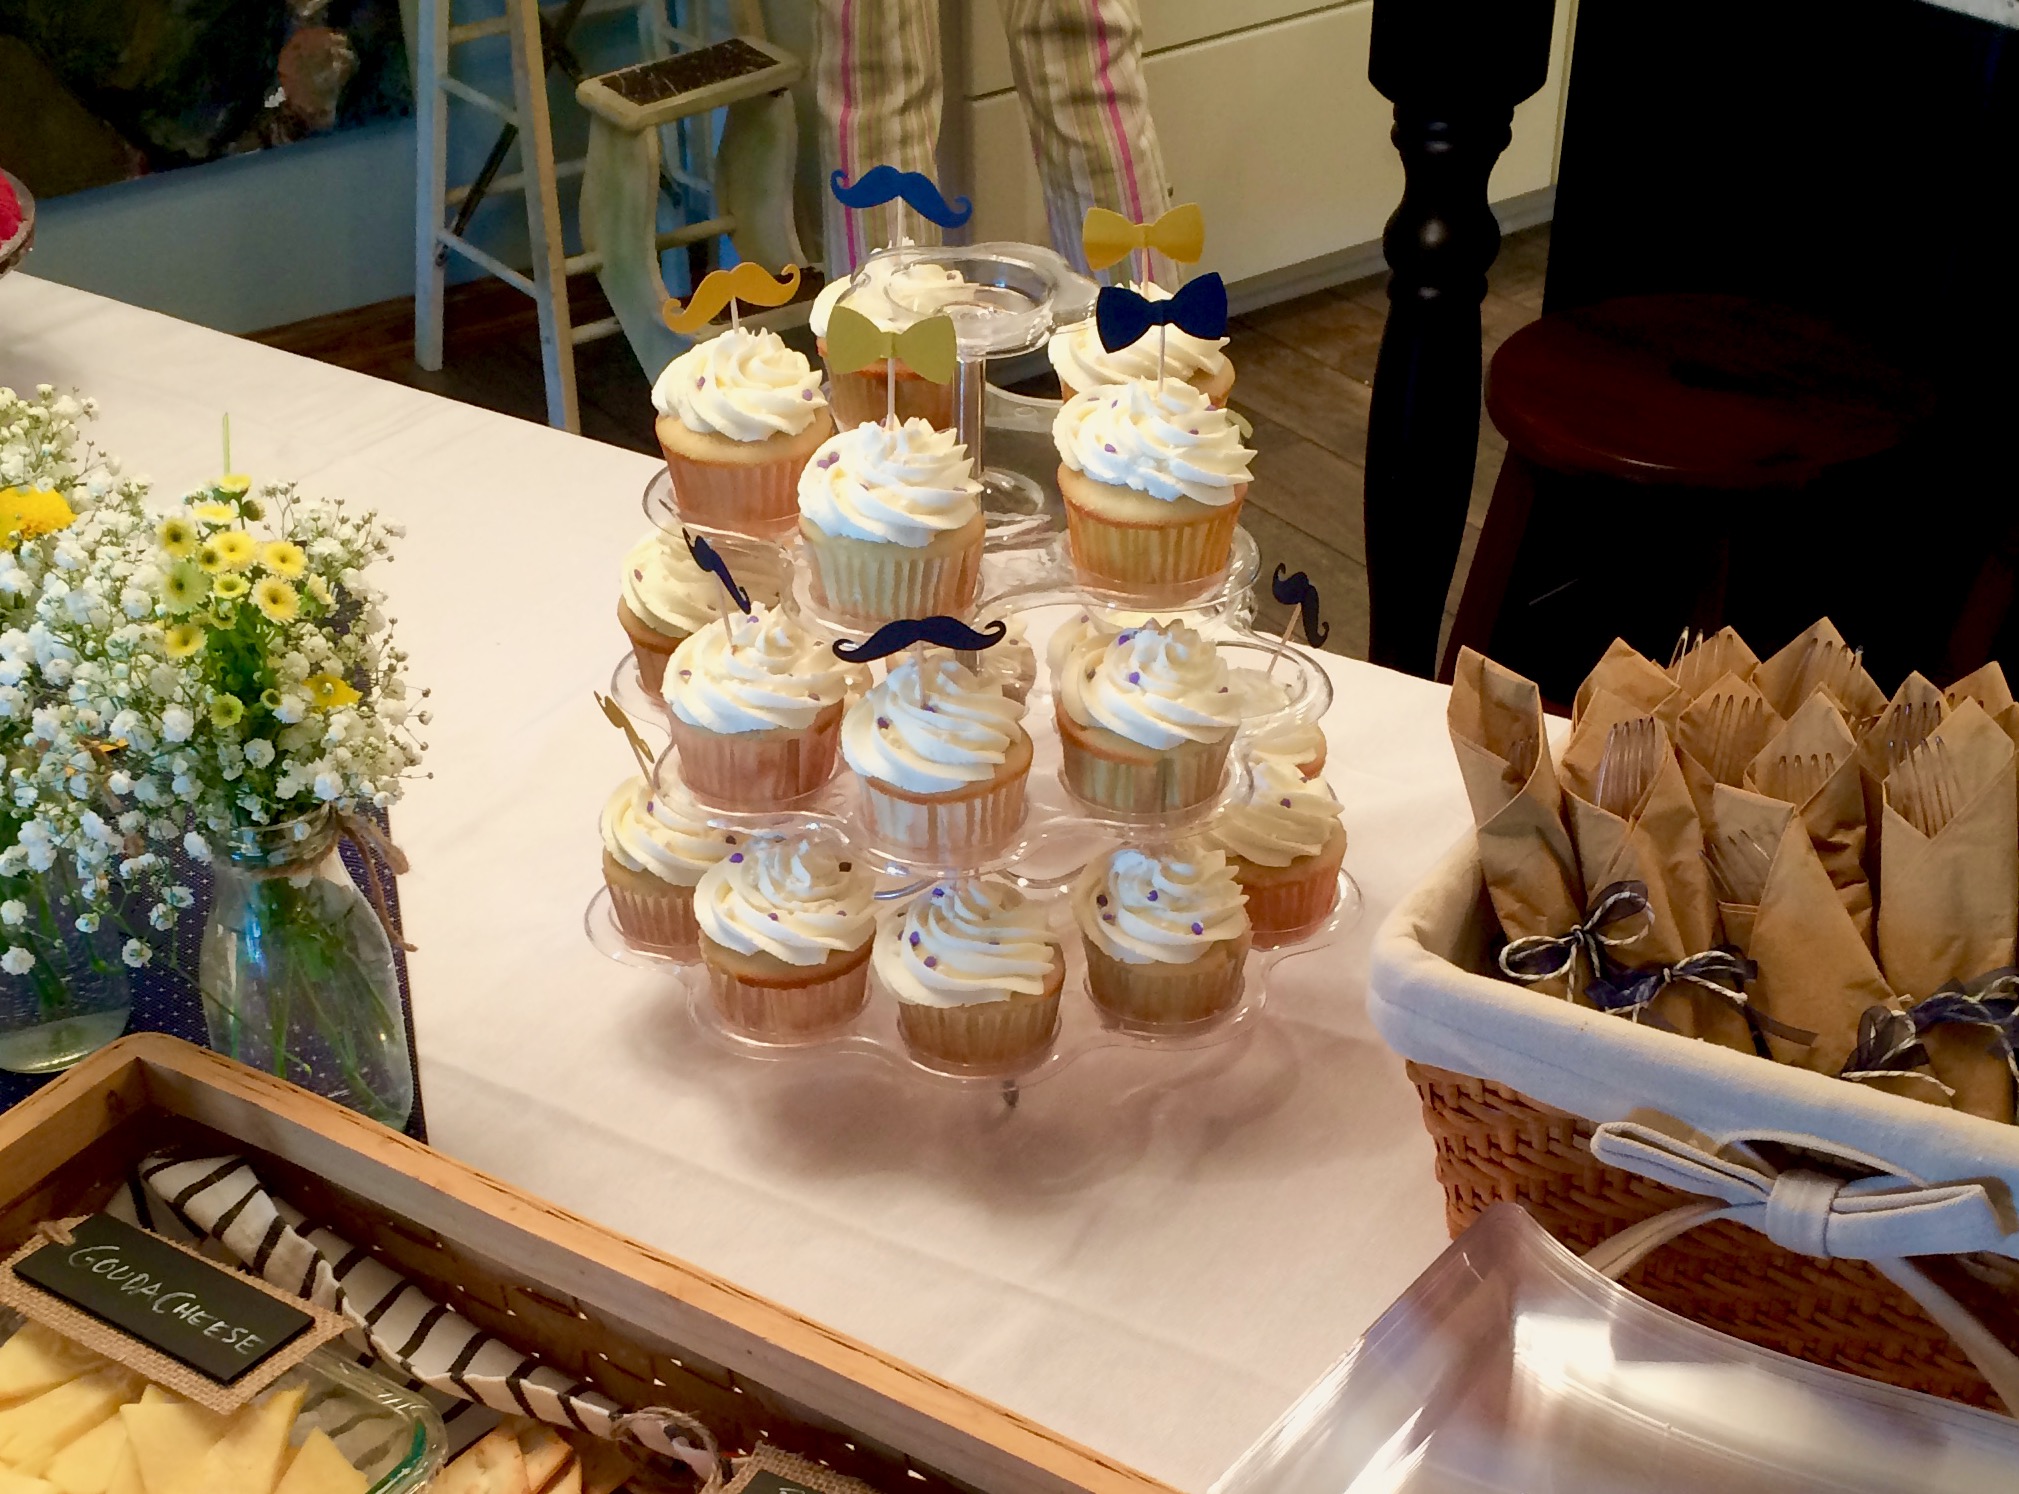
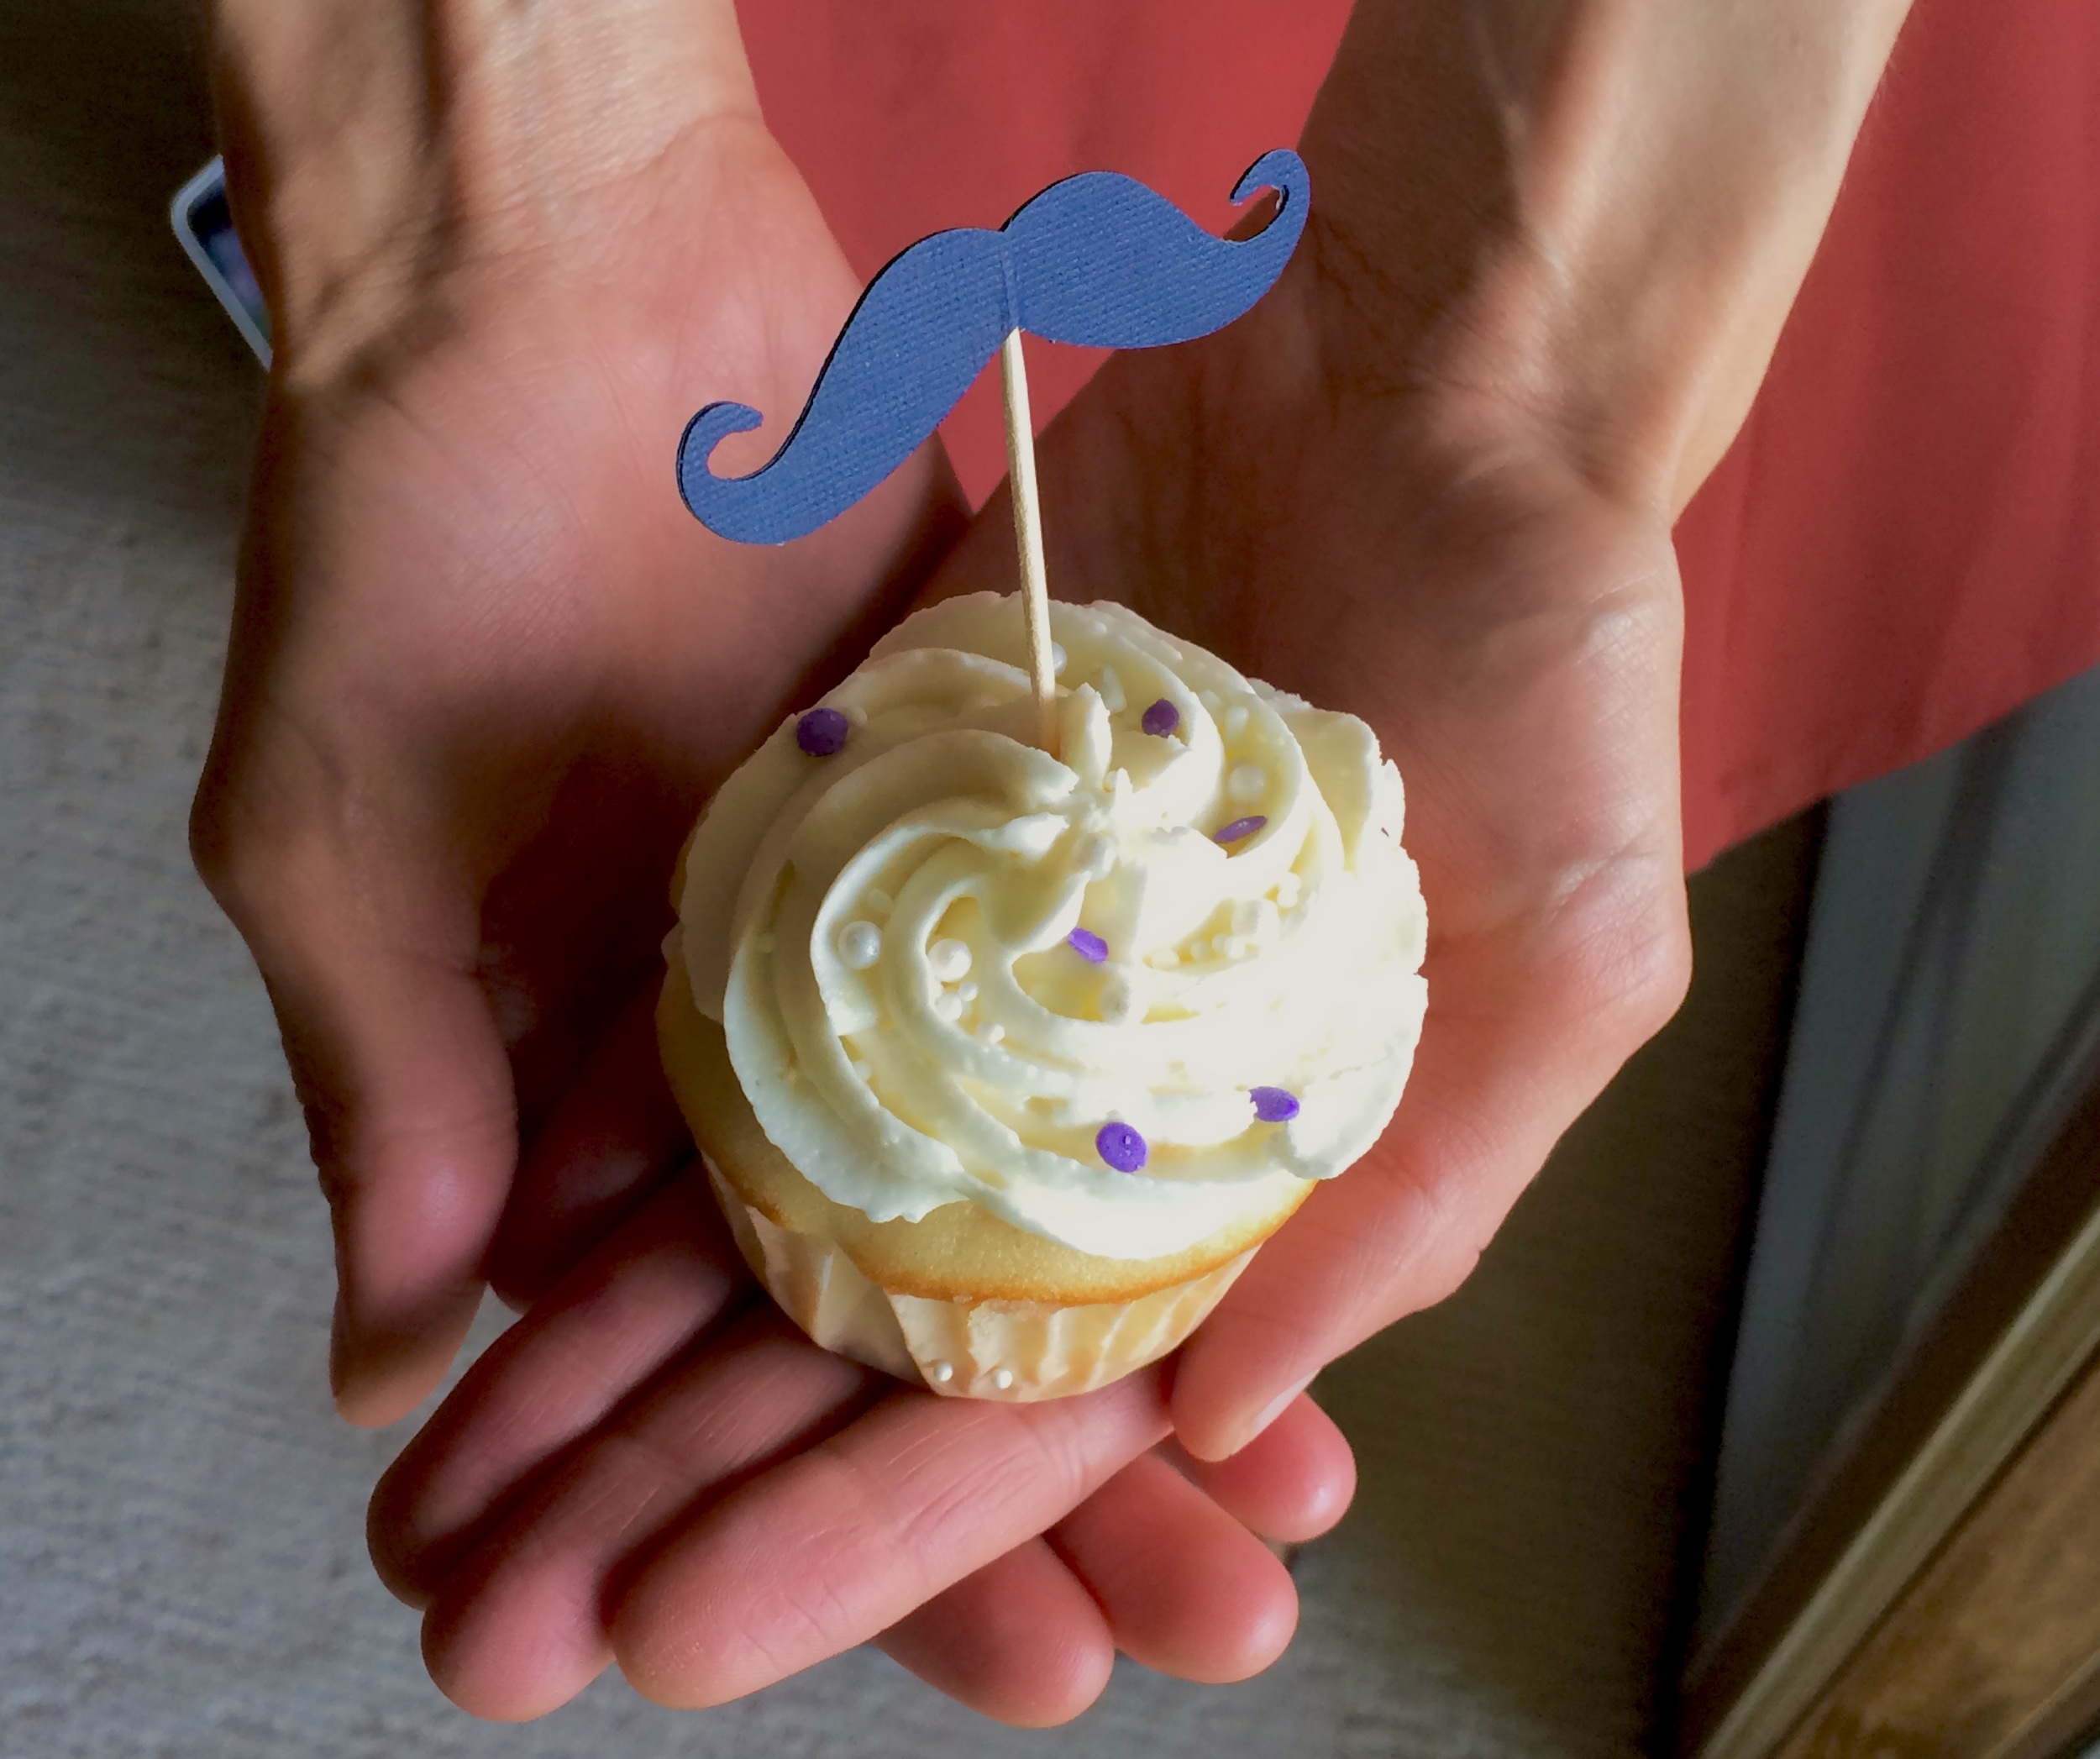
Last week one of my cousins had a baby shower, and for this event I was asked if I would be willing to make cupcakes as one of the desserts. Always one of my favorite things to make, of course I said yes! I was so excited to have a reason to make cake, and also excited when I found out that creative liberties were being handed to me. The mother-to-be's sister, another one of my cousins, said that she didn't care what kind of cupcakes they were. All she wanted to be able to do was finish them off with some mustache cupcake toppers to match the shower theme, easy enough!

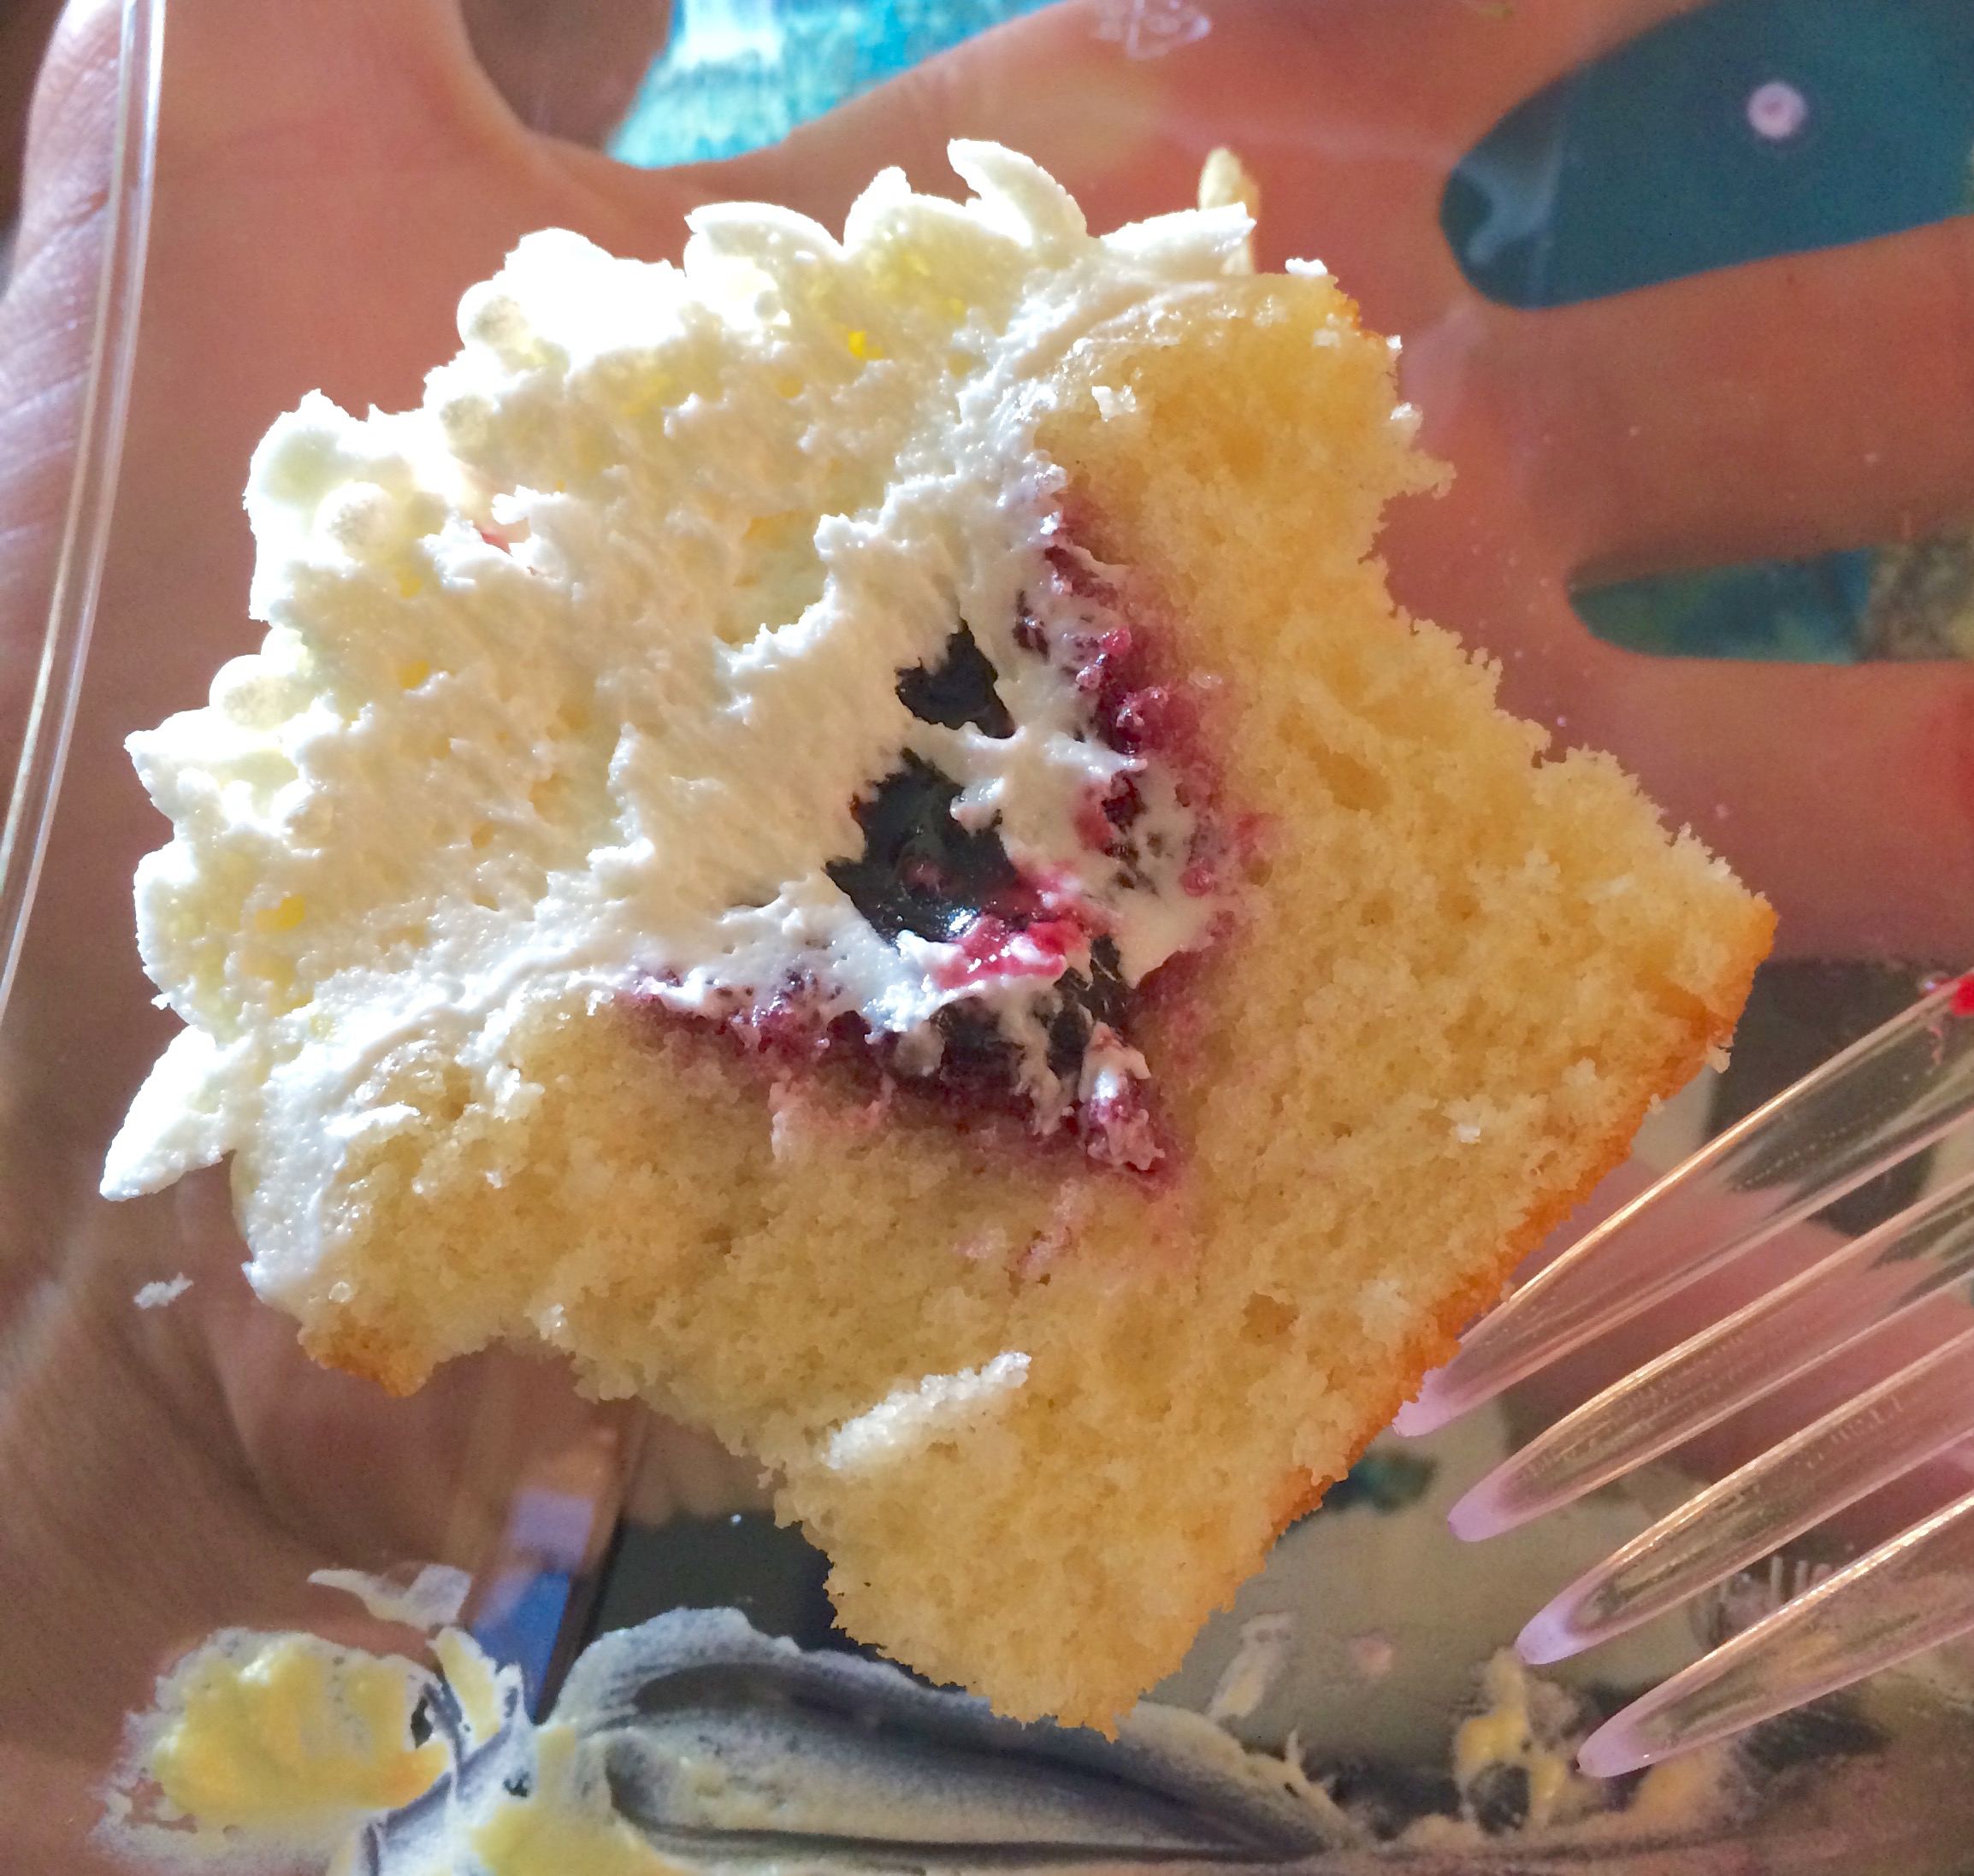
After brainstorming some ideas with Lara we came up with a game plan. I wanted to do lavender cupcakes because the lavender just popped out the last few weeks and I'm loving it! Delicious and seasonal. We thought lemon sounded like a nice combination with the lavender so lemon buttercream was decided for the frosting, and to finish them off with something a little extra special we decided to fill them with a little blackberry jam. Lavender, lemon and blackberry, how could it be bad? 

To answer the above question; it couldn't be bad, and it wasn't! If fact, this may be my favorite cupcake flavor combination yet. They turned out fabulously, the lavender flavor came through very mildly which is what I wanted - I didn't want a cupcake that smelled or tasted like perfume or potpourri. The buttercream was perfectly tart and sweet from the lemon, and the blueberry filling really put it all over the top. Could you skip it, sure, but I don't think they'll be as good!! :) 


Lavender Cupcakes with Blueberry Jam
From Delectably Mine
Ingredients

  • 3/4 cup (6 ounces) milk
  • 1-2 tablespoons fresh lavender flowers
  • 2 1/4 cups (10 1/2 ounces) all purpose flour
  • 1 1/3 cups (9 ounces) granulated sugar
  • 1 7/8 teaspoons baking powder
  • 3/4 teaspoon kosher salt
  • 3/4 cup (1 1/2 sticks) butter, softened, cut into small cubes
  • 3 eggs
  • 1 teaspoon vanilla extract
  • Blueberry jam, for filling

Directions
Preheat the oven to 350 degrees F and line cupcake pan(s) with liners.

Place the milk in a microwave safe bowl and microwave for 1-2 minutes until simmering. Remove from microwave and add the lavender flowers to the milk, stirring to combine. Let milk sit and cool for about 45 minutes. 

Meanwhile, place the flour, sugar, baking powder, and salt in a mixing bowl and stir to combine.

Add the butter and mix on low speed, until mixture resembles coarse crumbs (2-3 minutes). Add the eggs, one at a time, followed by the vanilla, and scrape the bottom of the bowl to make sure all the ingredients are well-combined. 

Once the milk has cooled to around room temperature, use a fine mesh strainer to remove the flowers. Add half of the strained milk and beat on medium speed for 1½ minutes, scrape the bottom and sides of the bowl, then add the remaining milk, and beat for another 30 seconds.

Fill prepared muffin pans ⅔ full with batter, and bake for 18-20 minutes, or until a tester inserted in the center of the cupcake comes out with a few moist crumbs. Let cool in pans for a couple of minutes, than transfer cupcakes to a wire rack to cool.

Once cool, take a sharp knife and cut out a cone shaped wedge of cake from the top of each cupcake forming a little well. Place a spoonful of blueberry jam into each well. Frost with lemon buttercream (recipe below). 

Yields: 18 cupcakes

Lemon Buttercream
From Delectably Mine
Ingredients

  • 2 1/4 sticks (10 ounces) unsalted butter, at room temperature
  • 5 cups (20 ounces) powdered sugar
  • pinch salt
  • 1/2 lemon, zested
  • 2 tablespoons fresh lemon juice

Directions
Place the butter in the bowl of an electric mixer fitted with the paddle attachment. Beat on medium-high speed until smooth, about 1 minute. Add the confectioners’ sugar, salt and lemon zest to the bowl and mix on medium-low speed just until incorporated. Continue to beat on medium-high speed until smooth, about 1-2 minutes. Mix in the lemon juice on low speed just until incorporated. Increase the mixer speed and whip on high speed until light and fluffy, scraping down the bowl as needed, about 4-5 minutes. 

* Note: I wanted a little more stable frosting since it was hot out. After a quick internet search, seemed like a lot of people use a 1:2 ratio of fat to sugar so that's what we did. Worked great, a nice stiff frosting that held up well. The final frosting is very sweet this way, so if it's not as hot I would probably not use this high of a ratio of sugar to butter, but it definitely worked great for this situation!

Peaches and Cream Cupcakes

It's an extra special birthday today, my mom turns 60!! I can hardly believe it! In honor of this special occasion, Lara, my dad and I threw a little shindig for her this past Sunday. Family members and friends came over for a salad bar party. It was pretty delicious if I do say so. Today I want to share the best part of the party - the cake of course! Since it's August, and my mom absolutely LOVES peaches, I decided to make a peaches and cream cupcake for her. While I love having the opportunity to make a cake, at a party like this I decided cupcakes would be easier to serve, and would be easier for everyone to eat. 

These cupcakes turned out light and fluffy, filled with sweet and delicious peaches, topped with the perfect frosting, an airy whipped mascarpone and cream frosting. It doesn't get much better than this for an August birthday. I highly recommend both the cake and the frosting. I may never go back to buttercream again!

This cupcake recipe is definitely a keeper. It was simple, and baked up 24 perfect cupcakes. I've been looking for a go-to vanilla cupcake and I think this is it. To turn it into a peach cupcake all I did was dice up a few peaches from the farmers market, let them drain in a colander for a few minutes, tossed them with a little flour and threw them into the batter at the very end. It worked out great. Because peaches have such a gentle flavor, the cupcakes aren't overly "peachy", but they lend a hint of fruitiness to the cake, and you get a sweet surprise every few bites.

I've been wanting to try a mascarpone frosting for some time now and I decided that this was the perfect opportunity. There was no doubt that I would love this frosting, and I was not disappointed! This was the easiest, most delicious frosting I have ever tried. It took all of 2 minutes to whip together, didn't involved any sticky and messy powdered sugar, and tastes absolutely divine! I may never make another white frosting again. The only downside to it is you have to refrigerate it once made, since all that is in it is cream and mascarpone! But that's okay, it's a compromise worth making!

Happy Birthday Mom!! Lookin pretty good! Love you!

Peach Cupcakes
Adapted from Baking A Moment
Ingredients

  • 3 cups (14 ounces) all purpose flour
  • 1¾ cups (12.25 ounces) granulated sugar
  • 2½ teaspoons baking powder
  • 1 teaspoon kosher salt
  • 1 cup (2 sticks) butter, softened, cut into small cubes
  • 4 eggs
  • 1 cup (8 ounces) milk
  • 2 teaspoons vanilla extract
  • Drop or two of almond extract (optional)
  • 2-3 peaches, cut into small pieces and placed in a colander to drain

Directions
Preheat the oven to 350 degrees F. Place the flour, sugar, baking powder, and salt in a mixing bowl and stir to combine.

Add the butter and mix on low speed, until mixture resembles coarse crumbs (2-3 minutes). Add the eggs, one at a time, and scrape the bottom of the bowl to make sure all the ingredients are well-combined.

Combine the milk, vanilla extract and almond extract (if using) in a measuring cup. Beat half this mixture into the flour/butter/eggs. Beat on medium speed for 1½ minutes, scrape the bottom and sides of the bowl, add the remaining milk mixture, and beat for another 30 seconds.

Toss drained peach pieces with a small amount of flour. Gently mix into the batter until well combined.

Fill paper liners ⅔ full with batter, and bake for 18-20 minutes, or until a tester inserted in the center of the cupcake comes out clean.

Cool completely before topping with mascarpone frosting (recipe below). 

Yields: 24 cupcakes

Mascarpone Frosting

From

Epicurious

Ingredients

  • 2 8-ounce containers mascarpone cheese
  • 2 cups chilled heavy whipping cream
  • 4 tablespoons sugar
  • 1 tablespoon vanilla extract

Directions

Beat all ingredients in the bowl of a stand mixer fit with the whisk attachment just to soft peaks. You need to beat it enough so that it is firm enough to pipe onto the cupcakes, but don't overbeat or mixture will curdle. 

Thomas Train 2nd Birthday Cupcakes

Just a couple of weeks ago my nephew turned 2 years old. It's amazing how fast he's grown. (Check out his first birthday here). All of a sudden it seems like he is talking nonstop and running around everywhere, it's so much fun, and super cute! My sister-in-law Lindsey once again asked Lara and I if we would be willing to make some cupcakes for his birthday party. Of course I said yes! It's only one of my all time favorite reasons to bake. I love baking cakes and cupcakes for birthdays and other special occasions. They are so fun to make, and can be so festive and celebratory. 

Since the theme of the birthday party was going to be Thomas the Tank Engine she asked that we just make a couple dozen cupcakes of any flavor and frost them simply with red and blue frosting to match the theme. This was simple enough to do of course. I just went to my trusty Martha cookbook,

Martha Stewart's Baking Handbook

 and picked out her yellow and a chocolate cupcake recipes and whipped them together. Simple and delicious! Lara frosted them in the Thomas blue and red and then Linsey finished them off with some super cute Thomas flags. I think they turned out adorable, and at the party Lindsey had them arranged as the cars of a Thomas train, super cute. It was a wonderful party and a great way to celebrate Tyce's second birthday!

Yellow Butter Cupcakes

Ingredients

  • 1 stick butter, at room temperature
  • 3/4 cup all-purpose flour, plus more for dusting pans
  • 3/4 cups cake flour
  • 1 1/2 teaspoon baking powder
  • 1/4 teaspoon salt
  • 3/4 cup + 2 tablespoons sugar
  • 2 large eggs
  • 1 teaspoon vanilla extract
  • 1/2 cup plus 2 tablespoons milk

Directions

Preheat the oven to 350˚ F. Line cupcake pan with paper liners. In a medium bowl, combine the all-purpose flour, cake flour, baking powder, and salt; whisk together to blend well and set aside.

In the bowl of an electric mixer, combine the butter and sugar. Beat on medium-high speed until light and fluffy, about 4 minutes, scraping down the bowl as needed. Mix in the eggs one at a time, beating well after each addition. Blend in the vanilla. With the mixer on low speed, add in the dry ingredients in three additions, alternating with the milk. Beat each addition just until incorporated.

Spoon the batter into lined cupcake pan. Bake, rotating the pans halfway through baking, until the cakes are golden and a toothpick inserted in the center comes out clean, 17-18 minutes. Remove cupcakes from pan and cool on a wire rack. Let the cakes cool completely before frosting. 

Yields: 12-14 cupcakes

One Bowl Chocolate Cupcakes

Ingredients

  • 1 1/4 cups all-purpose flour
  • 1/2 cup plus 2 tablespoons (100g) dutch-process cocoa powder
  • 1 1/4 cups sugar
  • 1 1/4 teaspoons baking soda
  • 1/2 teaspoon plus 1/8 teaspoon baking powder
  • 1/2 teaspoon plus 1/8 teaspoon salt
  • 1 large eggs
  • 1/2 cup plus 2 tablespoons milk
  • 1/4 cup vegetable oil
  • 1/2 teaspoon pure vanilla extract
  • 1/2 cup plus 2 tablespoons warm water

Directions

Preheat oven to 350F and line or spray two standard 12-cup muffin pans. 

Sift into the mixer bowl: flour, cocoa powder, sugar, baking soda, baking powder and salt. Add the eggs, yolk, milk, oil, vanilla and warm water. 

Beat with a paddle attachment on low speed until smooth and combined, about 3 minutes; scrape down the sides of the bowl if needed.

Divide batter evenly among the muffin cups. Fill each muffin cup about 1/2 full. The batter is quite runny and if you overfill them they can make a mess as they rise in the oven. 

Bake, rotating pans halfway through the baking time, until a cake tester inserted in the center of a cupcake comes out clean, 18-20 minutes. Cool in the pan for a little bit and then transfer onto a wire rack or board to cool completely.

Yields: 14-16 cupcakes

Thanksgiving 2014

I truly do love all holidays, but there is something special about Thanksgiving. Everyone gets together on the same day every year and stuffs themselves with turkey and all the trimmings. The camaraderie makes me smile, and the fact that the main focus of a lot of people (myself included) is the food makes me love the day even more. For one day I am not the only one doing all of the food talk. 

My sister Lara and I made the Thanksgiving meal for our family again this year. We have such a fun time doing it and have been thinking about it and preparing for weeks. Instead of going full out and roasting an entire turkey we decided to do something a little different this year. One of my biggest pet peeves about Thanksgiving is that the turkey hogs the oven for the entire morning and I can't use it for anything else. (I am jealous of everyone who has more than one oven in their house.) We decided to utilize the grill instead. And for a different spin on the traditional we skipped the whole turkey and decided to grill up a whole bunch of turkey kabobs. 

It turned out great! I loved not cooking an entire turkey, and it was fun to use the grill while standing in a bit of snow. An experience for sure. We tried to keep the sides simple and light as well because that's how we like to eat. Everything went off without a hitch, we were so happy with how it all turned out. I would definitely do it again next year!

As for the rest of the meal, it started off with some butternut squash soup with leeks and carrots, finished with a little yogurt for creaminess. Next, the salad was a spin on the Fuji apple chicken salad from Panera; we sliced up a few apples and dried them out for apple chips, toasted some pecans with a hint of cinnamon sugar, thinly sliced red onion, dried cranberries and some feta cheese rounded out the toppings. The mixed greens were dressed with a simple white balsamic, apple cider vinaigrette with honey and dijon. It was a fantastic salad, Panera sure knew what they were doing when they created it!

We also served some homemade bread and my favorite Clementine Brown Rice Salad. A few extras finished the meal off, a simple cranberry sauce as well as a yummy lemony sage yogurt sauce, both for dipping the turkey into if desired (which I did!). 

While we were finishing up the cooking we served our guests a simple platter of cheese and crackers with some grapes and carrots. Just a little something to whet the appetite. I made a simple sangria and had some apple cider for some festive drinks to go along with the meal. And finally, a pumpkin bundt cake added the finishing touch to a fantastic Thanksgiving. I was so glad to be able to share my love of cooking with my family on this festive day. I am so thankful for all my family members who were able to come and celebrate the holiday together, as well as for all the delicious food we were so privileged to eat. I am so blessed, and for that I am extremely grateful, all year long! God is good is an understatement.

 Simple, yet scrumptious appetizer

 A little cold weather grilling never hurt anyone

 Plenty of drink options

 Dried fruit, pecan and feta salad

 Squash soup

And don't forget the turkey!

Turkey kabobs, my take on the traditional 

 This is what I like to see on Thanksgiving

And never, ever forget about dessert